Sunday was catch up day. I had big plans for the trim but we really needed to work the sheep. I stayed home while Annmarie went to church (this happens a lot) and I busted out one more window, the largest window in our house. Annmarie came home with the great news that Sarah was going to come out and help with the sheep. 

We needed to count the sheep as we had no clue how many there were. We also needed to get a count for how many we were going to need to sell come summer. Plus we still had to tag and band the stragglers from the last two months of random births. We rearranged the barn panels and ran the sheep into the barn. The sheep were pushed down the chute. I like to just wade in and randomly catch the babies but this is stressful on the sheep and I don’t get to do the catching. I sit down on my kiester and have the babies brought to me. I do the tagging and banding. I am the only one with a strong enough grip to hold the banding pliers open and to punch in the ear tags. I have a secret thought that no one else wants to torture the baby lambs but the banding pliers are very hard to hold open and you cannot let them go until everything is correct and there are 2 peanuts on the right side or it doesn’t work! It can be hard to hold open if it takes any time to fish around for the second testical.
We have 100 sheep exactly! We need to sell 40 lambs this summer and hopefully will get another 25 ewes this summer also. Each mother generates on average 1.5 lambs/year. So with 85 ewes we will make 255 lambs every 2 years or 127 lambs/year. We are going to hold off on getting another ram until all the ewes have had babies. There are still a few that are pregnant. We want everyone to get on the same cycle so that all babies will come in a single month. At least all born within a two month period, not constantly trickling all year long.
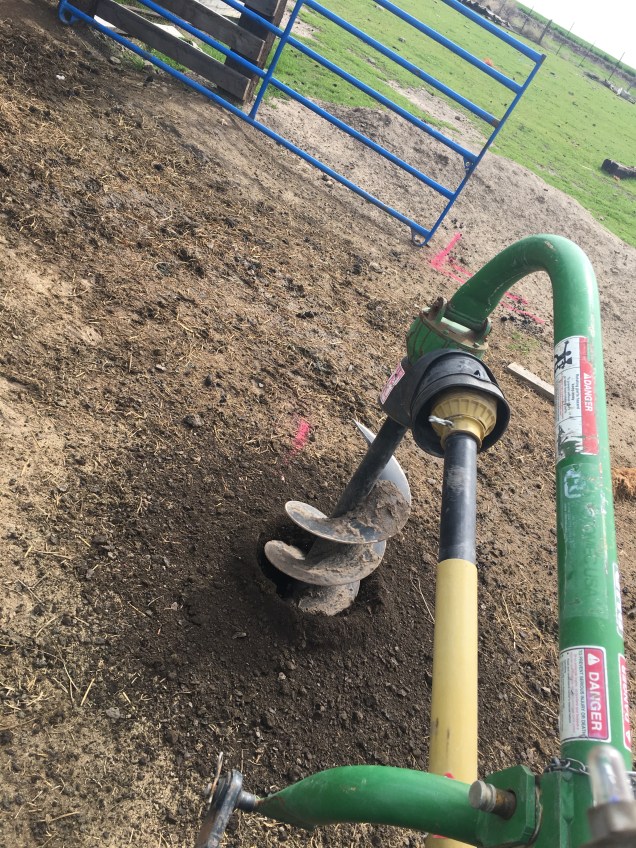
I have started digging fence post holes in the barn lot for the ram and bull enclosure. I have called the custom wood mill in Reith and will be purchasing some tamarack 2x8x16 foot rough cut lumber to use inside the enclosure. This is the hardest native wood we have in the area and they only do 2 runs a year for this express purpose- corrals. I also managed to get 50 boards of 1×12 x16 foot rough cut boards to finish the siding repairs on the barn. Again I called at the perfect time as they had cut the boards just not run them through the dryer yet. I will be picking those up next week. 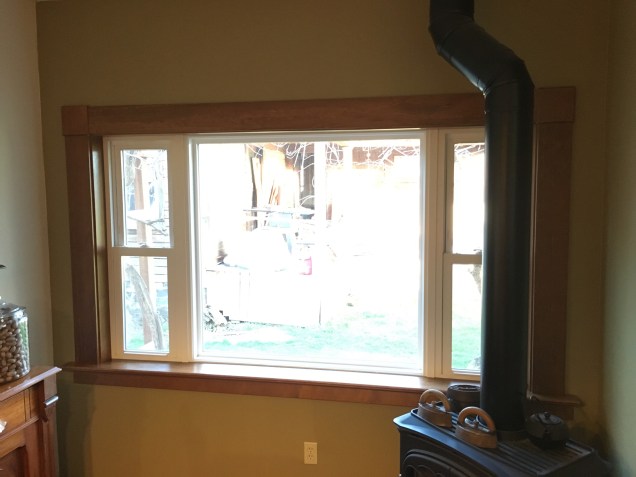

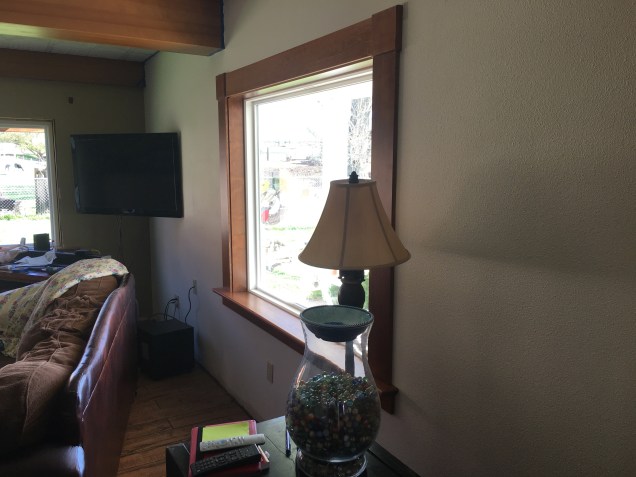
I am done with all three windows in the living room and dining room! Unfortunately, I ran out of caulk! I had 18 tubes and used up 17. I ordered 20 more tubes from Amazon and will work on the floor trim when they arrive. I know, Amazon is the killer of local businesses but I waste hours going to those stores and they never have enough as I want more than a few at a time. Its a trade off and Amazon has been good to us so far. I am getting so many boxes now that I am having to burn them on a semi regular basis now.
We have another barn kitty getting used to the place in the barn kennel. We had one die but have seen several around the place. Not sure why the one died.
We also may have a pack rat in the barn! No one has seen it but we are starting to find hordes of nesting material in quantities that mice cannot form. I sure hope not as they are hard to catch and can be very destructive.


 On Friday I had to go fix fence again. On Thursday the neighbor moved his cows into the pen directly across the road from our property. This means our bull can see a hundred plus cows across the road and starts to immediately think like a teenage boy. I noticed the cows on my way home and vowed to not work on our window trim but to instead fix the fence. Usually, the bull gets out every year at this time. We had noticed a weak spot in the fence a couple of months ago and I had vowed to Annmarie that I would fix it before the bull got out this year. Its in an awkward spot and there is a huge wild rose bush that has enveloped the fence in the way. The only real way to fix this section is to cut out the rosebush and rebuild this entire section. I don’t want to do that, so I plugged the hole with a 16 foot cow panel. I had brought a few more tools but no T post driver. I needed the driver.
  I ended up having to fix the entire fence all the way up to the gate on top. I put in new staples and Tpost clips where the bull had popped them loose. I added about 8 new wooden stays from scrap on the ground and my scrap pile. Eventually, there will be no more scrap piles laying around. I keep bringing the junk together and throwing it away, recycling it or burning it to clean up areas. This took me all morning long and put me way behind on the trim plan.


 I finally managed to find a stock trailer! Last week I spotted one for $2500 which was my max upper end. I wanted to spend around $1500. We had been looking for over three months with no success. We had found a lot of horse trailers in that price range but no stock trailer. You ask, what is the difference? Well there is a difference, the first part is look at the back door. It will slide open halfway. This allows you to load animals directly from a chute. The second part is halfway down the trailer there is a divider that can be closed widthways. This allows you to push some animals into the trailer and shut internal gate. This then lets you load more animals!
