Gazebo up!

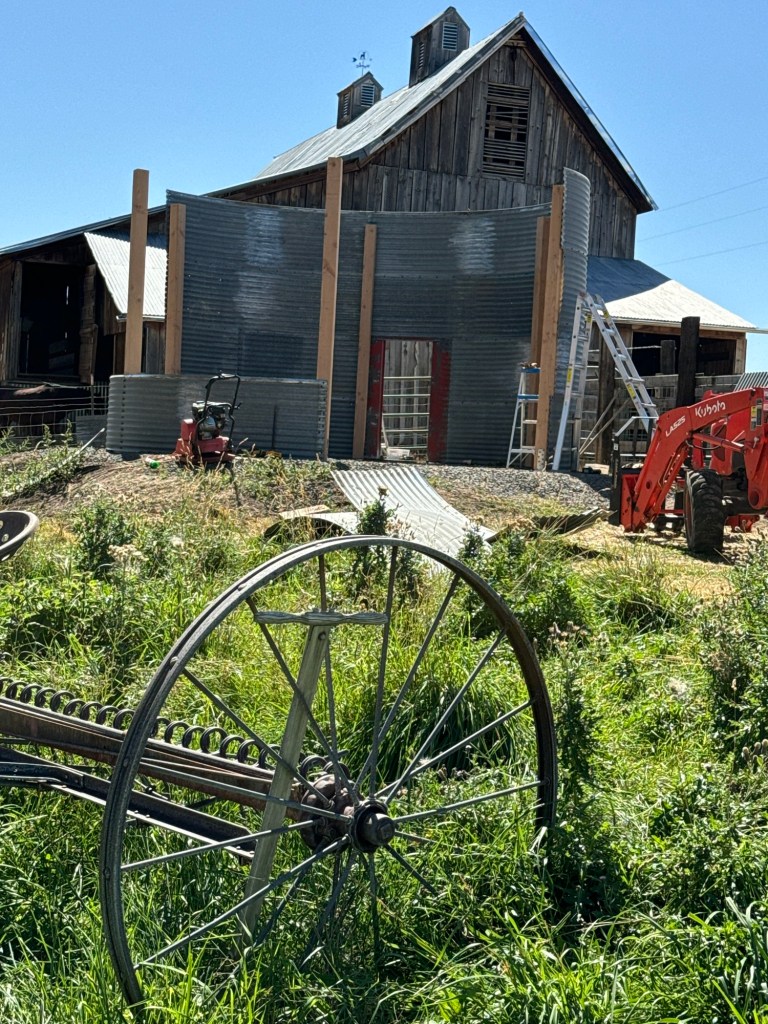
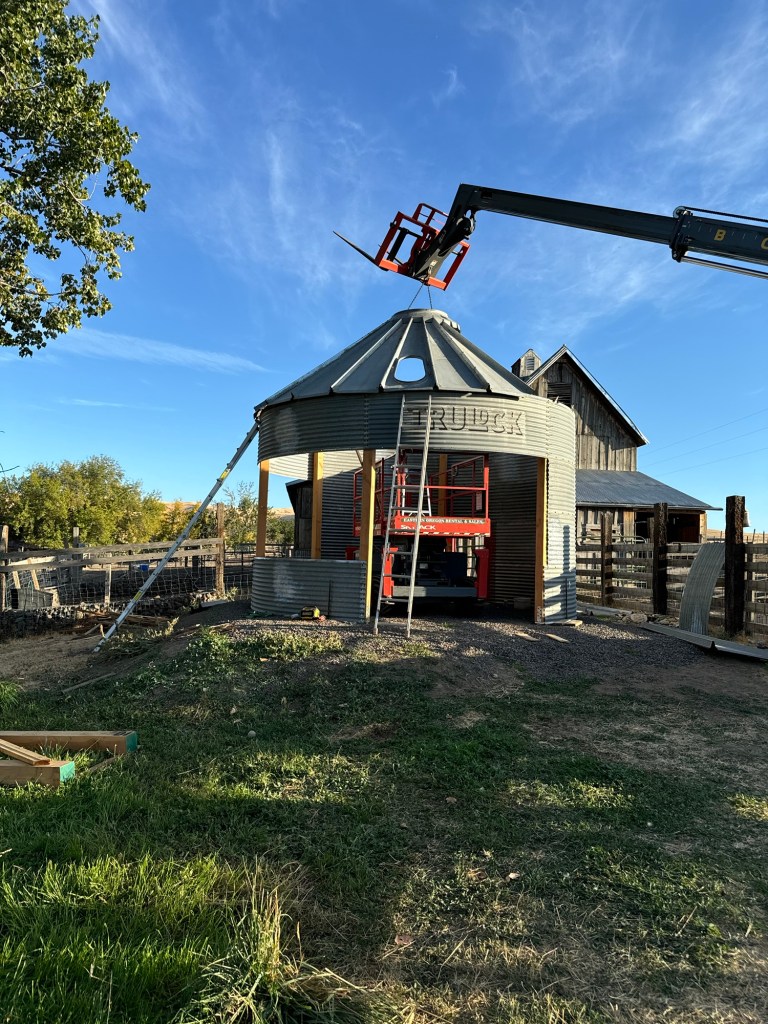
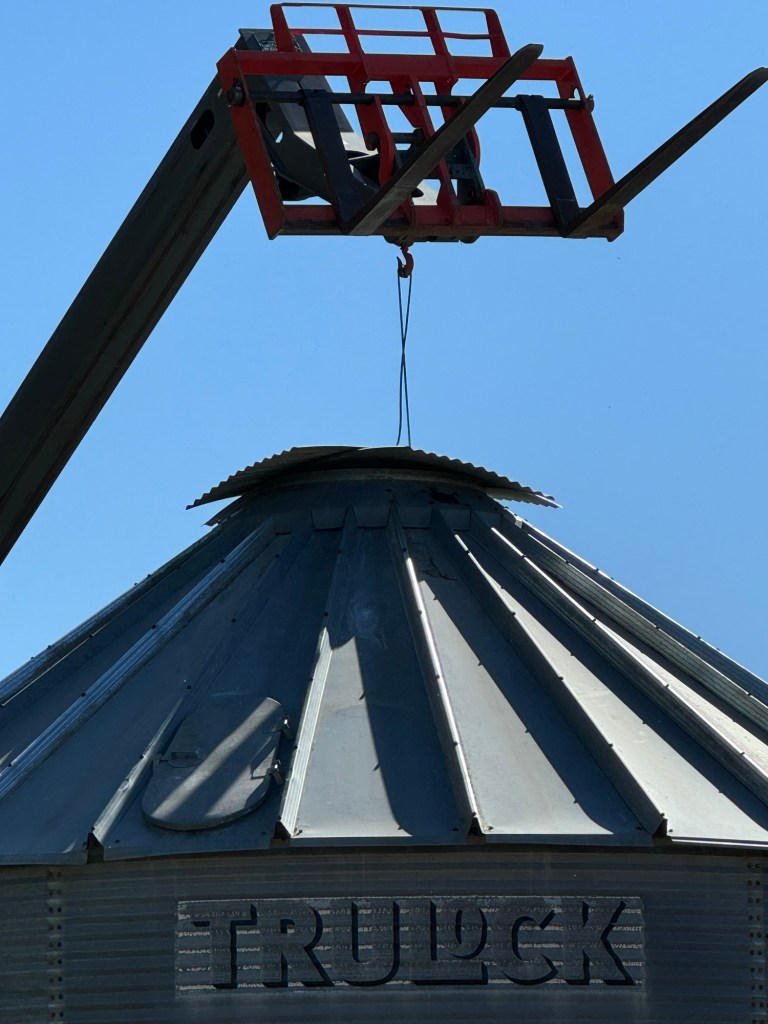
This was the weekend to finish up the gazebo! The rental equipment came on Friday at 0900, a scissor lift and 45’ boom lift. I got the requisite five minutes of training and I was in control of my own fate. I knew that I needed to get the boom setup first as it was needed to hold the roof up so I could tear down the platform. But I needed to get the scissor lift onto the front hillside first as I was going to park the boom in the corral and all access would be blocked. Luckily, there was a hook hanging from the bottom of the forks so I was able to just use the hook on the boom. I thought the 45’ boom was a little overkill but it just barely reached out far enough! I ended up with the boom fully extended and had to drive the boom forward a few inches to get the needed distance.

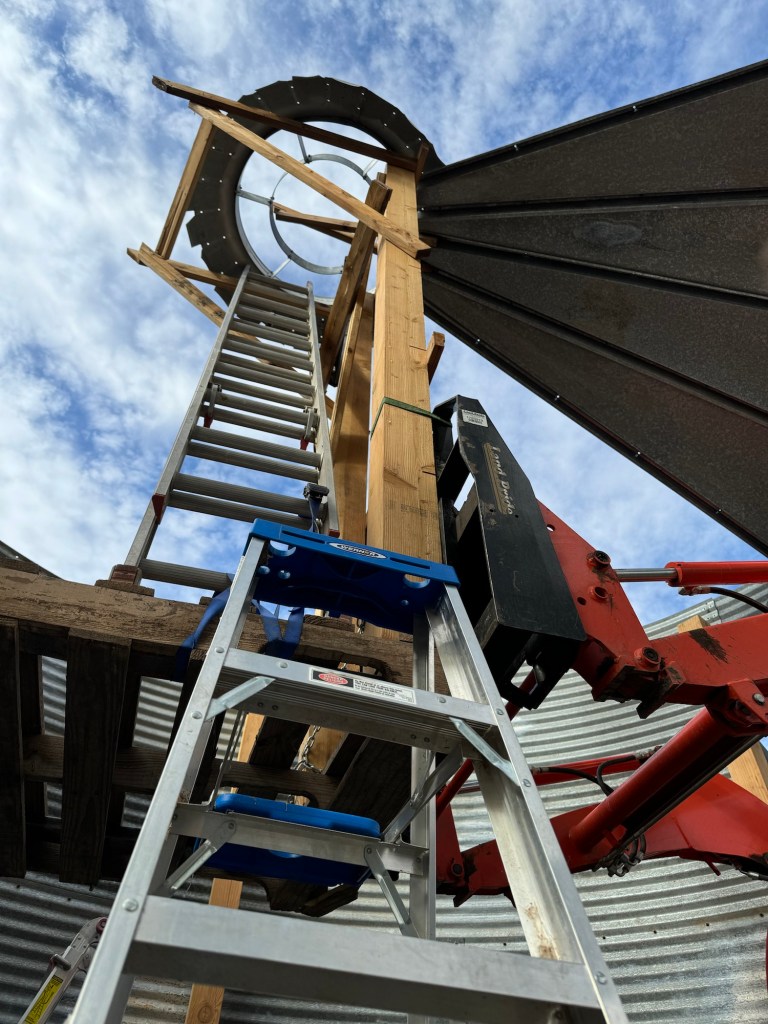
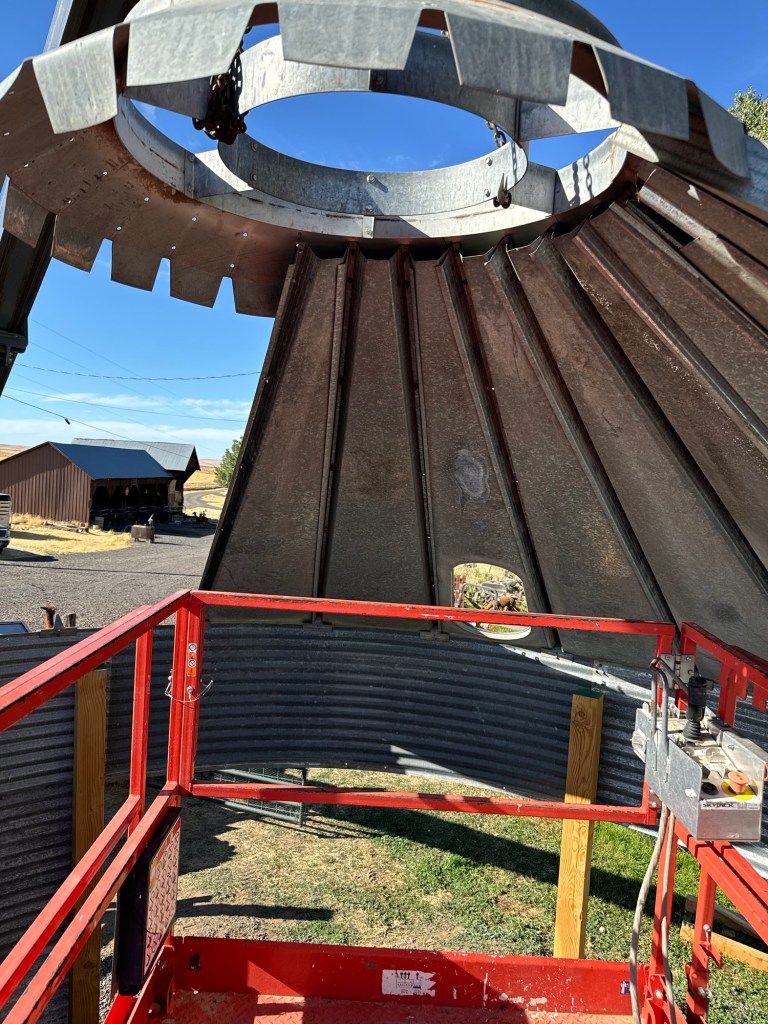
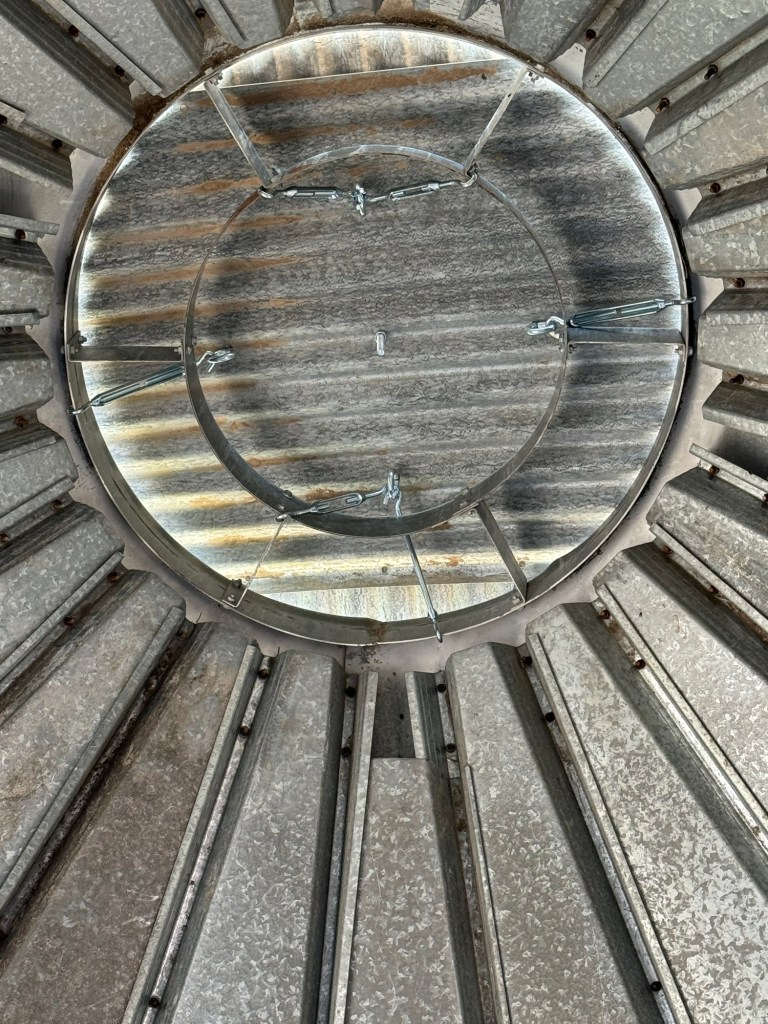
I was able to put up a chain attached to two points of the center ring and over the boom hook. When I took tension off the platform I was ready to tear it all down. During the dismantling of the platform I discovered that one side was only held up by a single screw, the other two had failed. The pallet I had built the platform on fell apart into three pieces. I was pretty impressed that it all held together long enough to get the rental equipment out to the house. The best part is they rented it for one day (8 hours run time) and did not pick it up until Monday. So I was able to use it over the entire weekend.

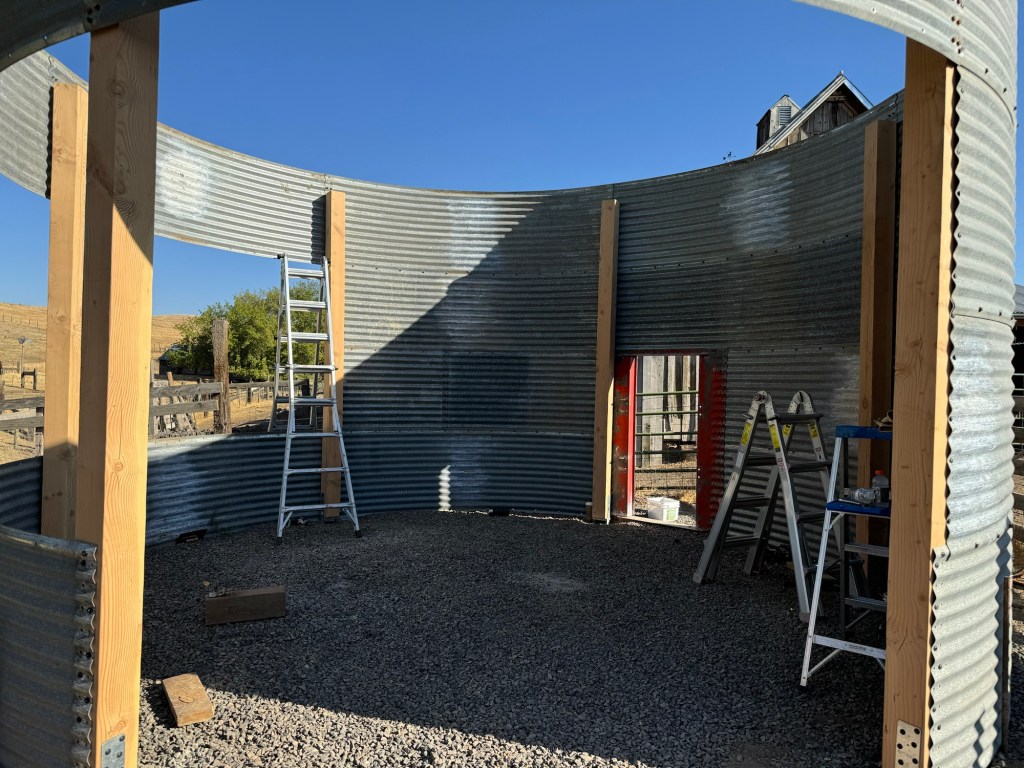
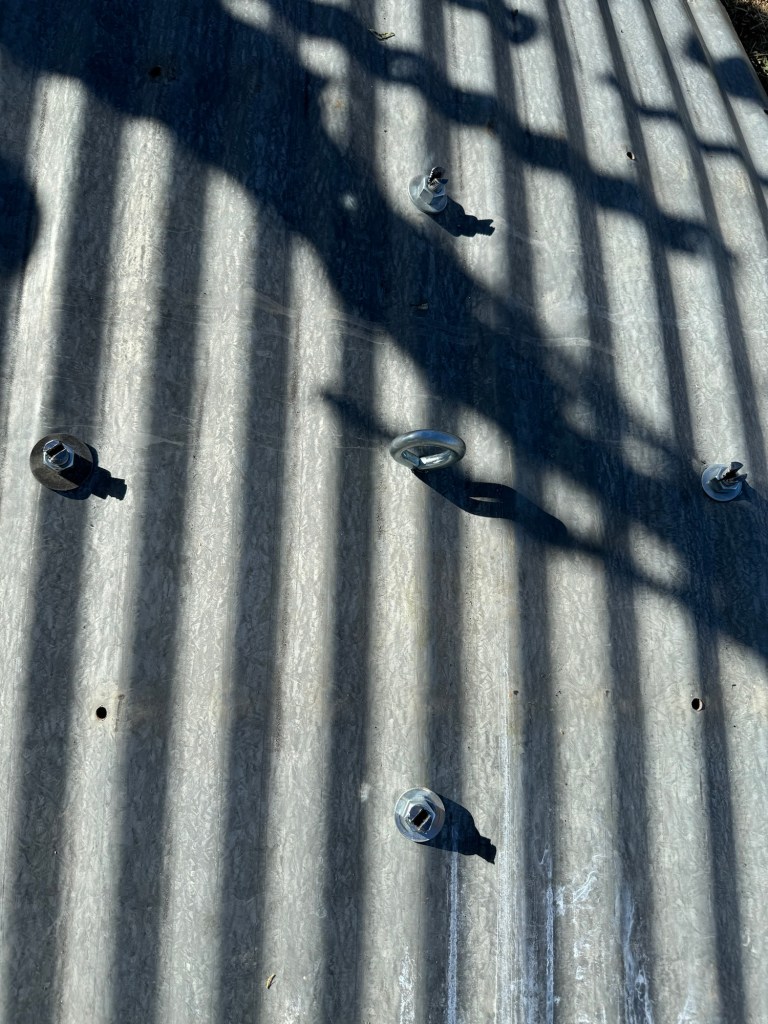
Once the platform was off the Kubota, I drove it out of the middle of the gazebo. I then tried to drive the 4×4 scissor lift with big tires into the gazebo, after having to drop all the protective rails to make it go under the opening, it was four inches too tall. Nope, one wheel kept spinning and it would not go more than three feet. I called the rental company and they sent out the mechanic. I worked on the baler as the new parts came on Thursday. I put the gear on backwards and had to pull it and was attempting to get it on correctly when the mechanic arrived. It turns out that this machine had been having some issues and he did not know about it. It turns out to mostly be poor design. It uses hydraulic pressure to drive all four wheels and once a wheel starts to spin all the pressure goes to that tire! We got the lift into the gazebo by nudging it a couple of times with the tractor forks. I was able to get four more roof panels on by myself for a total of 8/24 that were attached on top ring and bottom to the wall.

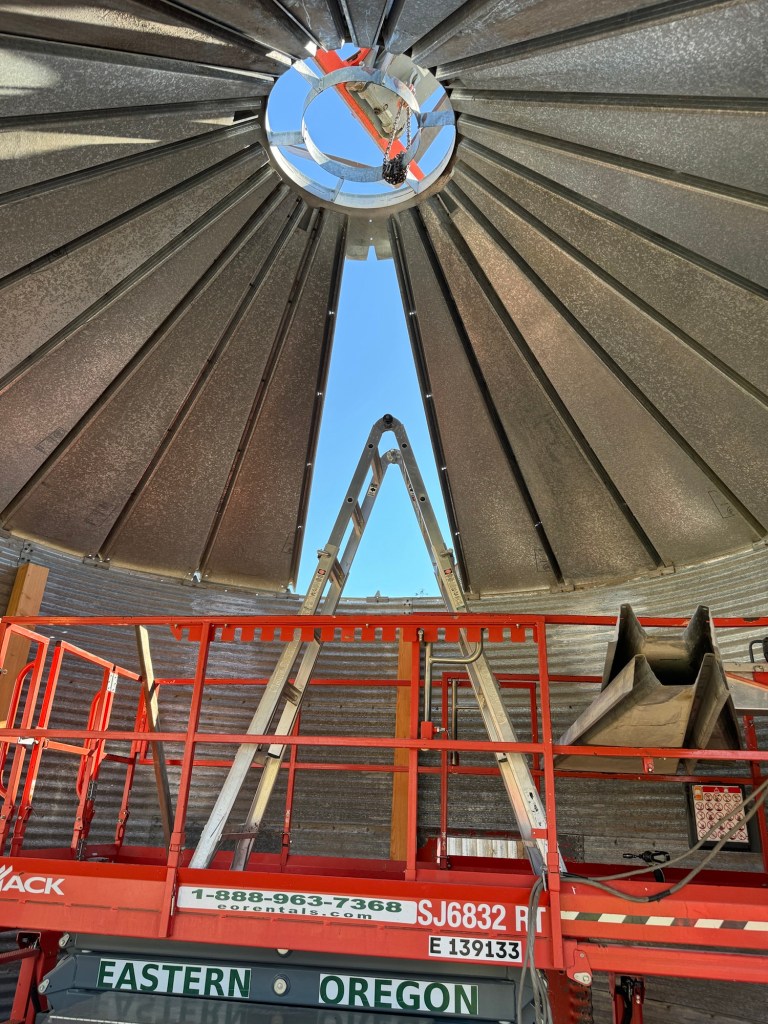
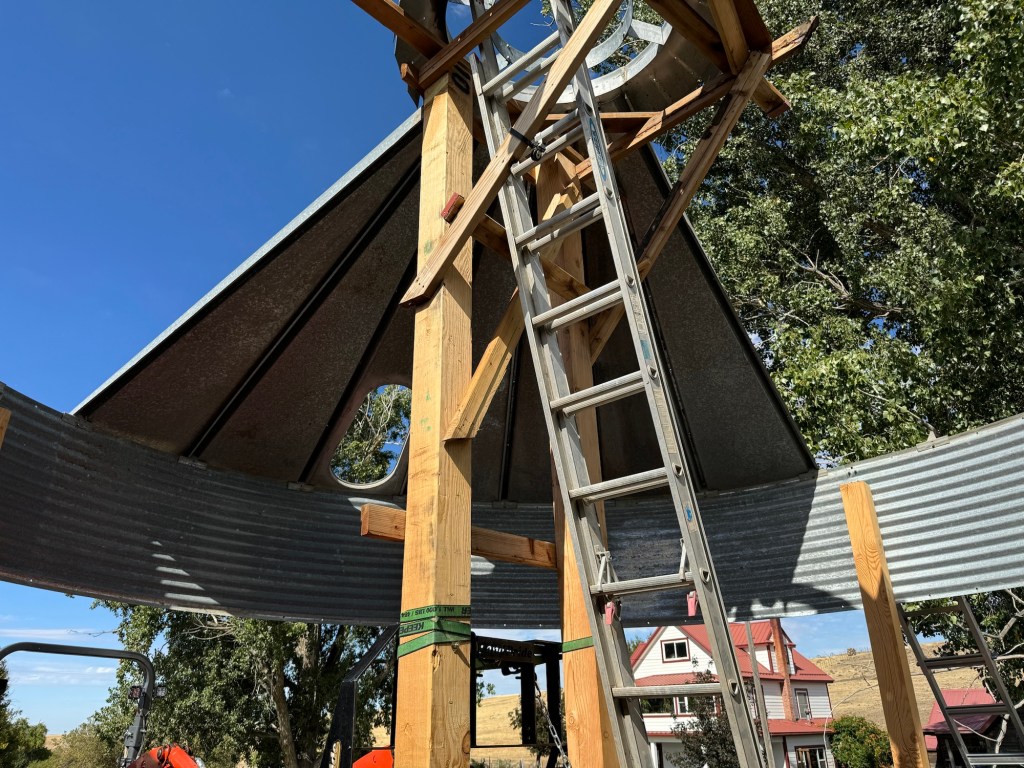
Mr Rainman came out Saturday morning at 0700 and we dove right in! It turns out we had four roof pieces that had the upper eight inches cut off! So you cannot bolt them to the upper ring. It was pure happenstance that I installed one on Friday and then Mr Rainman found three more. Once we knew how many we had we spread them out every fifth panel evenly around the roof. The scissor lift had to have a little push/pull help with the Kubota to get it turned inside the gazebo so we could finish getting the roof panels up. We made really great progress but it was starting to get late and we had three panels left. I was tired and wanted to quit, but we were almost there so we stayed and finished the last three. The entire roof was up, all the panels that could be bolted to the center ring were but we were having trouble with six panels not lining up at the bottom of the roof. The roof was too high, it needed to drop about one to two inches on just those panels. We decided to let gravity do its job overnight and come back in the morning and all would be perfect. Especially since we had already bent one anchor by me extending the boom when I should have been retracting it.

It was not perfect the next morning, absolutely no part of the roof had shifted. Now on one hand this is great news, but it still left us with the conundrum of how to lower the roof. Especially, since the wind was blowing 10-15 MPH, I was so glad we finished putting up the roof on Saturday! We talked about going up in the scissor lift and trying to just hang and throw our body weight around to get the roof to slide down. Instead we moved the boom truck around to the back of the gazebo and used the boom to “push” down on that side of the roof. We got all but two holes lined up and ended up drilling new holes for those last couple of holes.

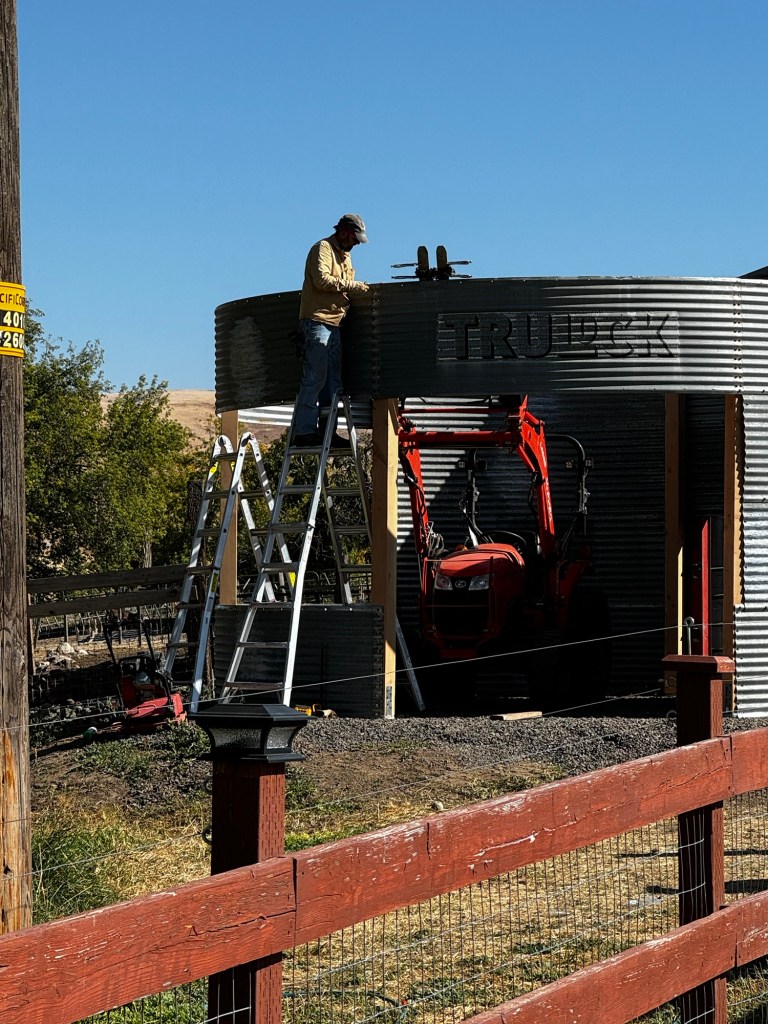
I had this brilliant idea to cover the center top ring with the panel I had cut in half earlier in the assembly process. I wanted to just use one piece of the panel but it was not wide enough. So my awesome idea was to just stack them like a cross at 90 degrees, drill a hole and put an eyelet on top then drill four more holes and put the eyelets in the opposite direction so I could then anchor the new “free” lid to the center ring. The wife was away at church and I was sure this was going to work. The big issue was neither myself or Mr Rainman knew how to tie quick release knot. The second knot I tried was called an exploding clove-hitch knot and it held 60# of metal and let us raise it 45’ into the air with the wind blowing! I wanted to release the hitch as soon as it hit the roof but Mr Rainman wanted to wait until we knew it would work.

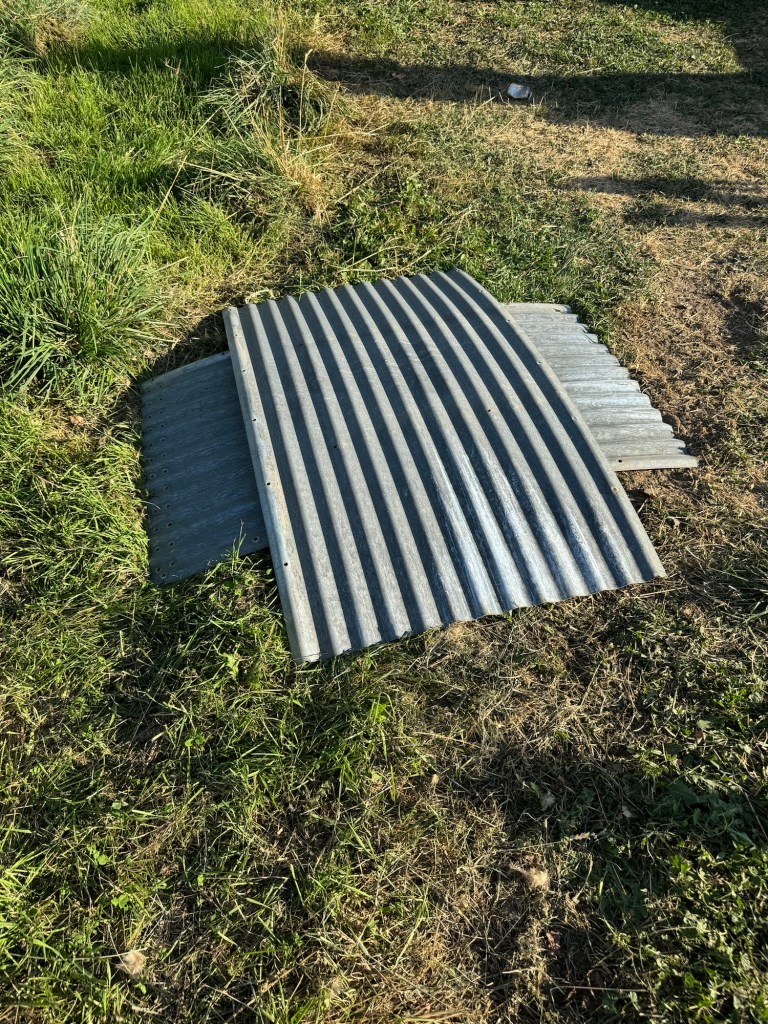
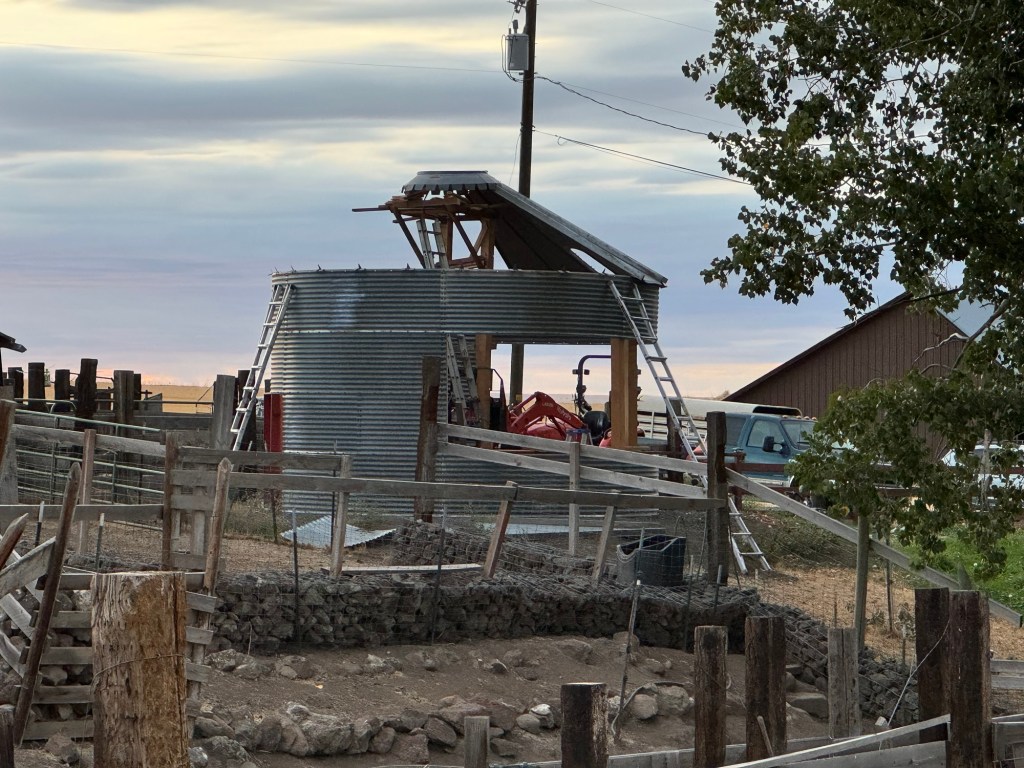
We went up in the scissor lift and started working on getting it attached. As we were getting ready to attach it he asks me if we should go down in the lift, walk out and look up to see how it appeared from the sidewalk. I naysayed this suggestion immediately! I was tired and wanted to be done. We got it all tightened down when the wife pulled up and promptly walked over and started saying “no” repeatedly. It was all Mr Rainman could do to not fall over laughing. So we dropped the lift and I went and looked. It did not look the greatest but I did not want to spend a $600 plus for a new cap if I could even find one so I got her to agree to let me use the cap idea as long as I cut the cross into a circle. Of course I thought I had a lot of metal cutting wheels and ended up only having two new ones and two used ones. I got it cut with my big DeWalt 60v grinder. I had half a disc left and only exploded one disc.

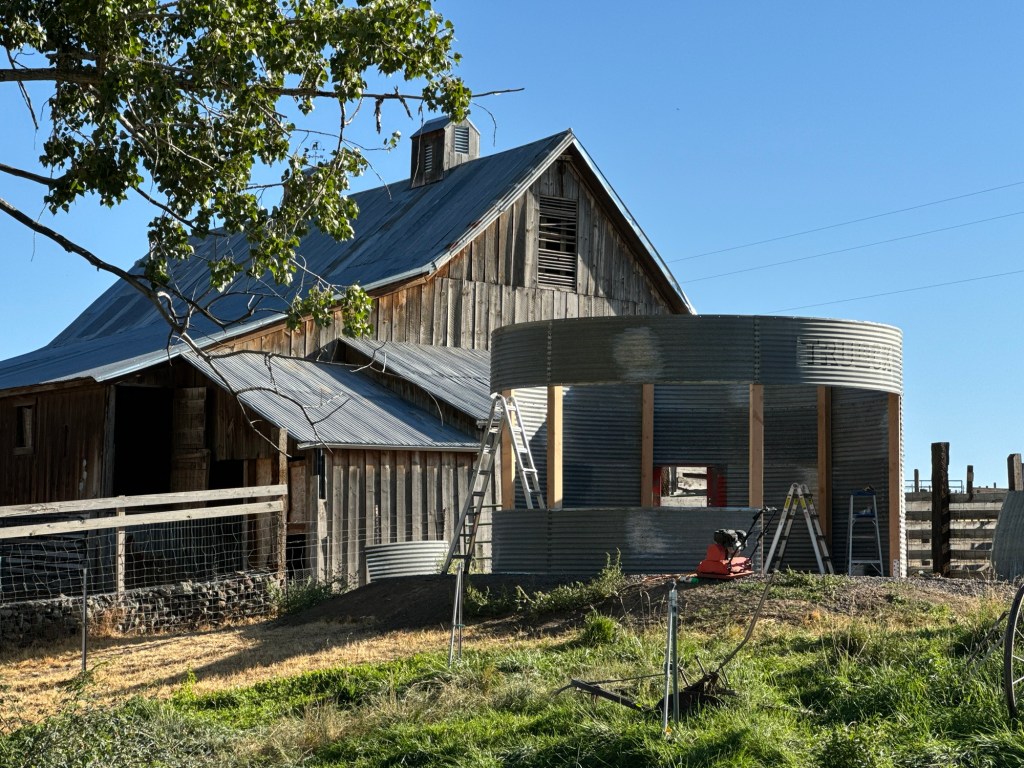
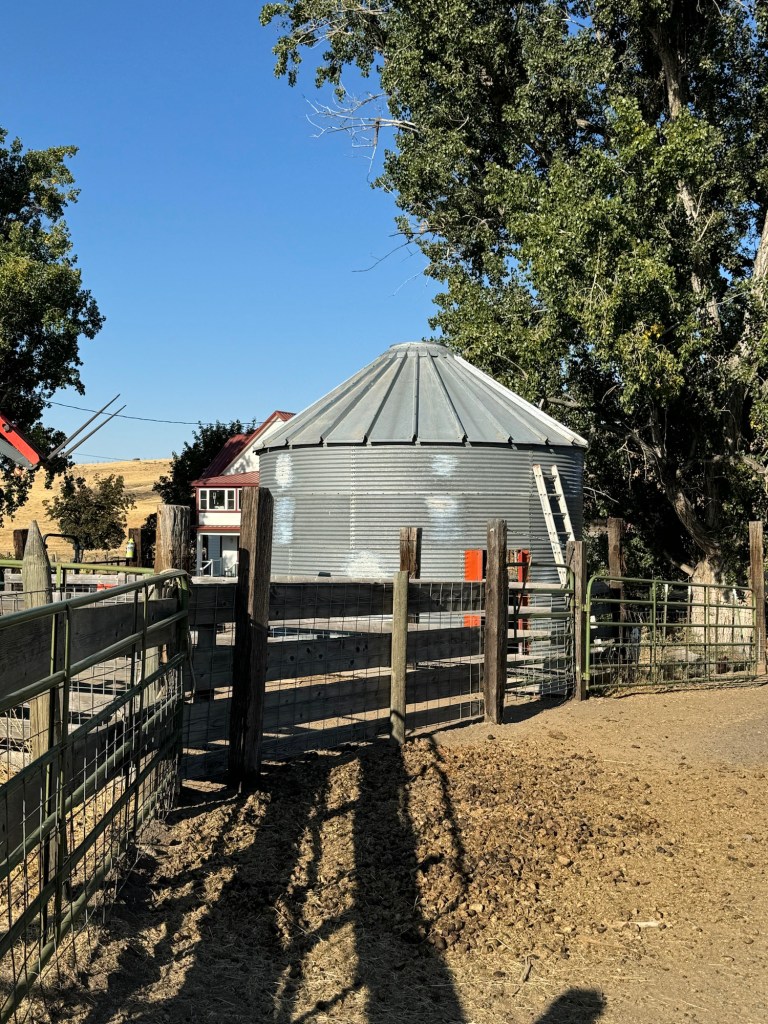
The amazing exploding clove-hitch was again used. It was easier to tie the second time and it did work as we tried it out after we brought down the cross. We got the round one up, we dropped the scissor lift, looked at it and then tried to anchor it down. This necessitated a trip to the hardware store to get shorter tighteners. We got six tighteners on it and it is not going anywhere. The knot gave way when it was pulled from the ground, we used 100’ rope and tied the knot in the middle of the rope.

All the equipment was moved out so it could be picked up on Monday. Again the scissor lift required some pulling to get it out of the gazebo but it was a down hill trip to the driveway so I was able to get it out without any more assistance. So it only cost about $1100 to rent equipment and I only had 2.5 hours of run time on the scissor lift and 2 hours of run time on the boom truck. Yes, I do know that I probably should have done that 3-4 weeks earlier. So learn from my hesitancy/cheapness and just rent the equipment early. It is a dang sight safer that is for sure.

Danger gazebo project halted

The platform was all ready and my only goal was to finish the roof over the weekend. We got a ladder tied into the center so that I could manipulate the center ring and bolt the wedges to the ring. It took us over two hours to get the first piece bolted in place. We had to keep jockeying the platform up, forward and back. Nothing seemed to be working so we started to lift the platform even higher, then higher. I had forgotten what it was like to stand on a ladder for hours at a time. You are constantly trying to balance yourself. Well maybe not a normal ladder but one suspended on a shaky platform anchored at the bottom and top so the ladder doesn’t fall off or lean backwards is a little different. On a side note the hydraulics have a very slight leak that is letting the forks drop a couple of inches over 15 minutes. This doesn’t seem like a bunch but when you are trying to line up four 1/4” bolt holes that is a lot of movement. It’s also very hard to move the bucket 1/4”!

So instead of moving the tractor bucket all of the time I started using a three foot span of 2×4 as a lever to move the ring enough to get the holes lined up. Then I started adding shims to hold it into its new spot. This went on for six hours and I only managed to get four panels totally bolted in place and three more up onto the ring. My legs and arms were cramping and the metal pieces were starting to get hot in the sun. It was time to call it a day. We cut four 2×4 and put them under the tractor forks so the platform could not sink overnight.

Today was the day, there are 24 roof wedges and we only had four bolted in and three more up so almost 25%. But we now knew what we were doing and the rest should be easy. Not even. It was discovered that the far end of the ring is sagging a lot. I needed to lift the center ring up another ten inches. I ended up putting ten inches of shimming under the two far sides. Since we had managed to get seven panels up onto the center ring it is incredibly hard to move with all that weight on it. I had Mr Rainman crawl up a ladder on the outside of the gazebo to reach out with a tape measure we need 108” for a roof panel, we were at 94”. I was hollering at him to take it easy crawling up the side of the gazebo as it was causing the entire platform to shimmy and shake in the air. There was no way I was going to be able to shim another foot. Not without causing the platform and all that metal crushing down on me. It was officially not Steve safe. OSHA and I have pretty drastic differences when it comes to safety but I do have some standards. I do own two roof harnesses. But no way am I going to finish this project this way.

I need a crane and a scissor lift to get the roof on safely. Using those two pieces of equipment I think we can get it done in 16 hours. So a two day rental should be enough to get it done. Now I have to find a crane and scissor lift and get them delivered to the farm. We will use the crane to grab the center ring, lift up 10 inches and then tear down the entire platform. Once the platform is torn down we will be able to drive the tractor out of the center of the gazebo and drive in the scissor lift. This will mean the tractor will be trapped in the front yard until we are done. Not really a big deal as the tractor is currently stuck holding up the platform now.

Unfortunately, this is going to add to the total price of the gazebo. But that cannot be helped. Those six weeks doing nothing with a broken foot did not do my fitness level any good. Plus, I am just starting to be able to get back into some hard manual labor without petering out in a couple of hours. I do not want to fall or have something fall on me and take me out for months or a year. I will call a couple of rental agencies on Tuesday.

Stuck. Need more equipment

Gazebo ready for roof

Well it was time to make some progress on the gazebo. The final step in the assembly process is to get the roof up. Since the crane thing was not an option for me, I needed to use Plan C. I mounted the two ten foot posts on the front of the pallet forks on top of a pallet. I drilled a hole in one and attached a bolt with a hook thinking I could somehow attach it to the fork railing. Instead I ended up running a tie down through the upper slats and cranking it tight. I used a chain around the bottom of the post tied to the fork. I did not want the bottom to give out at all. I then drove over to the Gazebo opening and tried to get the posts through the opening. I could not tilt the platform enough to get the posts inside the Gazebo. So I had to tear down my post setup, toss the posts to the side and drive the tractor into the Gazebo. Once inside I mounted the two posts then proceeded to use the scraps of 2×4 from the house window trim to stabilize the posts and to build a top that is hollow. This is because we will need to put a ladder up through the middle to bolt the center roof pieces in place.

Once I had the platform built I went over to the pile of roof pieces and dug around and tried to figure out how to attach the roof to the outer wall. There is a weird small attachment piece that is bent on three angles. I could not figure out how it went onto the gazebo edge. Gingerman helped me roll the center piece over to the gazebo and then lift it up onto my fancy dancy platform. This would not have been possible to do alone it weighs too much. We took the pickup and trailer over and loaded up the roof pieces. Because I have the tractor with the pallet forks all tied up! I should have moved the roof pieces over with the tractor before building the platform.
I went inside for the day and was talking to Annmarie while she made homemade tomato paste. This is not super easy and not very much is obtained but it tastes great! We were talking and I told her I was unsure how the gazebo roof kept birds out of the tall peaked ridges between each piece. Then it dawned on me, the little weird triangle piece on the roof attachment is the part that goes up into the ridge! Now it will be super easy to get all the roof pieces installed.

Gingerman and I got an impact driver, drill and some large head treated wood anchors. The floor in the barn is coming up in a few places as the old screws have rusted off. It was perfect time to work inside as it rained for a whopping 15 minutes. The rain gauge did not even register the rain. Once we had the floor repaired we set up the sorting chute and unwrapped the old hay so the sheep can tear into it and create bedding. They will spread it out as they tear through it. We will need the chute to tag and band the lambs in a couple of weeks.

Cow hay now on the farm

It never fails, when I need to do anything with the hay it always rains. Labor Day was no different, just as I was finishing up transporting the last load to the farm it started to rain! This is great timing as it is going to sit out for a week until it can be loaded into the machine shed.

I have been trying to get last years big bale discards from a source all summer long. It was going to be discounted and I wanted enough that I was hoping to have it delivered. This did not work out at all. Annmarie has been “reminding” me all summer that the cows need hay for the winter and I am being a cheapskate. There is nothing wrong with being a cheapskate when possible but she was right it was getting late in the season to be buying hay. The real problem with buying hay is I only have a 7500# 16’ bumper pull trailer. So I can only fit four large bales at a time on it which causes problems when you want to pickup 60 bales of hay.

Normally, I purchase all of my hay from Bluview Farms. I always wait until September to purchase it. So I went with this option again as it fits the bill nicely. They are only four miles from where we live so I can take an entire day and just run back and forth with four large bales at a time. Unfortunately, they are selling their farm and moving which is going to cause me issues next year. I really need two semi truck loads delivered. The second problem is that I do not have a tractor large enough to unload the hay and restack it. I am not buying a third tractor to use once a year. The third problem is our old pickup may not be able to haul a large gooseneck trailer if I have to pickup the hay myself.

So that being said Mr Gingerman is coming over today to stack all of the large bales into the machine shed. I think we can get 50 bales, stacked four high in the hay storage area. I can toss a chain around them and pull them down with the little tractor. Once they are down my new Kubota 3301 can lift a bale about 4-6” off the ground and I can drive it anywhere on the property fairly easily. This is much better than pushing it along the ground which is only what the little John Deere 2520 can accomplish. Mind you, I have fed the cows large bales almost exclusively but I keep hoping to make it easier.

What does this mean? I need to find a source of hay that can deliver it by the semi load and unload and stack it into the machine shed or I need to purchase a larger pickup and trailer so that I can haul 10-14 bales at a time. Fortunately, I was able to pickup a F350 Diesel this week for a steal. Again, the Dodge 10 cylinder is a beast but it is starting to show its years and it has 180k miles on it. I just purchased tires for it at the beginning of summer but they are the same size as the new Ford so I will get them swapped out. The Dodge is rough on the exterior and rough on the interior, a true farm vehicle. Once I get the tires swapped I will be offering it up for sale, cheap!

I have the new truck, now I may need a new trailer, gooseneck. I do not want anything fancy. I want it very functional and capable of hauling a lot of weight. I can even rewire the lights and brakes if necessary. So if you know of anything “cheap” let me know I would appreciate it.

Gazebo moving along

The grain bin gazebo is starting to come together. I as usual did not watch any videos, ask anyone and spent 10 minutes looking at pictures on the internet as a precursor to building said gazebo. The guy I purchased the parts from told me it was the bottom 10 feet of a 20 foot grain bin, he gave me two tubs of bolts and nuts, four floor anchors, a pile of roof anchors, a door, the roof parts and central roof ring. Supposedly the only thing missing was the vent cap for the roof. This was promptly unloaded and ignored for two years.

Well, let me say that it is definitely the bottom half due to how heavy the pieces are. We did not get enough pieces to go to ten feet, only eight feet and if we put up a full ring for the roof then you would have hit your head every time you went in and out of the gazebo. We could have cut one of the upper panels but then I was afraid it would weaken the roof. The bottom line was after talking with the boss, wife, we opened up enough of the gazebo to have a full six pieces to go around the entire top and to get the gazebo sides over ten feet into the air. It’s actually about ten feet six inches high now at the walls with the roof I think it will be another 4-5 feet higher.

This morning I decided to do a little research on how to put the roof together. Yeah, I was better off not knowing. They used a crane, built the roof and then stood on the ground and proceeded to add a row of panels and lift up the entire grain bin as they built it. No ladders needed! The only drawback for me is that I don’t own a crane. Instead we used the trusty Kubota with the forks on it, a chain and some Vice-grips to hold the chain at the far end of the forks. This worked to get the third and fourth row in place. The fourth row was the worst. We ended up having to drill out three holes that we just could not get lined up, they were off by about 1/8” and the entire rest of the panel was already bolted together.

Mr Rainman came over Friday morning and we got the three panels up on the high back wall. It was a battle to get them bent into shape, another problem with not putting them back on in the exact order they were removed. I put up the last three rings myself with the Kubota being my trusty partner. At no point did I fall. I did tear my finger away from one of my fingernails enough to make it bleed and discovered a metal sliver in my finger this morning. The bolts had to be put on between the panel and the wooden support posts and this was an incredibly tight fit. Putting the posts 1/2” from the metal and then adding bolts meant some of the bolts are touching the posts. This is a good thing when I screwed in the lag bolt anchors.

The trusty Kubota is not going to be able to lift the center ring for the roof. It will only lift something about eight feet into the air. I am going to bolt two ten foot 6×6 posts to the upright frame of the forks resting each one on a fork. But first I am going to get a stout wooden pallet. This will let me put a diagonal support out to the front of the forks. I will then build a small open box with 45 degree supports at the top for the posts. This is where the roof ring will sit. I can then lift it up and get it centered with the tractor and then assemble the roof. I think this will work. No, I am confident this will work!

I just have to figure out how the roof support pieces go onto the sides…