
Chickens can be very contrary creatures. A while back, Steve realized that he had reached the point where he needed more nesting boxes in the coop. The idea here is that the chickens will lay the eggs in the nesting boxes and not all over the coop (and farm if we’re unlucky). So, we’re discussing ideas, and I happen to see a blue bin that we’ve not used in a while. You know the ones. You likely have at least one of them storing your Christmas decorations in the off season. The big inexpensive ones you can purchase at most department stores, and I suggest that he use that. You have to understand that we are building up at this point. The nesting boxes are actually in the back room of the coop, and the chickens have access through the interior wall. Steve built the first set from scrap lumber, but we are fresh out of scrap lumber. So, we used other scrap material for this set. The dog-food container that started life in the woodshed across the creek and tempted the racoons (details can be found here – scroll down to about the 6th photo on the right) is one. An old cooler that is really not fit to be called a cooler any longer is another, and that blue bin makes 2 more. So we now have a total of 7 nest boxes in the coop. You’d think the chickens would want to check out their new digs, but, chickens are rather contrary creatures that really do not like change. They first ignored the new boxes, and layed their eggs on the floor of the coop when they couldn’t get into a box. Then, they apparently decided to check them out, but they were unhappy with the fact that they were intended to house eggs and tossed out the plastic egg that is supposed to show them what to do there. For a while, they were making nests and teasing us, but not laying. Apparently the “new” boxes have now been in place long enough to be accepted. Sarah found eggs in all of them last week. It only took about two months. Chickens really really hate change. We do, however, still have one holdout. I found 4 eggs in the woodshed this morning. I guess she is not a fan of recycling. The cure for this is to lock the chickens in the coop for a few days so they get used to laying where they should, but I really don’t like to do that. I miss my bug control. Maybe it’s just as easy to go check the woodshed every day….
Month: April 2010
Living Room
 In the absence of anything more interesting, since Steve is working the majority of this week, I thought I’d post a recap of the progress so far in the living room. The picture on the left is what it looked like when we started. Yes, the house was left fully furnished, the first then we had to do was find new homes for all that stuff. And yes, the entire house was fully furnished – including the upstairs bedrooms and the closets in those bedrooms. There was a lot of stuff to relocate. Most of it went to family and friends. Some of it was donated to a good cause. Some, unfortunately, was not salvageable and had to be discarded. But in the end, the house was emptied, and the demolition phase began in earnest. All the wall coverings came off, the dropped ceiling was removed, and the carpet was pulled up. It was a mess, but the room looked huge. Then, we stalled for a while, but eventually, things
 started to come back together, was the sheetrock went up and was primed and painted. There is something about unpainted sheetrock that really makes a room look small again. But, paint and texture really helps. While the walls were exposed, Steve pulled all the wires and installed the new outlets. Eventually, sheetrock was installed and primed and painted. By the time we got to that phase, we just couldn’t wrap our minds around choosing a color, so we went with Kestrel white everywhere. Yes, I know it’s rather boring, but we were overwhelmed. In 10 years or so when we need to repaint, maybe we’ll be feeling more adventuresome. About the time we got the sheetrock up and painted, the coffers ran dry and we had stalled with the exposed wood ceiling. Steve and Lee (our contractor) installed the suspended grid for the ceiling, but there we stalled until this year when the ceiling tiles were finally installed. I haven’t gotten completely updated photos on the website yet
 , but I will get them up soon. In the meantime, you can see more photos of the living room throughout the various stages of the remodel (along with some rather amusing captions) on our website at the address below. http://www.hardinsonline.net/Living%20Room.htm
Apple Tree completed
The hole wasn’t big enough. I knew that when we were trying to get the tree and root ball out of the garden at Ruby’s (Annmarie’s Grandmother) house. I took my nephews. We tried to move the root ball and tree out of the hole. It was three feet in diameter and so heavy it was all we could do to get the tarp wrapped around it. 6 tries later, and five stops because it was too, heavy and five more to dump out the dirt that keeps breaking loose, we dug an angle into the side of the hole to get the root ball out of the hole. Three more attempts to get the root ball into the back of the pickup (three foot dead lift), no success (did dump two more piles of dirt out of the tarp). The root ball is significantly smaller now than when we started! Almost 50% smaller now, much easier to work with, the neighbor was watching and I went to use a ladder as a slide to get into the back of the pickup and he loaned me a 8 foot 12 inch board, so we could slide it up into the pickup. We then filled in the hole and moved the three new planters around in the garden before leaving Grandmas. Of course, the hole needed to be bigger. I in my esteem wisdom, I had decided that the tree needed to go right were the old paper birch had died. I had to chop out the roots nonstop to get the hole dug. We got the tree in the ground.

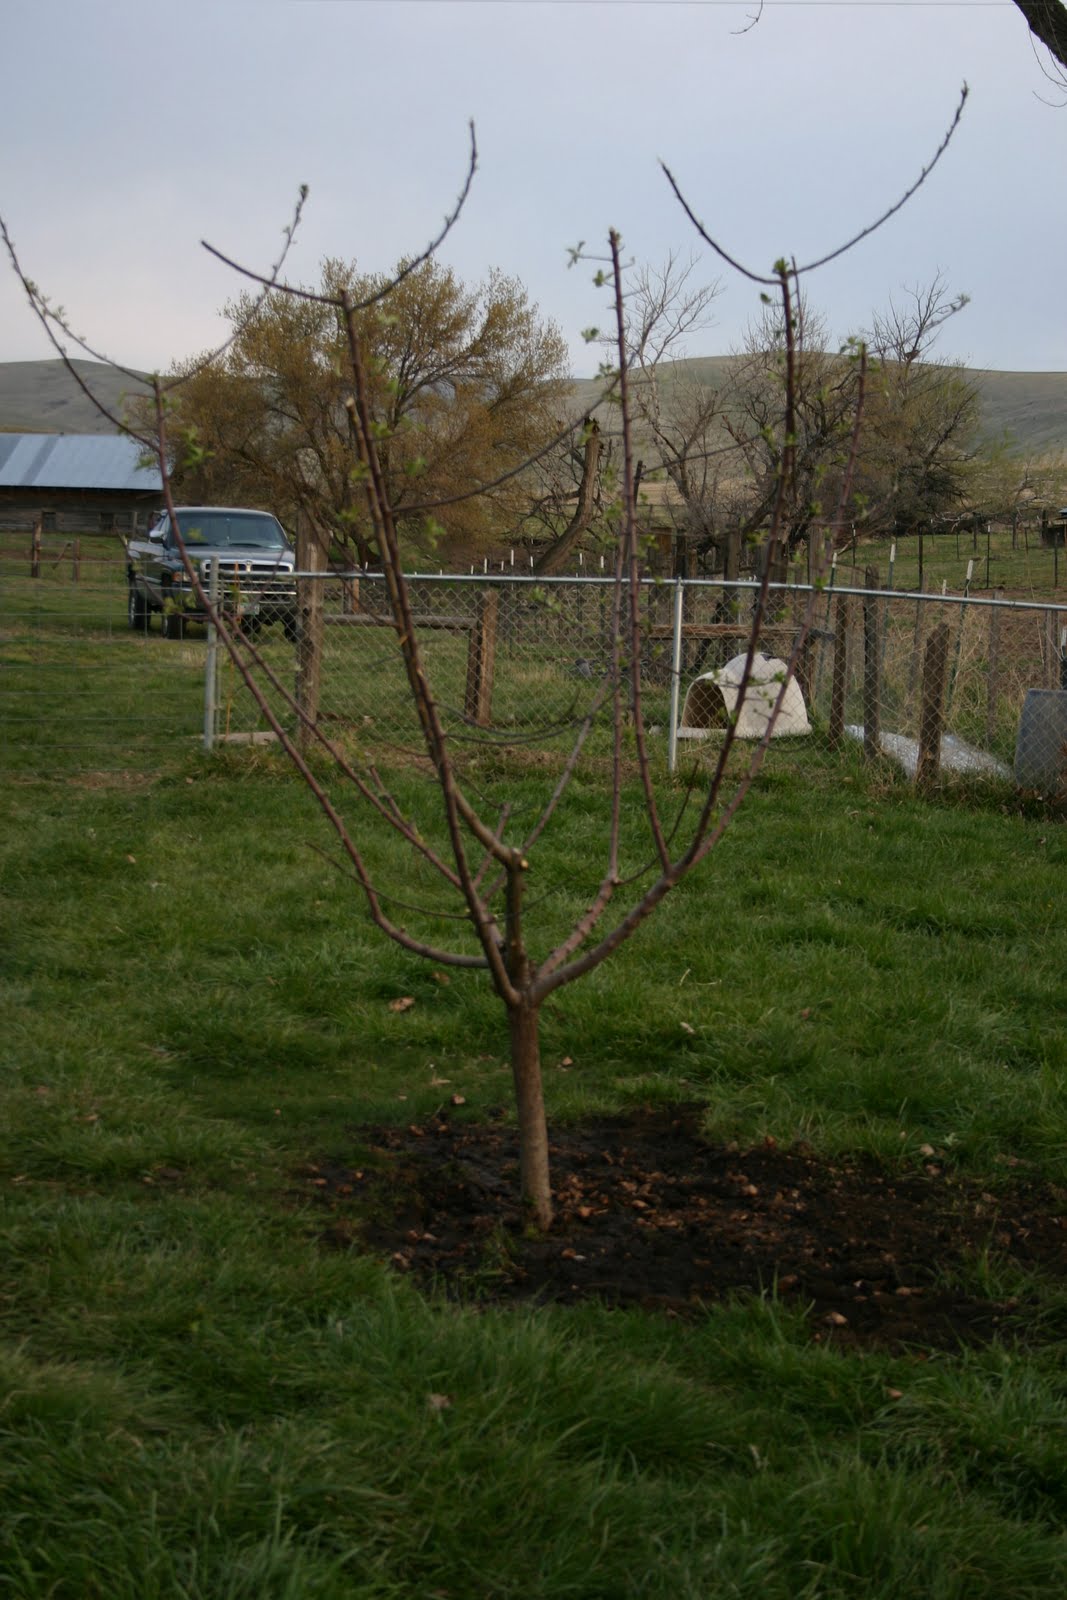
In the theme that nothing is ever easy or works right the first time, the hole was too deep. So we had to lift the tree and throw more dirt in the hole. Now if only the tree will survive its harrowing brush with death. I put lots of water on the tree and it is right next to the water spigot. Hopefully, I can keep it alive. Took me over 5 hours to dig everything and complete the endeavor. My arms and back ache from all the digging. But, I had promised Ruby I would get the tree out and I don’t say no to her, so the tree is gone. So here is the completed version of our new front lawn ornament…
I am really going to get back to the stairs tomorrow.
Fun with apple trees
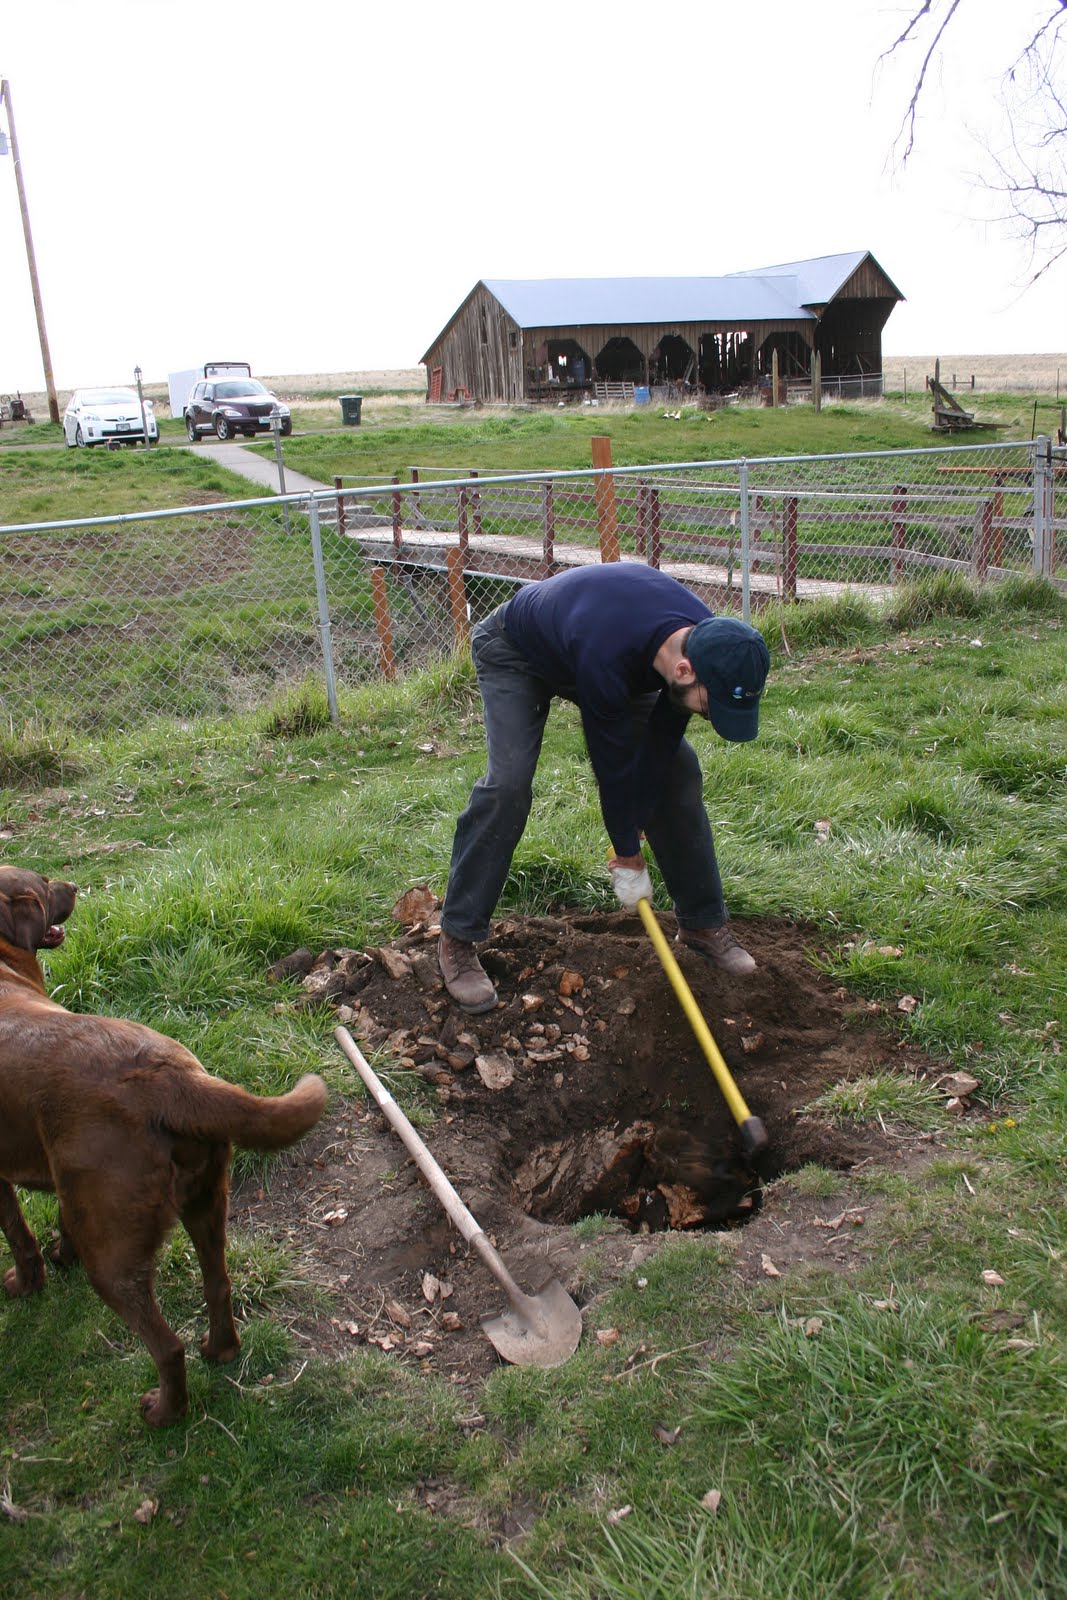
First we need a little bit of background. Years ago, Grandma and Grandpa Lane (my mother’s parents who live in town about 3 miles from here) planted an apple tree in their garden. It’s one of those that had several different varieties grafted on to it. I’m not at all sure it has ever produced, but I digress. As time passed, it became clear that this tree blocked the water from the sprinklers from reaching a significant portion of the garden. So, Grandma and Grandpa went back to watering with a mobile sprinkler attached to a hose. But, now more time has passed, and Grandpa is no longer with us, and Grandma can’t drag hoses around so good anymore. Last summer, Steve told her he’d take that tree out so her sprinkler system would work again. Winter came and went, along with the dormant season for the apple tree. I’m sure you can see where this is going. No, the tree did not get moved. Now, Grandma is ready to start her garden for the year, but with the lingering effects from a Christmas-time shoulder injury she definitely can’t drag a hose around to water the garden. So, Steve is moving the tree – today. Yes, it’s a bit late, and yes, the poor thing has leafed out. So, he’s leaving a root ball intact.
Now, after 16 years of marriage, I know we don’t necessarily have to discuss every tiny little thing, but it was a bit disconcecting to arrive home and see the following scene in the front yard. 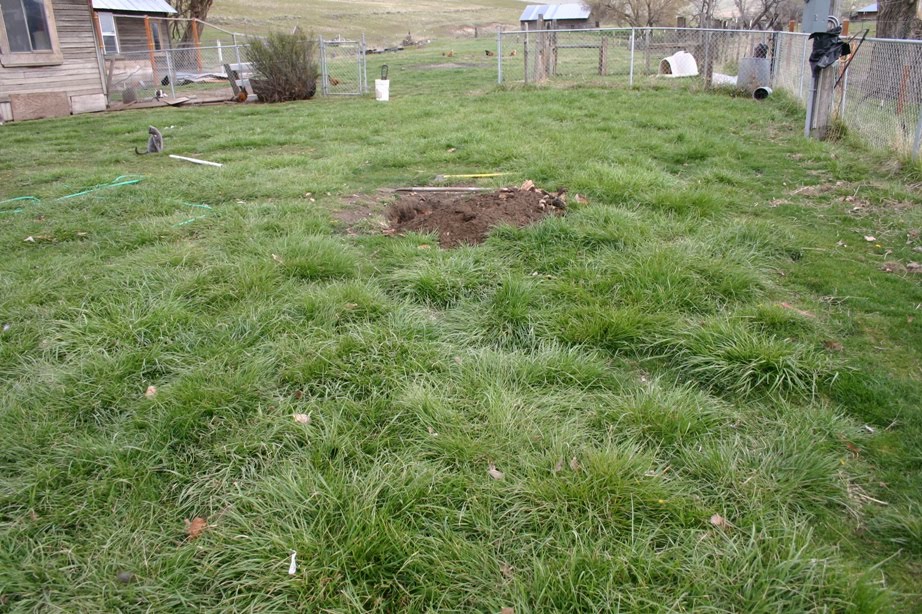 Upon closer inspection, I see that yes, yes that is hole in the yard. No, it’s not a big hole, but it is a deep hole.
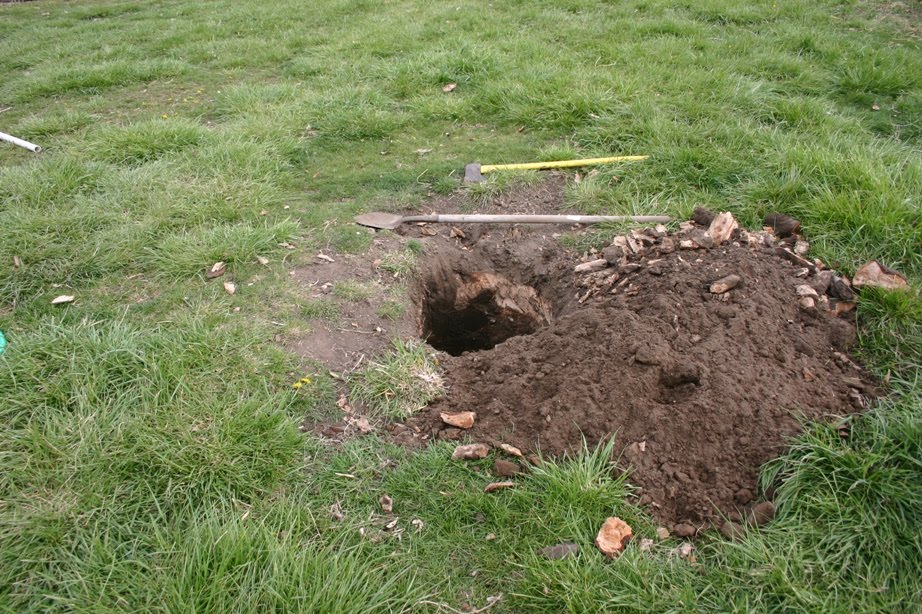
After a few minutes of head-scratching, it dawns on my that this is where Steve intends to put the apple tree! The apple tree that he is as this very moment removing from my grandmother’s garden, and that I thought would be going into the orchard. Yes, I know – silly me. OK – let’s put aside for the moment that we have not discussed where the tree would go, and the fact that I am not at all certain I want a little dwarf apple tree in the front yard. Because there is a much bigger issue at hand here. I’ve just come from Grandma’s house, and I’ve seen the root ball on that tree. It is much much wider than this hole.

He has taken our nephews (ages 14 and 16) back to town with him to get the tree into the pickup. I’ll try to document the effort to fit the root ball into that hole. I have no doubt at all that he will make it. I just am not sure he’ll get it in place before dark (it’s 4:45 now).
Staircase

The stairs are probably the biggest change we’ve made in the house. Really it’s more of a rollback or restoration than it is a change. You see sometime in the 40’s (we think), the house underwent a fairly major rennovation. From what we uncovered when we stripped the living room walls and ceiling out, we think there may have been a fire and the repair of that damage opened up the opportunity for some fairly significant remodeling. It appears that they switched from wood heat to fuel-oil furnaces. There was a wall furnace in the living room, and another one upstairs to service two bedrooms. Although Dad says the upstairs one was never used because it made Grandpa too nervous. At the same time, the downstairs ceilings were lowered by about 18 inches, and the stairs were enclosed. This effectively halved the amount of space that needed to be heated, but resulted in a hallway that was kind of dark and narrow.
 The staircase itself was equally dark and narrow, and the room that we think was originally an upstairs parlor extended out over the base of the stairs, creating a pinch point that made it impossible to get a queen-sized box spring up the stairs. Our box spring went in by way of being lifted up the front of the house and into breeze porch via the openings that no longer had screens on them. I’m sure you can see the eventual issues now that we’ve put windows in place on the breeze porch.
We were pretty sure we could do away with the pinch-point by shrinking the room that was now just storage, but we weren’t sure how the enclosing of the stairs had been accomplished, so we had resigned ourselves to the dark narrow hall and the dark narrow stairs. But, during the demolition of the fir-tex (old sheetrock), Steve found what you see below. Notice that the wall appears to have been built right on top of the stairs. It looked like we would be able to reopen the staircase after all. Now, this eliminated the dreamed-of enlargement of the downstairs bath, and created a bit of strife with Steve as he wrestled with the trade-off, but I had no trouble with the concept.

So, 18 months or so later, we have an open but unfinished staircase. Although we do at least have a railing installed. At the moment, we have a sheet of plastic where that wall used to be, but I’ll live with that, since it means that Steve is once again making progress on this little project and is sanding the floors and stairs in preparation for staining. Actually, he’s nearly done and has only the final sand left on the upstairs floors, as well as a little trim work on the stairs. Then he can start applying stain. He says he’ll be done in about 2 weeks. I’ll be happy with a month. Of course, his true motivation is the fact that he’s can’t work outside for more than an hour or so until the floors and stairs are done, and he really really wants to get to that barn project.
If you want to see more pictures that were taken as the work progressed, please visit http://www.hardinsonline.net/stairs_hall.htm
