Staycation day 10

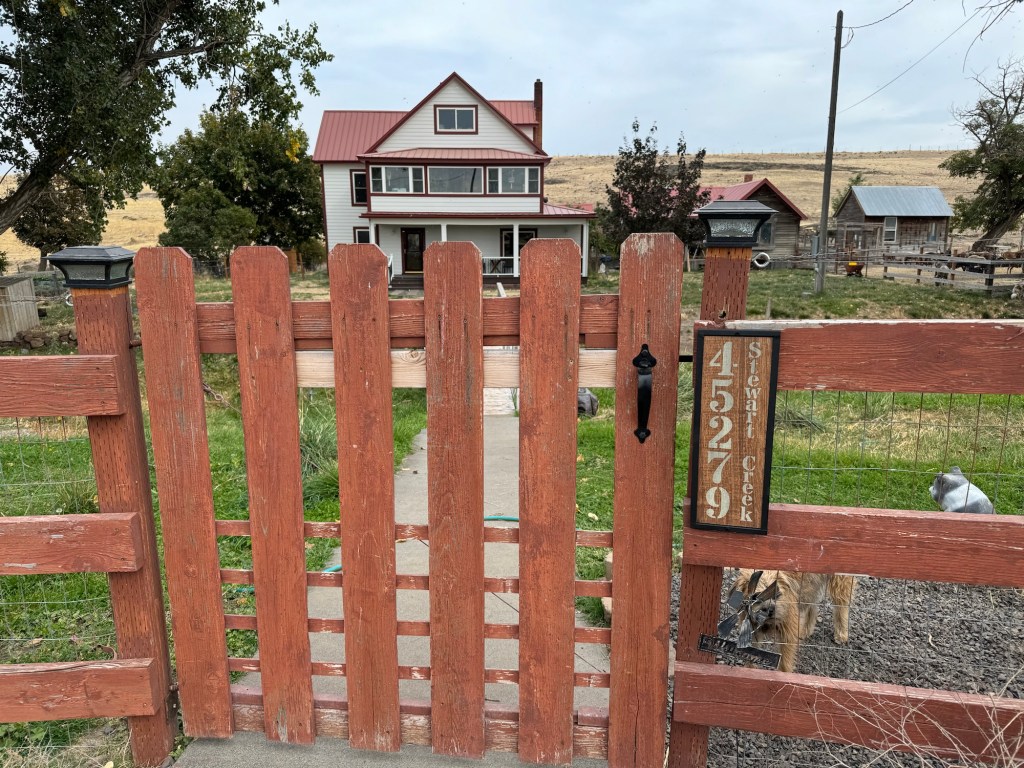
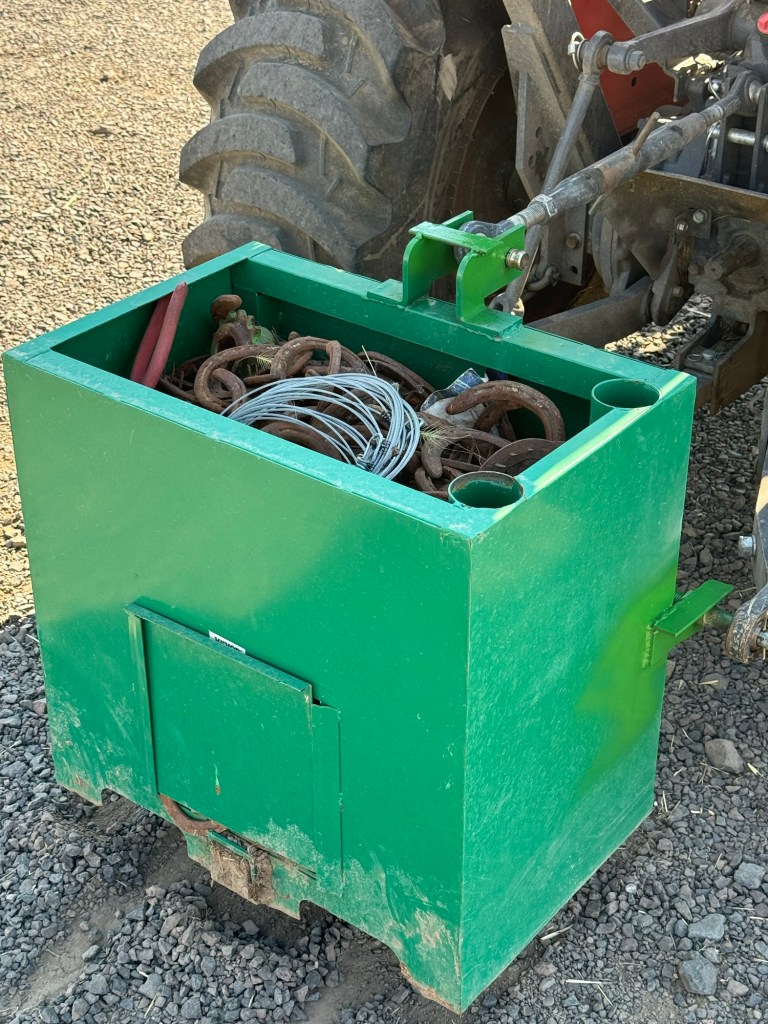
It is not really day 10 as I had to work on Monday but it’s close enough. The Gingerman spent Sunday with my daughter working on a creating a yard gate for my mother-in-law. He got it all up and attached with extra support inside garage so gate doesn’t sag. I have a welded horseshoe chain ready to go. I just need to meander down there and get it installed.

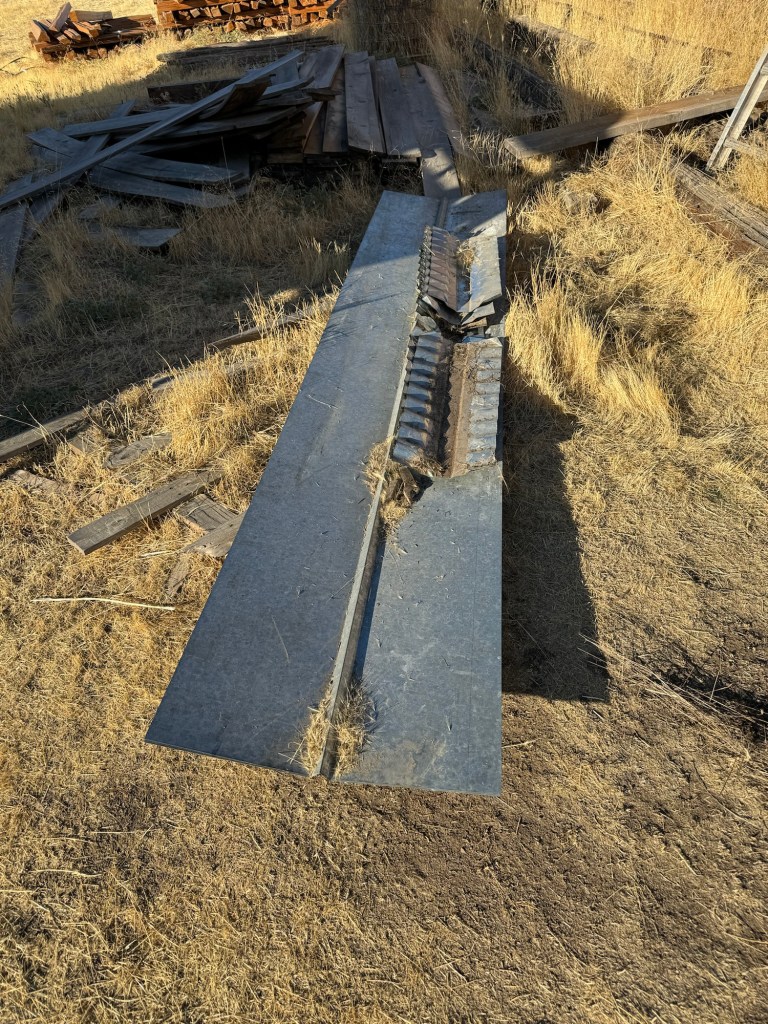
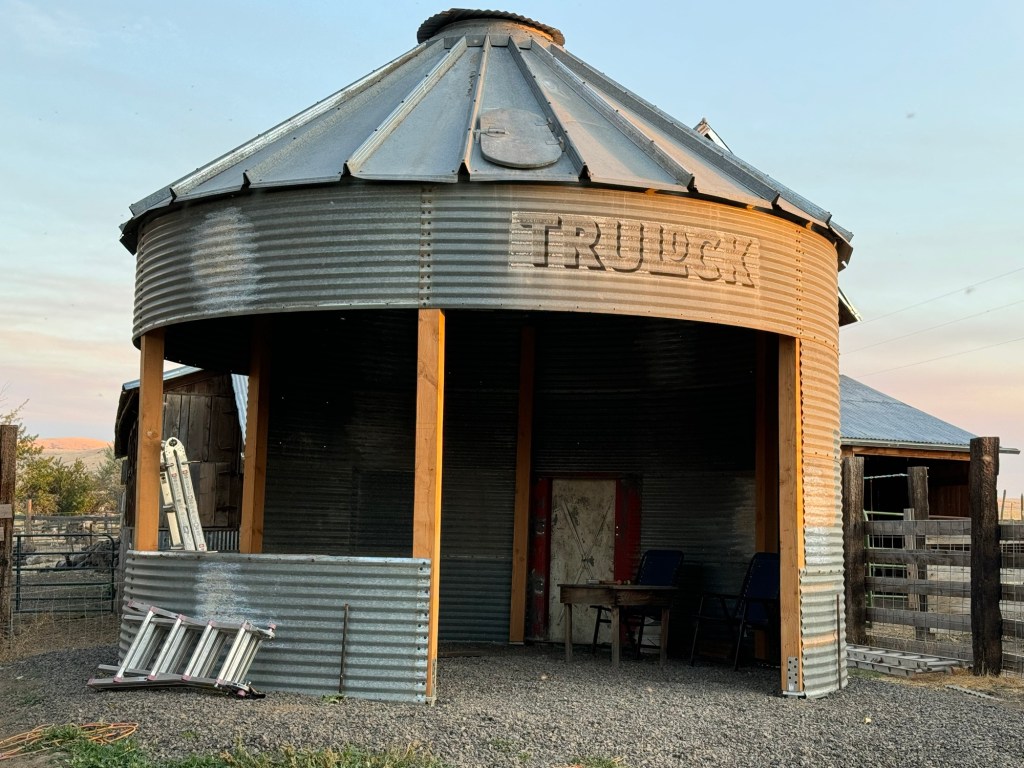
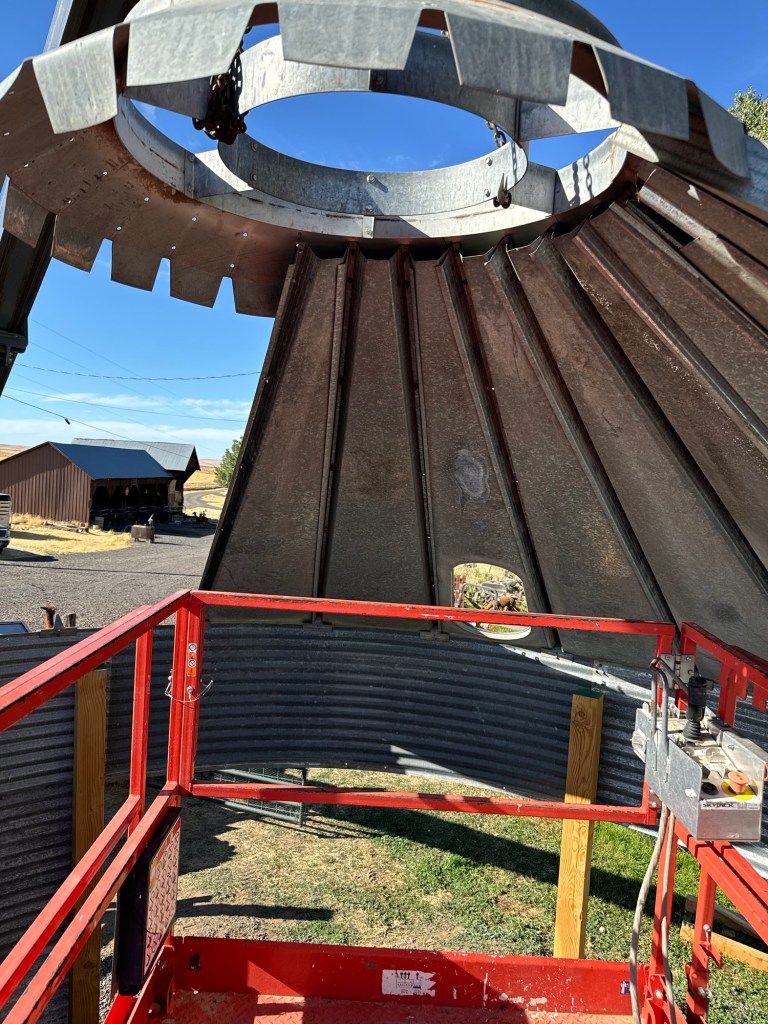
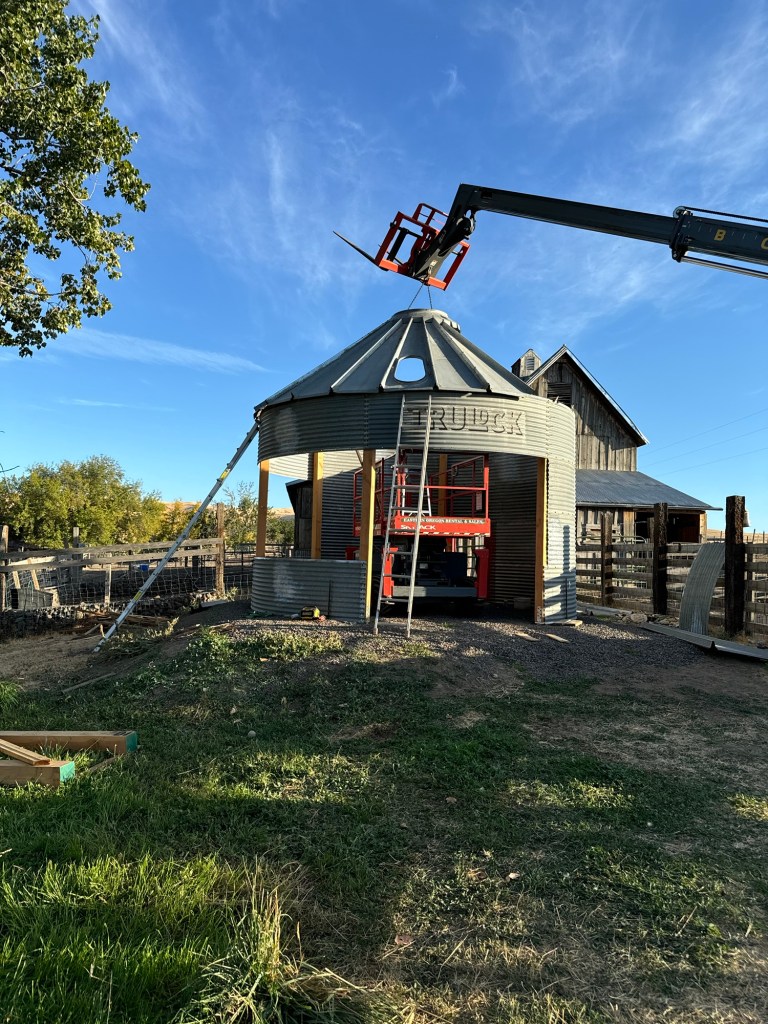
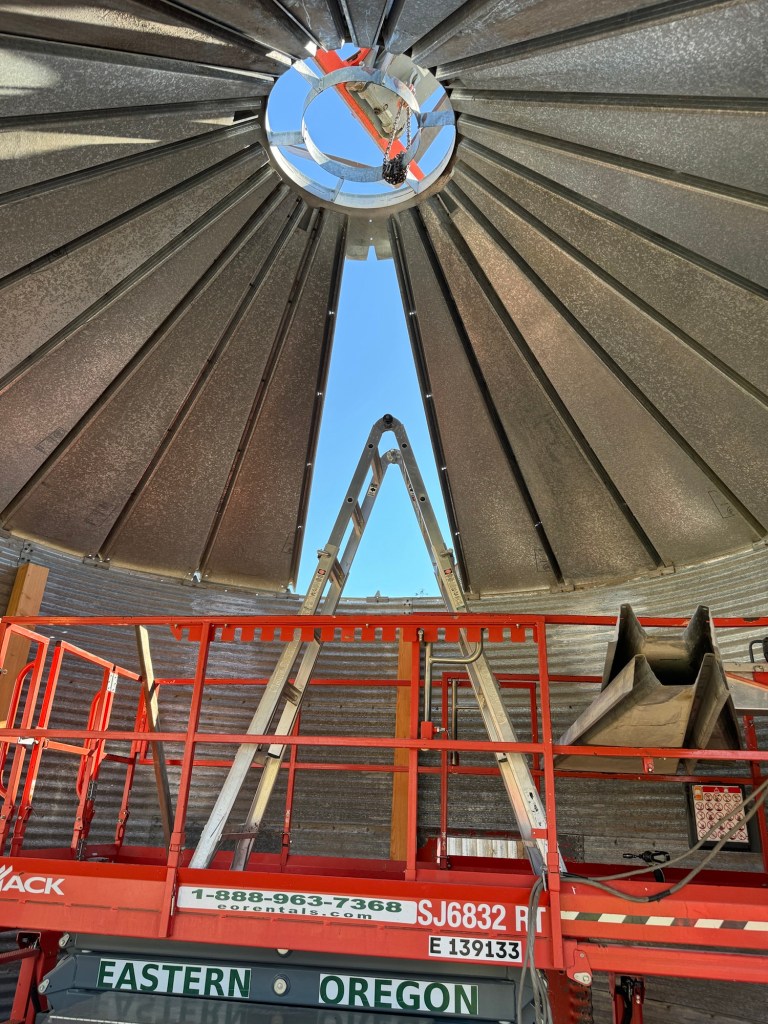
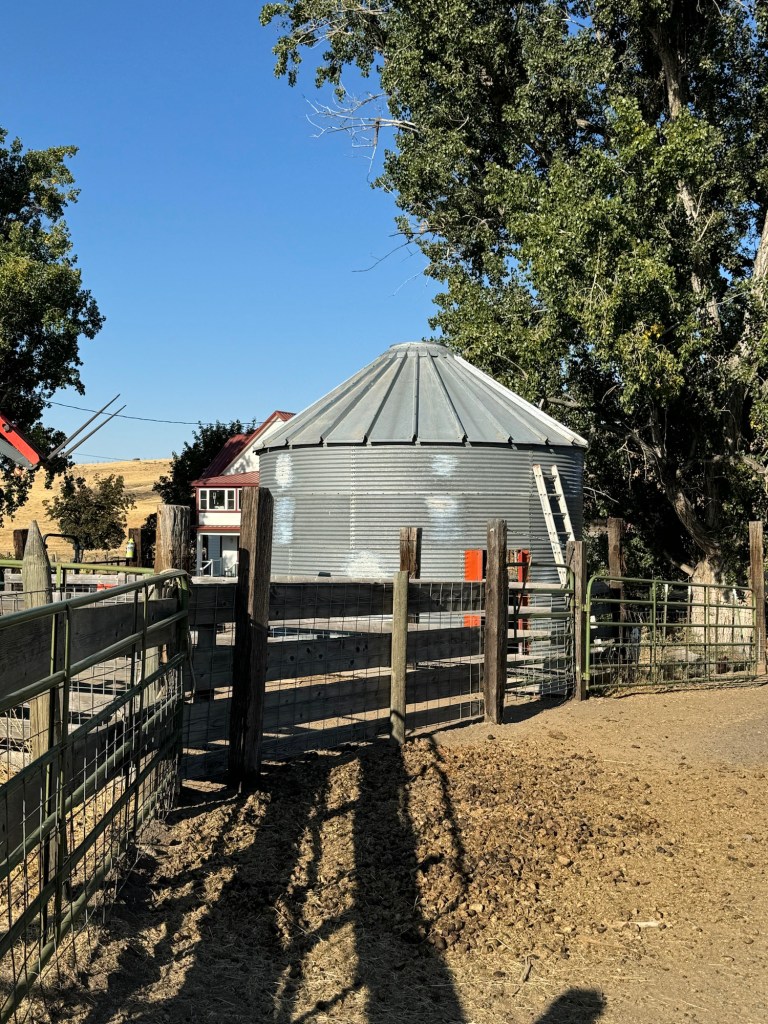
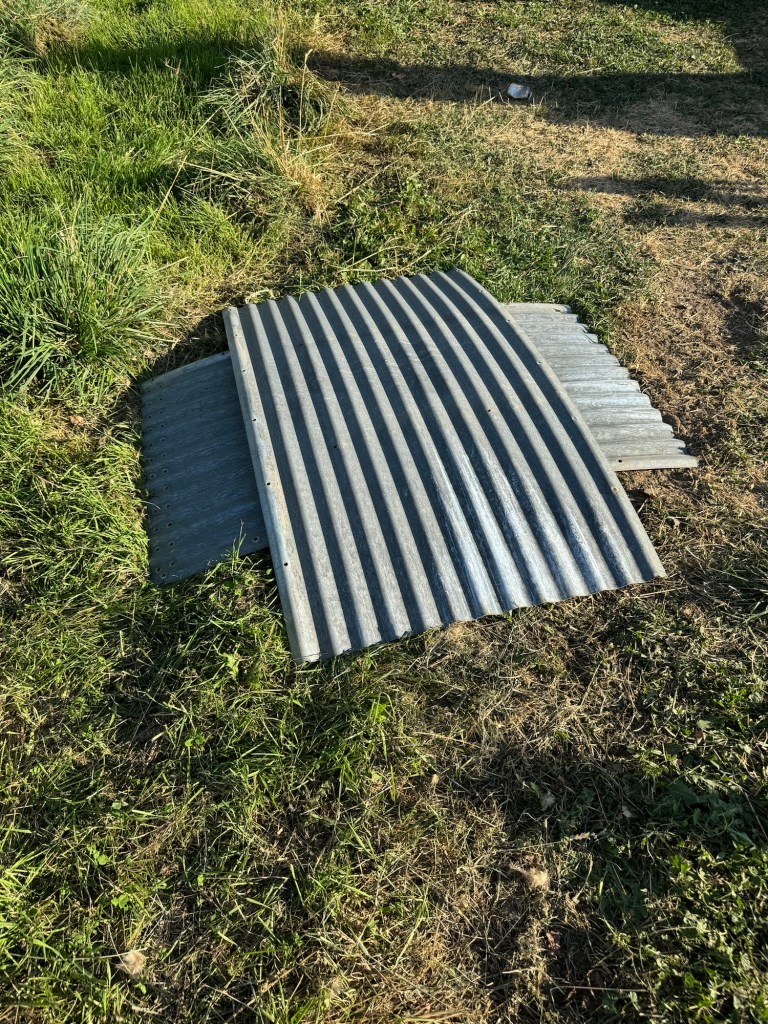
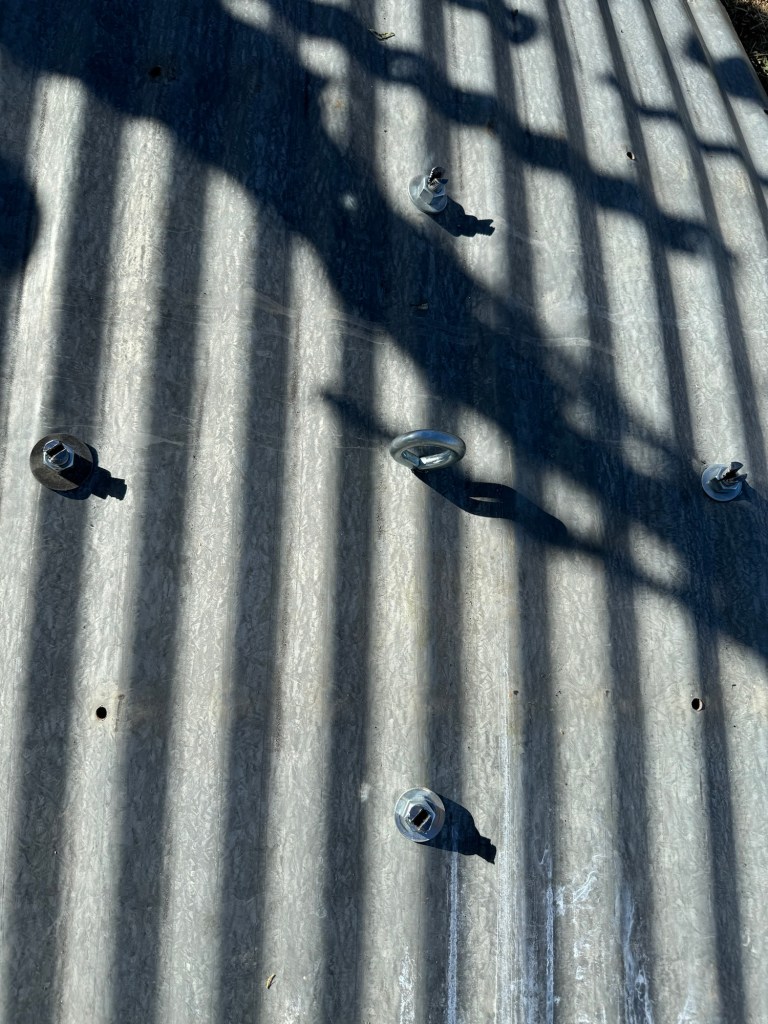
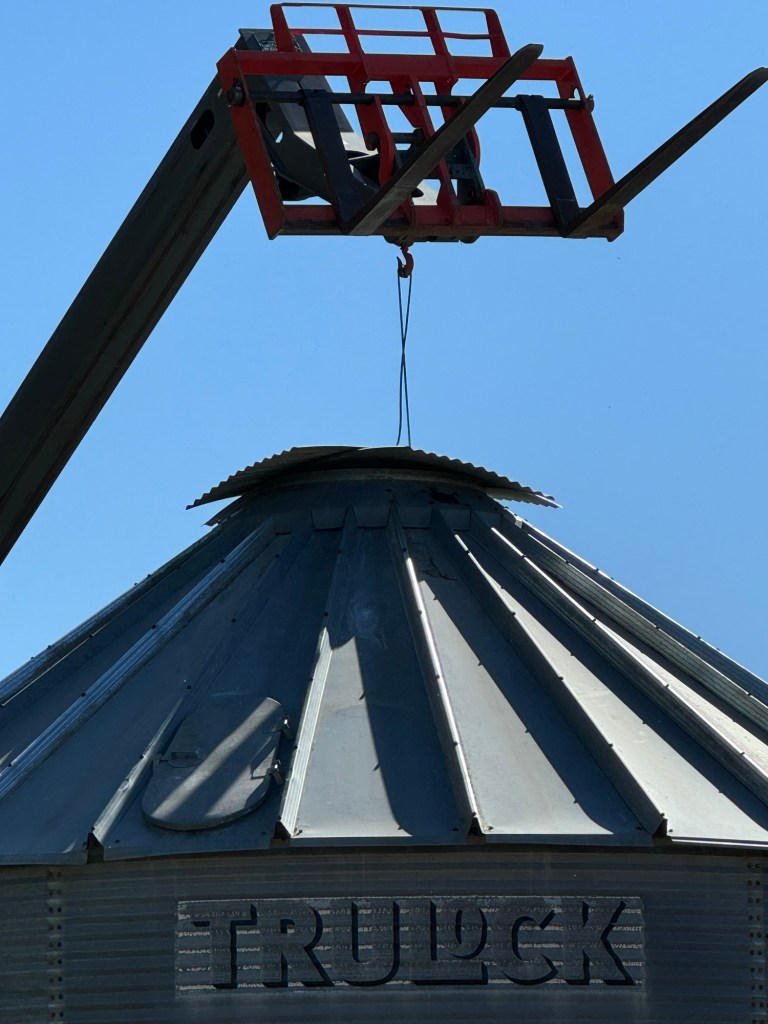
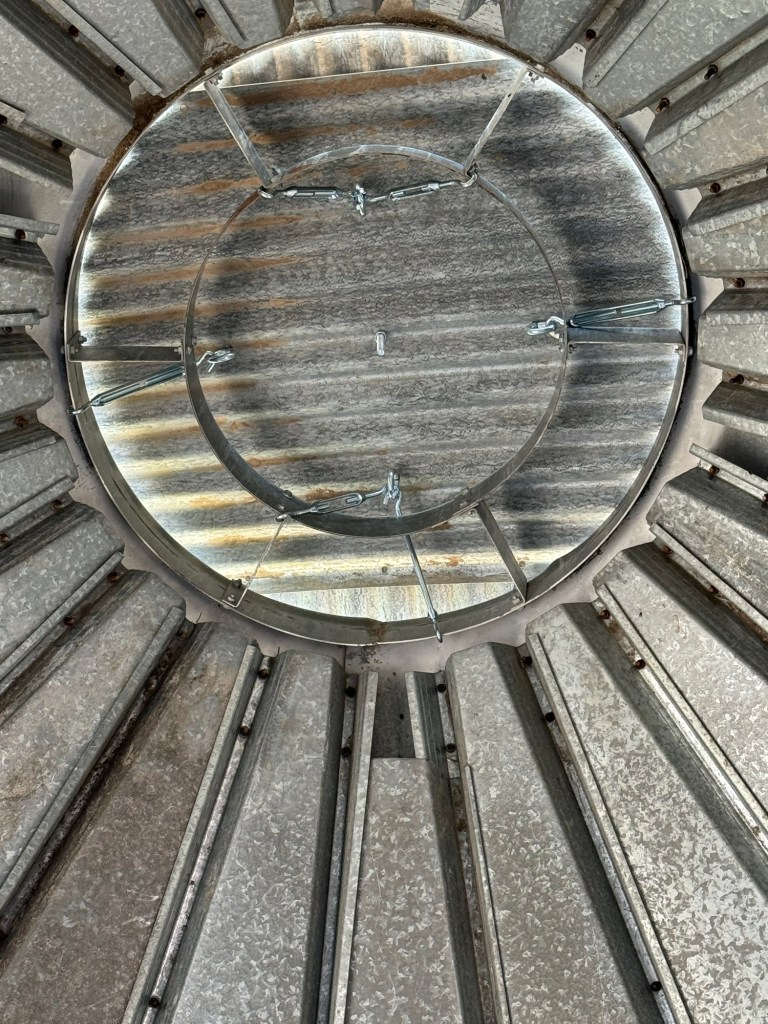
Mr Rainman came out on Monday and cleaned up a bunch of rotten wood and emptied some old decking out of the grain bin. It sounds easy but there was a lot of stuff and the spot he did it is looking amazing. We are going to empty the chicken coop first of all of the rough cut maple and black walnut that is stored out there. Next year we will take the black walnut from last year and get it stacked out there also. It’s waterproof and we will put stickers on the green stuff and just stack the other nice and tight. That will be a lot of weight to hold everything down. We will put wood stickers on the concrete so the wood has an air gap. This will free up a lot of space in the old chicken coop.

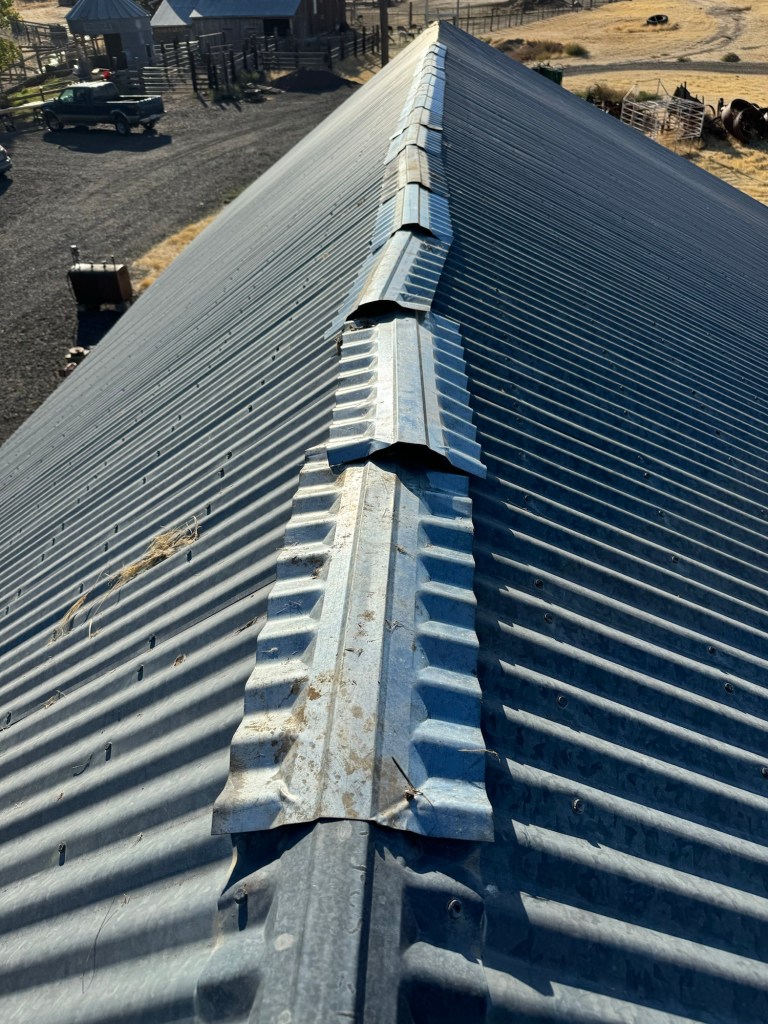
I plan on moving most of the tool storage from the old house out to the old chicken coop. Most of those tools and supplies are super specialized and I have them all sorted into separate bins. This way you can just grab a specific bin type for the needed job type. I only do tile work occasionally, same with painting supplies. I am also going to sort out most of my corded tools and give them away. They work just fine but I use battery powered almost exclusively now. It is so convenient when I am out and about on the farm. He also got the back drainage tank set up with a drain. This sits under the roof valley and catches the water and ice as it comes off our roof. We split the drain pipe in hopes that it would not freeze up this winter and crack.

I keep running to town every couple of days to get little things for the next project. I had to go and buy electrical conduit and wiring plus some miscellaneous wiring items. I figure that by the time I am completed there will be about $250 worth of electrical supplies just to get a double outlet of 110V out to the Gazebo. We want a string of lights around the inside of the gazebo. We have a set upstairs on the breeze porch that you can set the brightness on and I can wire in a timer if needed.

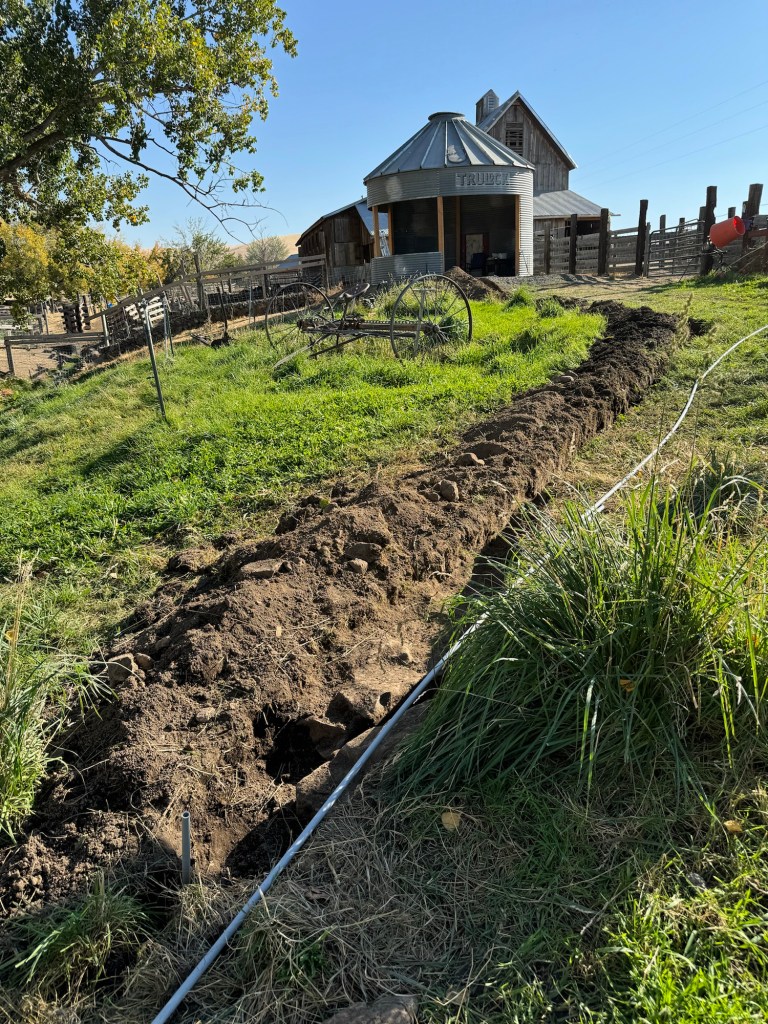
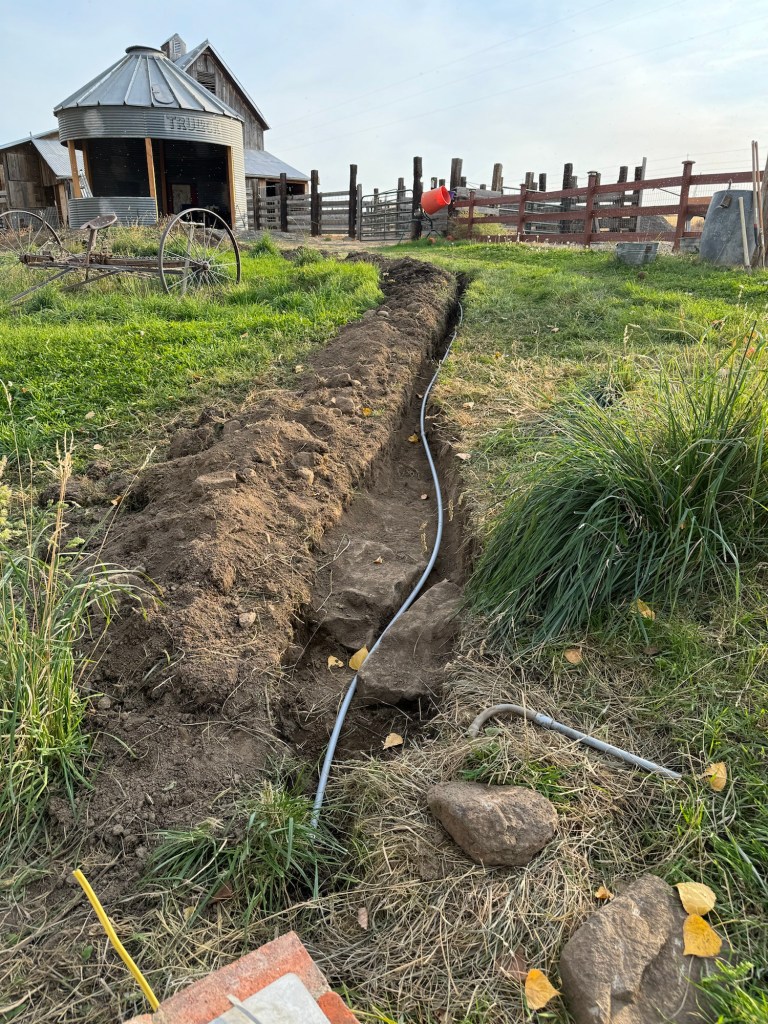
Today I worked on getting all of the conduit installed. I glued the main line together and pulled 130’ of 12g wire through it. I was able to install the wiring in the brick box I made last year. There is quite a bit of humidity inside the box so I used vulcanizing tape and electrical tape in alternating layers to keep the moisture out of the electrical connection. It takes a while to get it all taped up and it is pure misery to remove but it’s how we did it when I was in the Navy and it held out against salt water so I figure I should be good for a few years at a minimum.

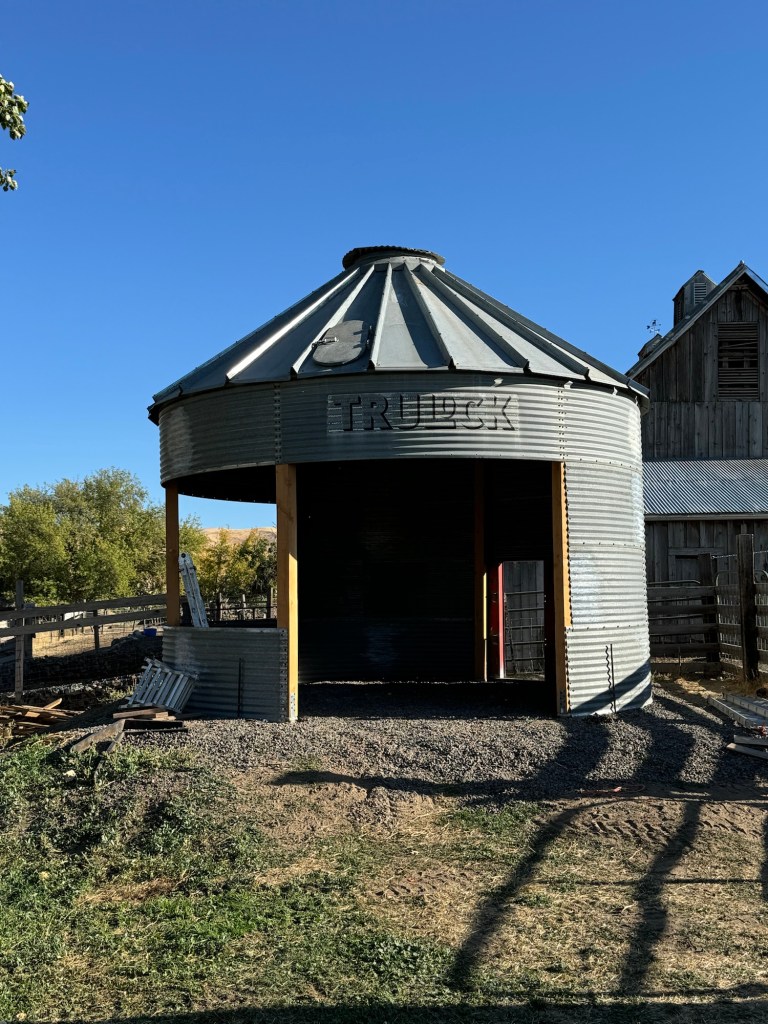
I wanted the conduit in the Gazebo to be fairly hidden so I mounted it under area where the countertops are going to be installed. I had to loosen the gazebo anchoring bolts into the 6×6 boards to make enough room to jam the conduit behind the posts. This makes for a nice clean conduit run. I will need to anchor it all back in place tomorrow.

Snoop, ancient black alpaca, was whining at me over the weekend until I gave him an apple over the fence. The alpaca are incredibly noisy and if they want something they are more than capable of communicating that desire to you via a cacophony of altering sounds. I have been feeding the animals leftover apples for days now and still have 2-3 more days worth of apples to feed out. They were the rejects from my mother’s trees.

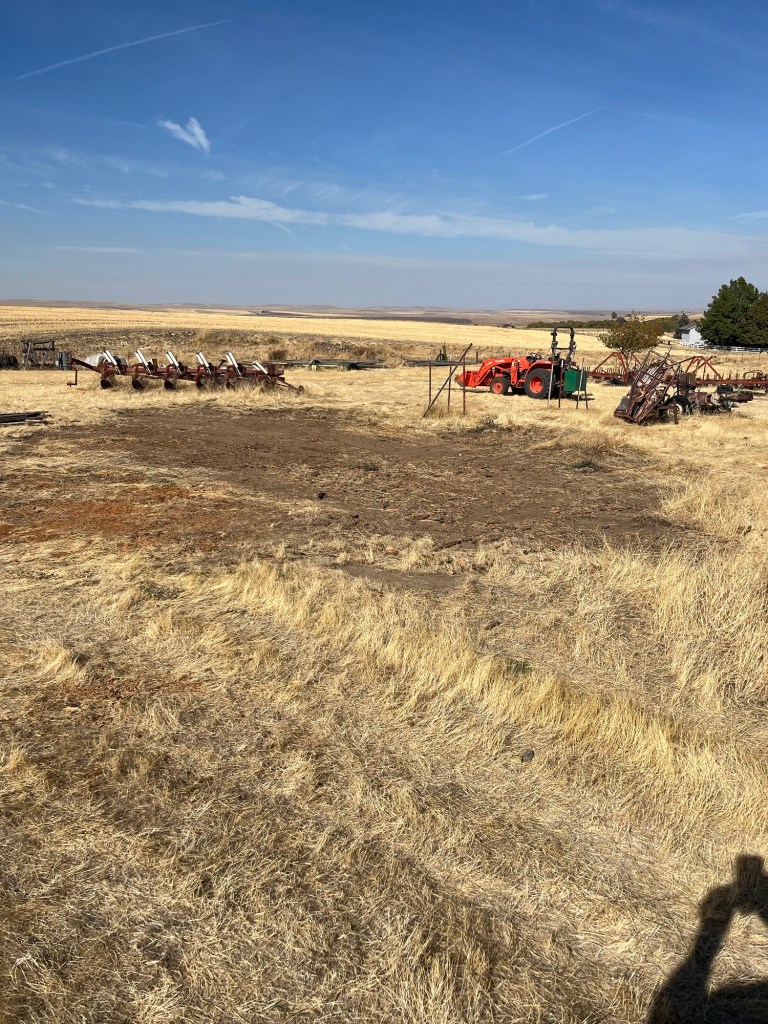
We still do not have any more lambs! It is the most bizarre thing ever. Yes there are still some pregnant, about 8-10. I checked on Little Dumper on Monday but the person in charge was not present and I was unable to get an update. I need that truck so we can get a bunch of rocks to put on the hillside to stabilize the gazebo downhill side bank.

Staycation day 8 Final 10% completed

My goal this time off was to actually check items off my list. I love the first 90% of a project but that last 10% is always painful! The last 10% of a project can take 25% of your time and by the time it gets to the true detail work I am tired of it and ready to move onto the next project. So what you are going to see are a lot of completions of little things that I have ignored for years!

Last winter I had the outside chicken door freeze open and/or shut. In a bad ice storm it is going to freeze. There is no way to really effectively block that without applying some type of heating system. I just want to stop the water from running down to it and then freezing in the night. To stop that I took an old metal wring from a whiskey barrel and cut and bent tabs then attached it over the door. I caulked it top and underneath to ensure that the water cannot run down the back of the door. This should work 98% of the time, we will see how it does this winter.

I spent a day cleaning the wife’s office. I had not been in there in a few months and I was applying for school last week and noticed that the office needed a good once over. I ended up vacuuming and dusting and removing all spiderwebs. I oiled down the window sills and cleaned the windows. After I did all of that I realized that I had never touched the Murphy bed we bought at auction. I have to repair it but I had not even cleaned and oiled it. So I spent a couple of hours and rubbed orange oil/beeswax combo into the wood. It looked amazing once I was done so I was determined to get it repaired. I ended up finding some furniture barrel nuts and a bronze sleeve bearing. The wood is torn up around the place they had the old screw attachment located. So I decided I could drill an oversized hole, insert and glue in place the bronze sleeve and then use locktite to keep the barrel nut at the right location. I ended up having to drill out the support straps a little to get the barrel bolt through it. I opted to let the super glue dry for a day or two before I did any assembly.

Yesterday, Mr Rainman came out and we really worked on knocking out a lot of little projects. I cut the last piece of oak kickerboard to go under the oven cabinet and we nailed/screwed all three pieces in place. This way the dog’s play toys cannot go to purgatory. I only had to fish out two toys before installing the boards. You can see from the pictures what a difference it made. The picture on the left is before I completed it and the one on the right is after they are all installed.

We have some of the very first cooking stones that Pampered Chef ever made and one of them is a large round pizza stone. It occasionally just rolls out of the open fronted storage area. Annmarie wanted me to install a wooden stop to prevent this potential tragedy. The stone has survived several rolls out onto the tile floor undamaged. I sanded down the front of the cabinet and glued then pin nailed and clamped the little 1/4” stops in place. I will rub a food grade finish on them tomorrow so they will be off the list. The slot on the left holds the stones but I wanted both sides to match and if someone accidentally puts the stone on the wrong side it still will not roll out. The stones are very well seasoned and cookies just slide off of them after all the years we have had them.

The back door trim got reinstalled for the third time. The mud room outside door keeps shifting with the weather. I think I have gotten it figured out this time. I ended up doing some latch work and should have it perfected. If I have to remove it a couple more times I will need to recut a new piece due to all of the nail holes.

We had to bring the table saw around to the front of the old house so that the window trim in the mud room could be finished. I needed to cut a custom width on the inside of the window. Luckily, we were able to find four pieces of scrap that were wide enough to work. I trimmed off the joint sides and kept the middle. I had to shim the window trim quite a bit to get it to fit correctly. The outside trim was just an intact 1×4 that we cut to size and sanded down. I will rub finish into all of this trim tomorrow when I get the trim in the kitchen. The pneumatic nailer and compressor had to be brought over. I am missing my 18g midsize nailer. We have looked everywhere for it but I do not really want to buy a DeWalt trim nailer to replace it, those things are expensive. So we made do with a larger finish nail.

The mud room does have an attic enclosure. I was up there when we first moved into the house as I had to run wire for house power through it. We sealed up the gaps and then installed the old trim back up. Due to adding a wall we ended up having to leave off the back board. I painted it all today after the caulk had time to dry. I am not sure we got the right white paint can correct. When it was wet the paint looked a little off. I won’t know until it dries and if it is really noticeable there is enough leftover paint to repaint the entire ceiling so it will all match.

Friday the last of the oversized roofing screws came in. So on Saturday I got back onto the machine shed roof to finish screwing in the roof ridge. It only took about five minutes to complete but before I could get down I wanted to remove the antenna pole that had been on top of the machine shed. Another thing I should have used the boom truck for along with the ridge line installation. So instead I just crawled up onto the hay room roof ridge and scooted over to the pole. I was able to unscrew five of the six anchors. I had used one off brand type with a weird star shaped pattern. I stayed on the roof and Mr Rainman went to get bits and then put it in a leather glove finger held in place with a rock jammed into the finger. He then tossed it up onto the roof at me. I could not move at all so the throw practically had to hit me for me to catch it. There was much cajoling and when that did not encourage him to throw harder some name calling may have been utilized. He could not find the correct head type so he had to throw me up two 1/2” open end wrenches so I could unbolt the pole from that half of the roof anchor. We ended up having to move the ladder, cut the grounding wire holding it up then move the ladder again and unhook one of the anchors. It came down finally. All the usable parts were removed and salvaged for later potential use and the rest tossed onto the metal scrap heap. That has been up on the machine shed roof since 2017!

After four attempts at welding and a couple of days to spray paint the house number was ready to be installed on our fence. I argued pretty vehemently against its current placement location. After I installed it I was unsure why I thought this location would not work. It turned out pretty nice, the paint covers some of my juvenile welding but it should hold together. I think the wire fed welder would work better for this kind of job than the stick. But I have not yet setup my wire feed side of the welder. I will need to do that next year.

Mr Rainman stayed very busy today. He mowed our entire lawn and tossed it all over the fence for the sheep and chickens. This should help remove some of the foxtails from our yard. The yard is pretty rough and not very easy to mow. He repaired the drip line in the lavender patch and put all the spare repair parts into Annmarie’s shed. Some weed whacking was done on the front hillside to knock down the rest of the thistles.

We don’t have any bees currently but Annmarie wanted us to expand the bee area so that she could easily walk around the hives and set stuff down without it always disappearing into the grass. He installed approximately another 50 blocks and the area is definitely large enough for 2-3 hives now.

Lastly after much discussion it was decided to dig the electrical ditch so I can run a single outlet to the gazebo. This way we can have the pellet grill out there and a string of lights. Unfortunately, where the ground is not getting hosed down by the sprinkler it is incredibly hard. So Mr Rainman started digging and then put water on in a couple of locations to soften the ground for tomorrow. I was able to go in and dig out another ten feet of the ditch and then start it all the way to the Gazebo. I took the hose and made water run down into the ditch from the gazebo side. I did this three times so hopefully in the morning we will not have any trouble getting down far enough for the ditch. I will need to buy conduit on Monday after work so I can wire it all up this next week. Mr Rainman is only going to be able to help three day in the next couple of weeks. So I will be flying solo most of my staycation. I am very happy with the progress we are making on the list.

Staycation day 5

It seems like every project is two steps forward and one back. I was able to work on the machine shed ridge line install yesterday. I had found some small two foot peak sections somewhere on the farm but they were not enough to cover the entire ridge line. I purchased some trough metal that I turned upside down and used as ridge cap. It was at a close out and I only paid about $8/piece. I was trying to use up my leftover roofing screws from the barn. The only problem is I ran out with only 27 left to be installed. They are oversized as I was reusing metal tin and needed a larger size to go through the existing holes. This meant I had to drill a pilot hole first. I drilled those 27 holes before climbing down from the roof and of course could not find a #14 screw anywhere in town. I had some #10 but they were red! I ended up ordering some and they should be here this week. Luckily, I ran out of screws as the sun was heating the roof up to unbearable temperatures but I kept trying to get it all done so I would not have to climb back up on the roof. I ended up going to town to get some oak, some trim for the cook stones enclosure, sheep and lamb pellets and some bolts to fix the gazebo door.

I had enough time to repair the gazebo door, cut off the door handle bolt and install a new one. I still ended up beating and bending the door into submission to get it on. Our original plan was to use the door to get to the grill outside after I built a lean to on the back of the gazebo. Nope, not going to happen. That door will be staying shut, it took a hammer and a couple of minutes to get it shut the first time. The grill will be going inside the gazebo. I just have to figure out where the grill is going to go as I need to run the power to that spot.

Today I took the second repaired cattle feeder out into the alleyway and got it ready for a large bale. I dumped some more scraps onto the burn pile. All the burn piles are starting to grow pretty fast now as we continue cleaning up. I got the weight box for the tractor and took it over to the machine shop so it could be repaired. The supports keep bending from the weight of all the metal horse shoes. I beat on the three point supports with an eight pound sledge hammer then proceeded to weld some supports on all three attachment points. I am hopeful that it will keep them from bending now during the winter use. I am still welding pretty roughly but it is holding and that is the main purpose for my welding skills.

I took 1000# of sheep and lamb feed out to the barn. We are storing the sweet feed in the large grainbin we have in the momma/baby area. I put 450# in it today and I am pretty sure I can fit another 1000# in it. The lamb creep feed gate is up and we are now feeding the lambs where the mommas cannot reach. This should hopefully help the mommas not slough so much weight. I took all of the leftover feed bags and net wrapping and bagged it all up and took it out of the barn. Annmarie had been complaining about there being no box knives out in the barn. I found two knives in the trash bin, some lamb nutrient mix and some hoof treatment powder. So now we know where all of that is located.

Annmarie really wants the house number holder completed so I started welding that project today. I am a mediocre welder so hopefully this turns out well. I got the rough frame welded today but had to let it cool off before I could work on it some more. Tomorrow I will grind it smooth and try and make it pretty. Hopefully the tile will still slide into the end. We will know tomorrow!

The porch lights went out for the third time! This is after I wired the new ones in. I took the main one down again, took it all apart and used a voltmeter this time to check everything and the switch. It turns out that it was the cheap porch light bulbs. They had blown up with all of our power losses. I bought LED this time!

Staycation Day 3

It’s that time of the year again where I take the much needed Staycation. As always, this time of the year I will be working on getting ready for winter. This also means I will be attempting to finish up a few projects I have laying around.

Day 1 staycation :

Saw me going to town for half the day. I had to get the new diesel pickup titled in our name. I also washed the exterior of it and spent about thirty minutes at the car wash vacuuming out dog hair and leaves. I got some wipes to wipe down the interior but they are too wet. I need to take a roll of paper towels out when I use them to dry the plastic afterwards. I found a plastic tool holder area behind the back seat so I will be able to keep a few things I use on a regular basis back there. I bought four new tie downs and they will be stored in it. I may put a pair of gloves in it also plus a set of battery jumper cables. I also purchased a steering wheel cover and some new floor mats. I almost got some seat covers but I was not sure they would fit. I will do more research but I need to get a heavy duty set of inexpensive covers for the front and back seat. The seat covers will have to wait until after I get the steering fixed and the new shocks installed.

I attempted to buy hose clamps while I was in town and could not believe the price at $3/ea. I ended up ordering them online for $0.35/each and will wait the six days until they come. Yes, I had to order more than the 10 I needed but I usually end up using them for something. I just need the 1/2-3/4” size to fix the black poly pipe in the lavender. I accidentally cut it with the hedge trimmers a couple of weeks ago.

I was going to finish the window trim around the mud room window but did not want to drag out the table saw so I attempted to cut the board longwise with the radial arm saw. After the board exploded in my hand I decided that it was not a great idea. I need to find more wide boards then I will run them through the table saw first. I gave up on this and went and sharpened the chain saw and went out to the old chicken coop area and hacked on a tree. The tree keeps growing lower and lower so it needed to be raised back up so that we could see out past it and I could drive the tractor under it. I knocked all the limbs I wanted off of it and left the branches laying around so that the sheep could eat all the leaves off of the ground. The nice thing about early in the staycation I can just pick and choose from all the items on my to do list. As I start lining things off the list my choices shrink and I may be forced to do something I managed to avoid all summer.

Day 2 Staycation:

I went out and brought the first cow feeder back to the machine shop so I could repair it. Big surprise, I needed some grinder cutoff wheels and used them all up on the Gazebo so I had to make a quick run to town. I bought 12 so there would be extras in the toolbox. I managed to not buy any DeWalt tools despite it being the last day of the sale, buy one tool and get the battery free! I just bought two 20V off brand batteries last month that fit the DeWalt and I am going to try them out. They are more than 50% cheaper than the DeWalt Brand batteries.

I was able to weld the feeder together and take it back out to the orchard. It is all setup and one side spread open so that a large bale could be easily inserted and sides closed once we start feeding the big bales. I went up to the upper alley way and got the second feeder. It was in rougher shape and required more welding and grinding to repair. I even broke out some paint and painted over the rust spots and repairs. I tried to match paint colors but the green can nozzle was plugged so black paint works. Honestly, as long as the metal is protected I really don’t care what color combination is as long as paint covers the repairs.

Mr Gingerman helped me snag some rebar and put the now clean branches onto the burn pile behind the old chicken coop. We can now see field four and the gate from our front room window. We can break out the binoculars instead of hoofing it up there to see where the sheep are at.

Day 3 staycation:

I decided to weld up the tile house number that Annmarie made on the laser cutter. I looked in every building and her office and could not find it! I had even purchased the metal for the hanger last month. I finally gave up and measured the gazebo openings for angle iron to be mounted at the lip height so a countertop could be installed. I have been piling up scrap steel in the machine shed for just this purpose. I can get a 20” piece installed that will let me use three preexisting holes in the rim of the gazebo panel. It got two cut out and edges all ground smooth. I then took them to the gazebo, clamped them in place then marked the three holes. I drilled pilot holes in the vice then finished the holes. Once I had the two outer bolts in place I realized that my center bolt is about 1/2 “ too short so I will need to buy four more bolts to get those installed correctly.

Did not manage to get outside until the early afternoon. I went out and took down the gazebo door and tried to figure out while it will not shut. I ended up beating on it with a hammer and bending parts of it with a crescent wrench. After a couple of attempts I realized that I needed a new three inch bolt that was threaded 100% of the shaft. I don’t have any so I added that to my go to town eventually list. The bolt is for the door latch so it is fairly important to have it in place before I hang the door back up.

I asked Annmarie where the house number was located. It was in her office in the windowsill behind the barn door! No wonder I could not find it. We had it there for safekeeping. It was definitely safe from me. I ended up cleaning up all the tools and calf table away from the corral loading chute. I will need to back the stock trailer up to the chute this week so that I can get the three cows loaded up Friday morning to go to slaughter. They are going to kill three this Friday and two next Friday. The sheep are not getting killed until the first of the year.

Our momma sheep are getting skinny again. The lambs are literally sucking the calories out of them. I put a protein lick out for them and tomorrow I will get some creep feed for the lambs. Feeding the lambs separately a high protein diet should relieve some caloric load from the ewes. Annmarie has a friend that agreed to take all the sheep for a month to clean up a boggy area on their property that is a little water logged. They don’t want cattle on it. It is a hay field that was too wet to get a third cutting on it. This is perfect for us.

Gazebo up!

This was the weekend to finish up the gazebo! The rental equipment came on Friday at 0900, a scissor lift and 45’ boom lift. I got the requisite five minutes of training and I was in control of my own fate. I knew that I needed to get the boom setup first as it was needed to hold the roof up so I could tear down the platform. But I needed to get the scissor lift onto the front hillside first as I was going to park the boom in the corral and all access would be blocked. Luckily, there was a hook hanging from the bottom of the forks so I was able to just use the hook on the boom. I thought the 45’ boom was a little overkill but it just barely reached out far enough! I ended up with the boom fully extended and had to drive the boom forward a few inches to get the needed distance.

I was able to put up a chain attached to two points of the center ring and over the boom hook. When I took tension off the platform I was ready to tear it all down. During the dismantling of the platform I discovered that one side was only held up by a single screw, the other two had failed. The pallet I had built the platform on fell apart into three pieces. I was pretty impressed that it all held together long enough to get the rental equipment out to the house. The best part is they rented it for one day (8 hours run time) and did not pick it up until Monday. So I was able to use it over the entire weekend.

Once the platform was off the Kubota, I drove it out of the middle of the gazebo. I then tried to drive the 4×4 scissor lift with big tires into the gazebo, after having to drop all the protective rails to make it go under the opening, it was four inches too tall. Nope, one wheel kept spinning and it would not go more than three feet. I called the rental company and they sent out the mechanic. I worked on the baler as the new parts came on Thursday. I put the gear on backwards and had to pull it and was attempting to get it on correctly when the mechanic arrived. It turns out that this machine had been having some issues and he did not know about it. It turns out to mostly be poor design. It uses hydraulic pressure to drive all four wheels and once a wheel starts to spin all the pressure goes to that tire! We got the lift into the gazebo by nudging it a couple of times with the tractor forks. I was able to get four more roof panels on by myself for a total of 8/24 that were attached on top ring and bottom to the wall.

Mr Rainman came out Saturday morning at 0700 and we dove right in! It turns out we had four roof pieces that had the upper eight inches cut off! So you cannot bolt them to the upper ring. It was pure happenstance that I installed one on Friday and then Mr Rainman found three more. Once we knew how many we had we spread them out every fifth panel evenly around the roof. The scissor lift had to have a little push/pull help with the Kubota to get it turned inside the gazebo so we could finish getting the roof panels up. We made really great progress but it was starting to get late and we had three panels left. I was tired and wanted to quit, but we were almost there so we stayed and finished the last three. The entire roof was up, all the panels that could be bolted to the center ring were but we were having trouble with six panels not lining up at the bottom of the roof. The roof was too high, it needed to drop about one to two inches on just those panels. We decided to let gravity do its job overnight and come back in the morning and all would be perfect. Especially since we had already bent one anchor by me extending the boom when I should have been retracting it.

It was not perfect the next morning, absolutely no part of the roof had shifted. Now on one hand this is great news, but it still left us with the conundrum of how to lower the roof. Especially, since the wind was blowing 10-15 MPH, I was so glad we finished putting up the roof on Saturday! We talked about going up in the scissor lift and trying to just hang and throw our body weight around to get the roof to slide down. Instead we moved the boom truck around to the back of the gazebo and used the boom to “push” down on that side of the roof. We got all but two holes lined up and ended up drilling new holes for those last couple of holes.

I had this brilliant idea to cover the center top ring with the panel I had cut in half earlier in the assembly process. I wanted to just use one piece of the panel but it was not wide enough. So my awesome idea was to just stack them like a cross at 90 degrees, drill a hole and put an eyelet on top then drill four more holes and put the eyelets in the opposite direction so I could then anchor the new “free” lid to the center ring. The wife was away at church and I was sure this was going to work. The big issue was neither myself or Mr Rainman knew how to tie quick release knot. The second knot I tried was called an exploding clove-hitch knot and it held 60# of metal and let us raise it 45’ into the air with the wind blowing! I wanted to release the hitch as soon as it hit the roof but Mr Rainman wanted to wait until we knew it would work.

We went up in the scissor lift and started working on getting it attached. As we were getting ready to attach it he asks me if we should go down in the lift, walk out and look up to see how it appeared from the sidewalk. I naysayed this suggestion immediately! I was tired and wanted to be done. We got it all tightened down when the wife pulled up and promptly walked over and started saying “no” repeatedly. It was all Mr Rainman could do to not fall over laughing. So we dropped the lift and I went and looked. It did not look the greatest but I did not want to spend a $600 plus for a new cap if I could even find one so I got her to agree to let me use the cap idea as long as I cut the cross into a circle. Of course I thought I had a lot of metal cutting wheels and ended up only having two new ones and two used ones. I got it cut with my big DeWalt 60v grinder. I had half a disc left and only exploded one disc.

The amazing exploding clove-hitch was again used. It was easier to tie the second time and it did work as we tried it out after we brought down the cross. We got the round one up, we dropped the scissor lift, looked at it and then tried to anchor it down. This necessitated a trip to the hardware store to get shorter tighteners. We got six tighteners on it and it is not going anywhere. The knot gave way when it was pulled from the ground, we used 100’ rope and tied the knot in the middle of the rope.

All the equipment was moved out so it could be picked up on Monday. Again the scissor lift required some pulling to get it out of the gazebo but it was a down hill trip to the driveway so I was able to get it out without any more assistance. So it only cost about $1100 to rent equipment and I only had 2.5 hours of run time on the scissor lift and 2 hours of run time on the boom truck. Yes, I do know that I probably should have done that 3-4 weeks earlier. So learn from my hesitancy/cheapness and just rent the equipment early. It is a dang sight safer that is for sure.