Freezer room closing in

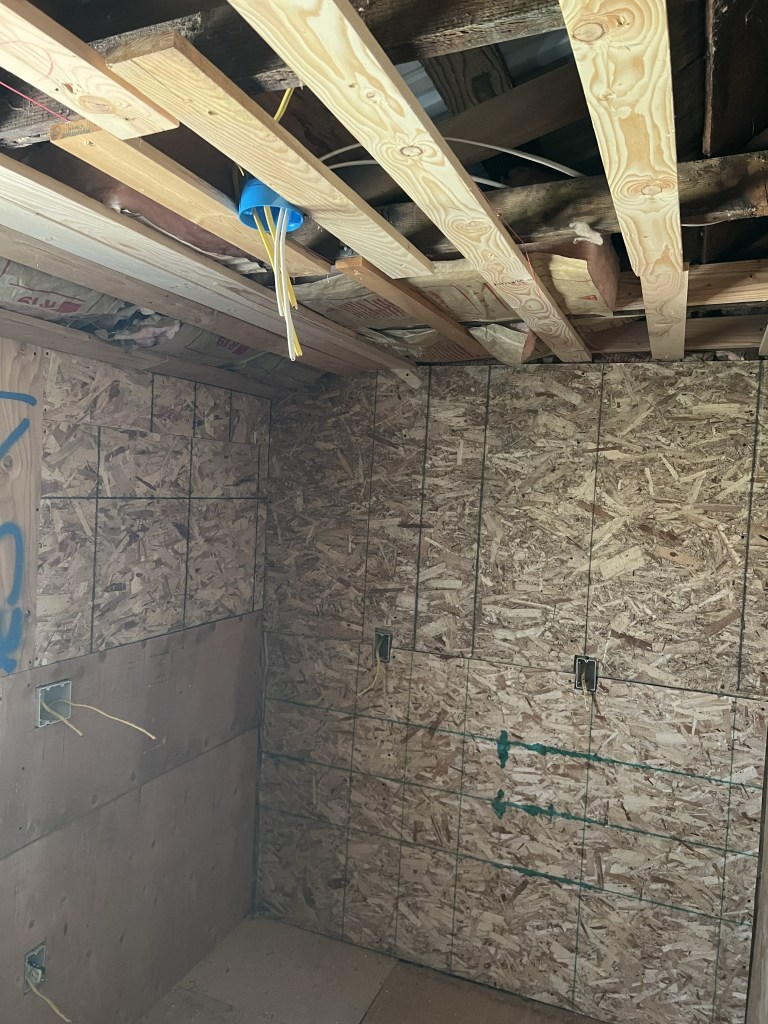
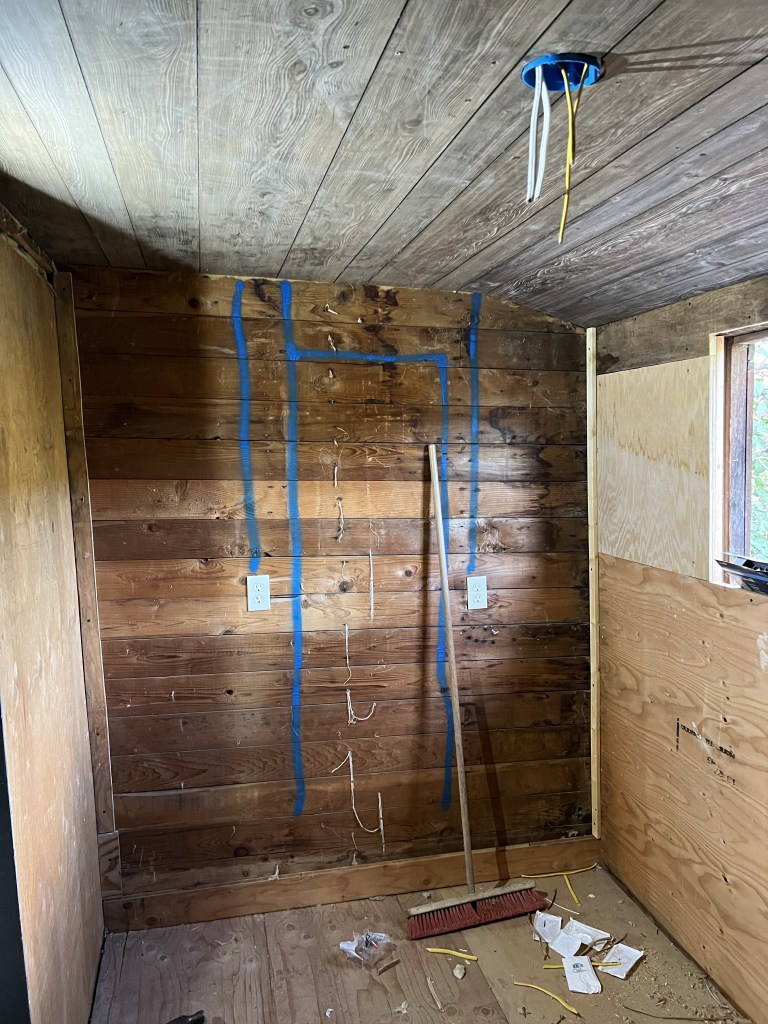
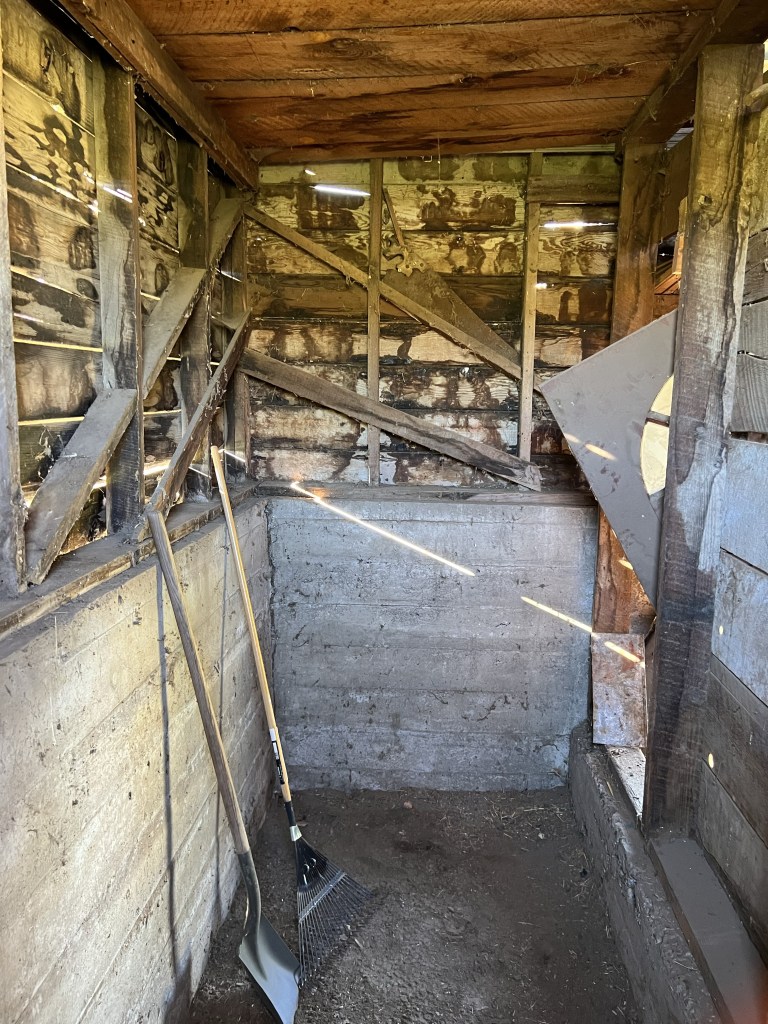
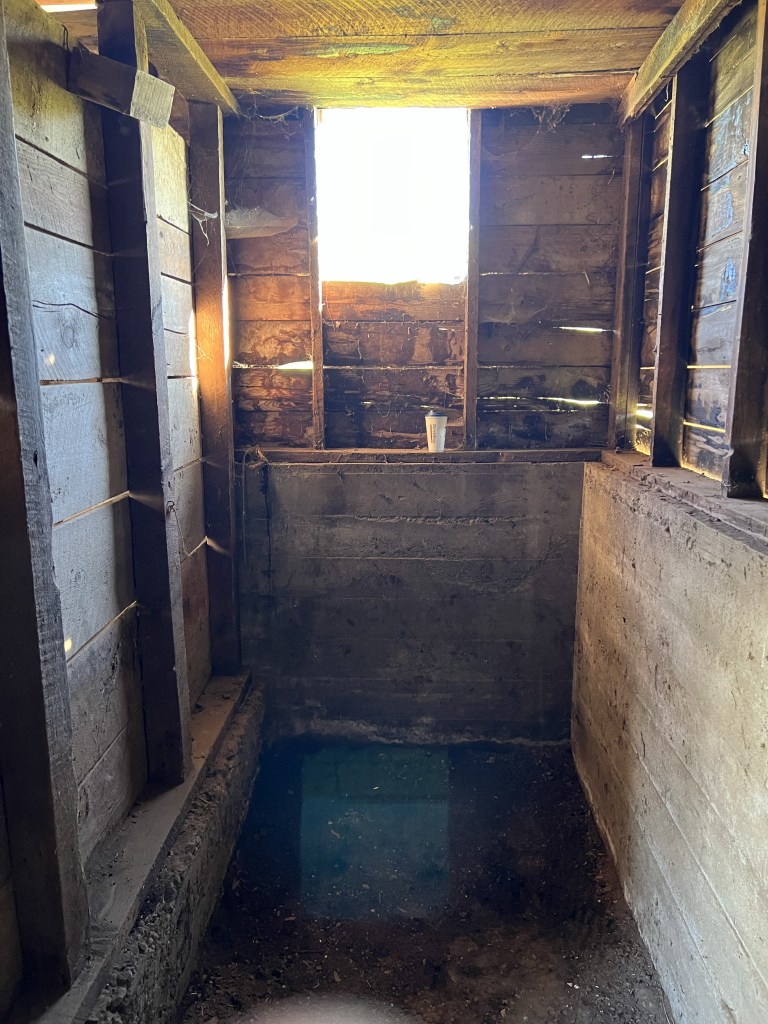
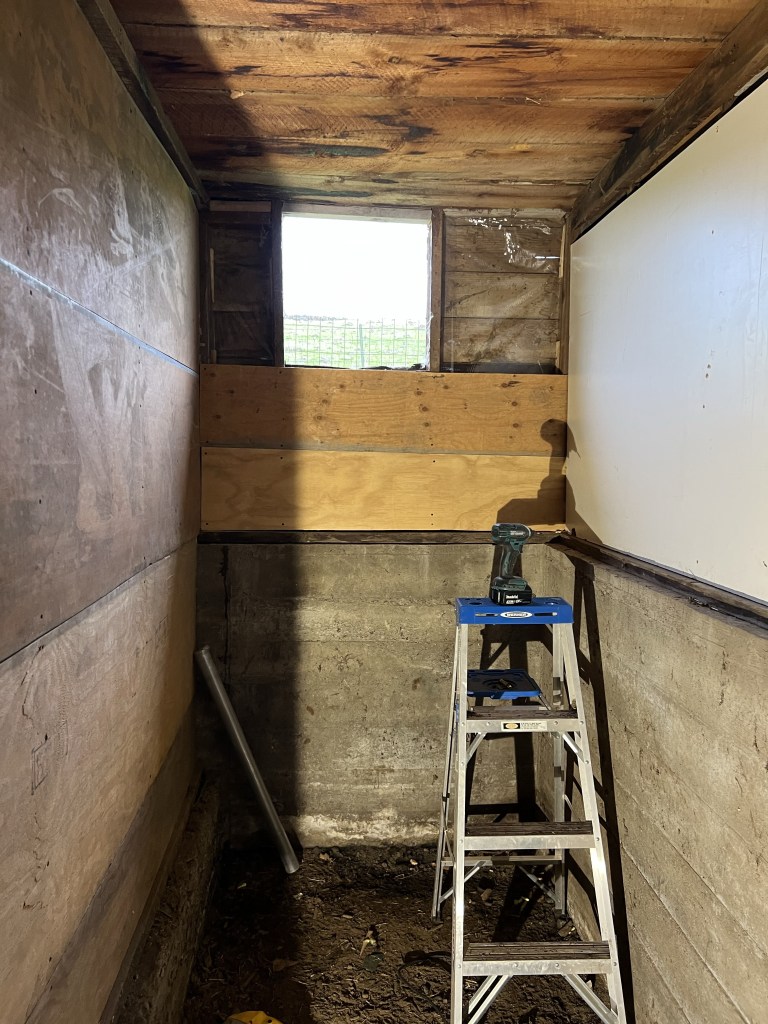
I had a plan on Sunday to get the freezer room almost done. I knew I would not be able to install the insulation in the ceiling as I need it purchase one more roll first. I figured if I could get the last section of the wall covered and then I could use something on the ceiling to hold the insulation up. I wasn’t sure what but I have two full sheets of wood paneling and 1/2 sheet of 3/16” plywood. I think it’s enough to cover the ceiling. After I got the siding up, four separate pieces of varying types and sizes of siding, I figured I could use the scraps of 1×4 boards I had used for trim in the office. I had just enough to cover the ceiling liberally and make it easy to install the paneling. Paneling is not designed to be hung upside down and it will need a lot of wide headed screws to hold it up. This took a lot longer than I had anticipated. Piecing things together may not cost much in materials but it does cause you to use a lot more screws and a lot more time.

I cut off a little piece of the thick bathroom future countertop, after sanding two edges I glued them together. I need to cut a triangle shape and was missing about two inches of the tip of one triangle to complete the top. I will leave it glued and clamped for a few days as I will not be able to work on it until then. I will need to put a new blade on my skill saw before I cut the triangle. I plan on sanding it all down first up to 80 grit, cut the proper shape and then finish sanding it. I was hoping I could crawl underneath the counter and screw up from the bottom to hold it in place, but I don’t believe I will be able to do that. I don’t really want to just use glue. I may have to drill four holes in it, about 1/2’ deep and then attach it directly from the top then fill it with a walnut dowel glued in and sanded down. I am going to have to use a polyurethane coating to seal the top. I need something that can get dusty and will be easy to wipe off when its cleaned. This is still an idea that is incubating, hopefully by the time its sanded down I will have finalize my attachment and finishing plans.

I have two very nice pieces of three foot by 20” chunks of two inch thick black walnut. I am unsure where I am going to use them. Once the freezer room is done and the freezers are moved I will start working on my office area. I have the inner door (old wooden exterior door), it just needs a new opening created that will hold it. My current door opening is not square and about an inch too short and too narrow. I will have to reframe the top and one side to make it fit correctly. I keep fluctuating on what I will setup in the man room. I believe I am going to setup the reloading equipment on one side and then start working on a jewelry bench on the other side. I will need to keep an eye out for a scrap kitchen hood to use as a soldering exhaust hood. Annmarie is so happy with her indoor “grow” super quiet vent fan that I think I will use that as the suction source for the ventilation.

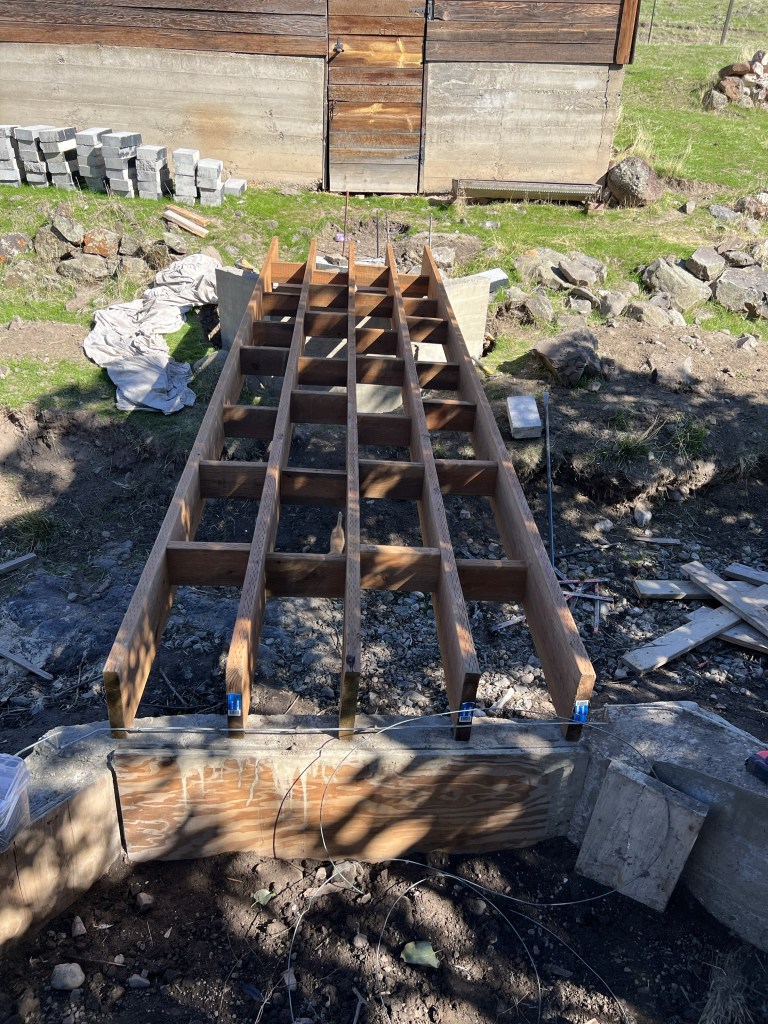
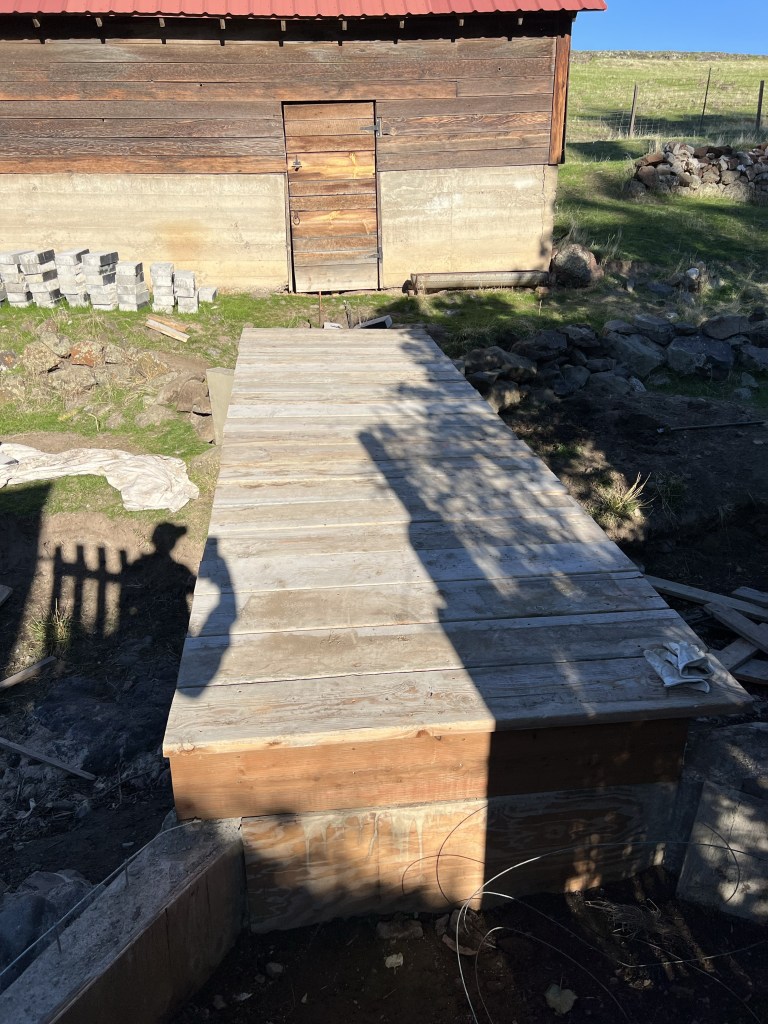
This will get the room closed up but I will still need to buy a new back door and a new window. I need to fix the back porch as one corner is trying to fall apart. I will also need to line the entire inside of the room with boards. Needless to say it may take me a while to get this done!

Annmarie spotted our barn owl! Their used to be a pair of them but in the last few years we have only spotted one. Their was a mated pair on the farm for over 30 years. Maybe the pair is just hiding so well that we only ever spot one at a time?

Wood bridge part completed

I wanted to get the wooden part of the woodshed bridge put up today. I had the wood in the back of the pickup. I went to get it out and had the 2×8 boards sticking out either side of the pickup with the 2×10 over the cab. I damn near knocked myself out again by hitting my head on a 2×8, I jerked back after smacking my forehead and smashed the back of my head into the other side 2×8 boards. I ended up with an abrasion and small goose egg on my forehead. The only real problem I have with not having hair is that there is no longer a cushion to protect my head from trauma.

I laid out the five 16’ boards and then screwed 10” pieces of 2×8 between them. I used 2×8 boards because I am cheap. I saved about $40by using the 2×8 boards and strength wise I just needed them to keep the boards from warping. I altered the height at which I screwed them in and alternated each board so I could get to both sides with the impact driver and tighten down the screws easily.

I used old 2×10 boards that used to be a concrete form for the decking. They were free so they make excellent decking! I only had one ten foot piece left by the time I was done. The bridge decking is five feet wide and the support underneath is four feet wide. I hung approximately six inches of the decking over the support frame. The decking will be easy to replace if needed and free was a wonderful price.

So far the supplies have cost $360 each for a pallet of Quickcrete. $300 for pressure treated lumber and a box of three inch decking screws. So at this point in supplies we have just over $1000 in the bridge. I may be able to salvage some of the concrete forms to use in the wood shed to line the walls. I need to look at it first before I attempt to reuse them for the fourth time.

There is a little kitten in the wood shed that keeps meowing all of the time. Annmarie is working on taming it down. She wants to have a permanent resident in the barn shed. I am hoping it keeps the raccoons out of the buildings. I have two huge piles of raccoon poop again in the upper parts of the barn. They like to poop up high and they make huge piles over time, so annoying.

I did move some rocks around and attempt to get the rock wall on the wood shed side to meet the bridge. The next big part of the bridge build is to fill up the backside with dirt. Get that all compacted down then I can put in a little gravel and install the large concrete pavers. I am currently leaving that for now to work on the freezer room and the wooden piece for the upstairs bathroom.

Freezer room completed

It has been a very productive last couple of days. Mr Rainman has been out for two days and we have been working on getting things completed. I love the stages of a project where you can just keep checking things off and then moving onto the next thing and checking it off! Mr Rainman worked on getting the coal side of the old wood shed cleaned out. This ties into us completing the back bridge as that is the only way to get to the wood shed. We have managed to make quite a mess back there with lots of scrap wood and junk from the shed added onto the pile. We knew that a day of cleanup was coming but The Apprentice reached out last week and said she was coming home this weekend and wanted to know if there was work. We just kept making a mess as we knew the Apprentice was coming and it would cleaned up.

I worked on getting the rest of the freezer room wired. I always have to break out an electrical wiring book when I do three way and four way switches. I just don’t do it enough to be able to do it without writing it down. I am happy to report that the three way switch worked on the first try. I got the light wired and the rest of the outlets tested today. Mr Rainman and I moved the deep freezer and the very first small upright Annmarie and I ever purchased, it is 29 years old! We just jockeyed them back and forth and slid them into place. They both had to be leveled and then we spent the time to organize and clean out both of those freezers. This allowed us to empty a large portion of the big freezer. The little fridge got cleaned out and up and is now going to be our water and gatorade fridge. I will keep it stocked year round. Tomorrow we will unload the big freezer and defrost it with the wife’s hair dryer. Once that is moved we will pull out the ancient radial arm saw and see if someone wants it. This will let me move most of the tools out of my soon to be space in the old house.

The Apprentice started a wood burn pile and lit it on fire after the first hour. They just kept throwing scrap wood on it. She did take some plum tree rounds that were cut on a diagonal and looked like horse hooves to use for nailing practice at farrier school. She did lament that on top of grip strength she worked on this summer she needed to work on thigh strength, its hard to hold the horse hooves between her legs. I didn’t think of that when we were working. Once all of the burnables were picked up she started filling in the dirt on both ends of the wood shed bridge. Tomorrow that will be her primary job.

Mr Rainman and I worked on getting the coal side of the wood shed lined with wood and sealed up. The goal is to get the walls lined then take the 6 mil vinyl sheet, used to be a road sign, and mount it 360 degrees in the room. Once that is done and stickers hold it in place we will bring in pallets for the floor and then close up the door. The goal is to keep the dust and bugs down to almost zero. I need to get all of the bee stuff into one location and get the frames hung up.

We had some people come out to hunt coyotes and they killed zero, did not even see any. They did thin out the pigeons some.

Predators 13/Farm 1

Last week was another kick in the teeth and yet super productive. Mr Rainman came out and spread grass seed on field #1 and the triangle. He then proceeded to mow field #2 then sprayed Rejuvra on field #2, 3, 4A. We are going to try Rejuvra it was designed for CRP and grasslands. It creates a 3/4” deep barrier that kills newly germinated cheatgrass. So as the cheatgrass seeds germinate they are killed. Since the seeds can sit around for years this process is essential to remove the weed seed. This is a fairly new product. Our cheat grass was so bad this year that we are willing to just spray it on and see what happens. We didn’t get to hay or use the fields until after we mowed because the cheat grass was horrible. I need to buy one more quart of it to spray the lower fields. The joy of this is that it lets the preexisting grasses thrive and grow through the chemical barrier. As long as they spread by root propagation they can continue to grow and thicken while the cheatgrass is choked out. This was great and he just kept after it until it was done.

The kick in the teeth came when he went down to the lower schoolhouse field. It needed to be mowed to get ready for the spray. As he was driving the tractor around the field he found two more dead ewes! One had just been killed that day or the day before. It looks like something grabbed it by the throat and it bled out. The other one had obviously died earlier as there was nothing left but a skeleton. There is no question that the coyotes are winning this year. We have had a serious coyote hunter out here all last week. He had in around 24 hours combined for the week and on the last day spotted a coyote running up the creek bottom. He did not get a shot off. I have another hunter who came out today with a call and to get shown around the property. He did wonder if he could come out at night with a thermal scope and hunt coyotes. I of course agreed to this! I have another hunter coming on Sunday to be shown around. I am hoping that between them they can figure out how to kill several coyotes. There is no way we have one coyote killing this many sheep. We have not lost a single cow. My mother-in-law is losing kittens and cats quickly. We think the coyotes are eating the cats also. This is a stupid problem.

I will say the 300K lumen light I now use when going out at night combined with a green laser and silencer on a 22 pistol is amazing. Unfortunately, this setup is not helping me with the coyotes. If they are howling and just over the hill I remove the silencer and pop off a few rounds into the ground to scare them away. Let me just say that a guard dog would cost us around $1500-2000 annually for seven years. We are not even close to having lost enough sheep to justify that expense. Now that the barn is open the sheep can hole up in the barn every night and we have never ever had a predator kill anything in our barn.

Today I had to take our only cow left and two sheep in for butchering. I got the six feeder cows into the corral and managed to separate off the large one going to slaughter. The cows are crazy! I ended up spending almost an hour and half chasing them all over the fields until I managed to corral them by just shutting every gate the closer we got to the barn lot so there was only one place they could run. I locked the sheep into the little spot in front of the barn. I figured I could just wade in and catch two whethers. Man, I needed way more coffee this morning before engaging with the animals. The steer was crazy! He ran into the stock trailer. But I had to get in the trailer to release the dividing door, he ran at me and I had to scrunch up in the corner while he ran out. I released the door then went and chased him back in and again had to get into the trailer with him. I managed to slam the door closed before he jumped back out again. He raised hell while I went to get the sheep. Nope, they would not go into the barn. I finally had to go get Chance (border collie teenager), put her on the lead and then we walked the sheep right into the barn. I shut the barn door then tried to catch a whether. Nope, they were too fast. So I made a pen with a 2’ entrance, pushed all of the sheep into it then bum rushed the sheep from one end. They form a mob before they try to squirt past me on all sides. That is time to grab your victim and drag them to the back door of the barn. The first one had horns which make great handholds. The second one I had to drag out by its head and it almost got away a couple of times. I ran them into the corral and then down the chute. They jumped right into the trailer, but after the cow fiasco I rushed down the alley to get to the outer door. Nope, dame sheep took a leap at my head trying to get out. I had to toss a 90# sheep back into the trailer twice! I imagine it feels like being a hockey goalie. I managed to get the slider door shut and the animals transported with no other incidents. Once unloaded the cow did try and get at me through their pen. I don’t know if it was saying goodbye or using my name in vain as it tried to get at me, either way the outcome was the same and someone is going to eat good.

When I got back I went to the barn and fixed the lights in the barn and finished that last string. It was not my splicing connection. One of the lights had a bad connector and I had to cut off the first two connectors I had used and after replacing them they worked perfectly. We now have lights in the barn! This is going to be great, I just know it. More to come as it starts getting dark and we have to start feeding.

Weekend update

Mr Rainman came out on Saturday so we could pour some more concrete. I ran into town and got another pallet (56) bags of Sackcrete and three bags of sand only Sackcrete so I could do the brick power enclosure near the front bridge if there was time. Mr Rainman got the mixer in place and the last two supports on each side of the form installed. We carried around 30 bags over to our work area then started mixing and pouring. It was a lot easier, there was more room to work and we were higher than the mixer so you did not have to try and muscle the bag up while dumping it out. This time I managed to mix almost half the bags before trading spots. We only needed 40 bags to get the other bridge footing poured. Once it was poured we covered it all up with a tarp. It is getting down into the 40F range at night so I wanted to try and trap some of the heat into the form and concrete.

We then went to the other bridge and I installed a 36 brick rectangle with a power outlet built into the side of it. I am not a very good brick layer. It took some trial and error. Time will tell if I did it right. I have a hollow rectangle now. I am going to find a concrete block that I can just use as a topper. That way I can have access to the inside for wiring in the outdoor kitchen light power (after its built!).

I was pretty stoked to get all of that done in a single day. So the next day we were going to get the tractor mower going and Mr Rainman would mow the rest of the fields and I would work on wiring the lights in the barn. I hate playing at being a mechanic. When Mr Rainman went to hook up the new PTO shaft he noticed that the gear box on the mower was loose. You could shake it and move it around about 1/8” in either direction. He showed me so I said lets just tighten it up as I have done nothing in ten years to ensure its tight. I want it to last another ten years. So we lift it up with the rear three point hitch and he crawls under it. After much swearing and two four foot lengths of pipe (cheater bars) I manage to break a large crescent wrench. We tip the mower up on its side and chain it to the other mower bucket for safety. Then we proceeded to try and take it apart. I hate cotter pins. I hate tight spaces. Who has a 1.5” open end wrench laying around? I did find the wrench after I went and raided the last of my father’s machinist tools. I have never needed anything that large before and I am pretty sure the bolt was metric. No go, we could not get it apart. So Mr Rainman went home to get a 1/2” DeWalt impact driver for just this type of problem and I tried to get more parts and a torch.

We tried the impact driver and got no where! Nope, Nada, Nothing, it was not going to budge. I get impatient and just said cut bolt head off. After taking off all of the guards on the grinder and putting on a cutting wheel we were able to hack off the bolt heads. The threads had been worn off due to the rattling and looseness, there was no way it was coming apart or getting any tighter. It took us four hours to do nothing. I finally just gave up, had him grind off the bolts while I went and wired lights. He hooked up the spreader and went and over-seeded field #1 and the triangle. I got all of the light strings wired but one. That last strand I had one light that would not work and the last light on the string that did. I have one more sixteen feet in the air to still wire in. I think the first one has a wiring issue. My splice piece did not want to go on easily and I think it failed. Needless to say the last run is the one that lights up the hay rooms! So there is no light when you are getting hay until I fix it. I did discover that we can only run two strands of light at any one time. The voltage drops too far if you try and run three strands at the same time. Two is just fine and will work perfectly.

Mr Rainman is going to come out the next couple of days to work on the fields.