Projects never go on the timeframe I quote, we should all know this by now. I quoted a month for the entire bathroom rebuild. I thought that was from start to 100% finish. That is not going to happen. When we get to the 95% mark we will need to measure and order the new wood trim and it will take a few weeks for it to arrive. But the goal is still to take a shower and use the sink and toilet by the end of the month.
Yesterday we got the floor cut and then I had to drive to the Tricities to pick up our vanity and granite top. I brought some towels and between the towels and tarps I was able to put the granite top in the bed of the pickup and wrap up the vanity in a tarp and strap it down for the ride home. It was of course raining hard the entire trip. While I was driving to the Tricities the Tile store called to tell me that my shower pan would be another week before it arrived! This is not good news. I stopped by there on my way home to get more all set and to get the depth of the shower pan 2 5/16”. This way I can set the wall tile start height above this and continue to get the shower tiled in. I can do the walls outside of the shower and the floor outside the shower. If I am that far ahead and still no pan, I will grout the floor and wall tiles outside the shower and install the vanity. There are always projects to keep going on. I could install the tongue and groove above the tile. This will not slow down progress. Mr Rainman has been working on getting our old door stripped so we can recondition it and use it as our pocket door. We staged the Kerdi-board in the hallway so I could install it on Thursday.
Mr Rainman got the entire floor down and attached while I was doing errands. We are now ready for the Kerdi-board.
I am not sure I should count this as day 14, because I have had to work at the paying job a couple of the days. But I decided to count the days I am on vacation and the clock is ticking no matter what else is going on in our lives. We are past the halfway mark on the calendar and tile is not going up on the wall yet. I recognize that this is a concern. I recognize that it seems like progress is fairly slow but we are actually moving forward every day, I tell myself that repeatedly.
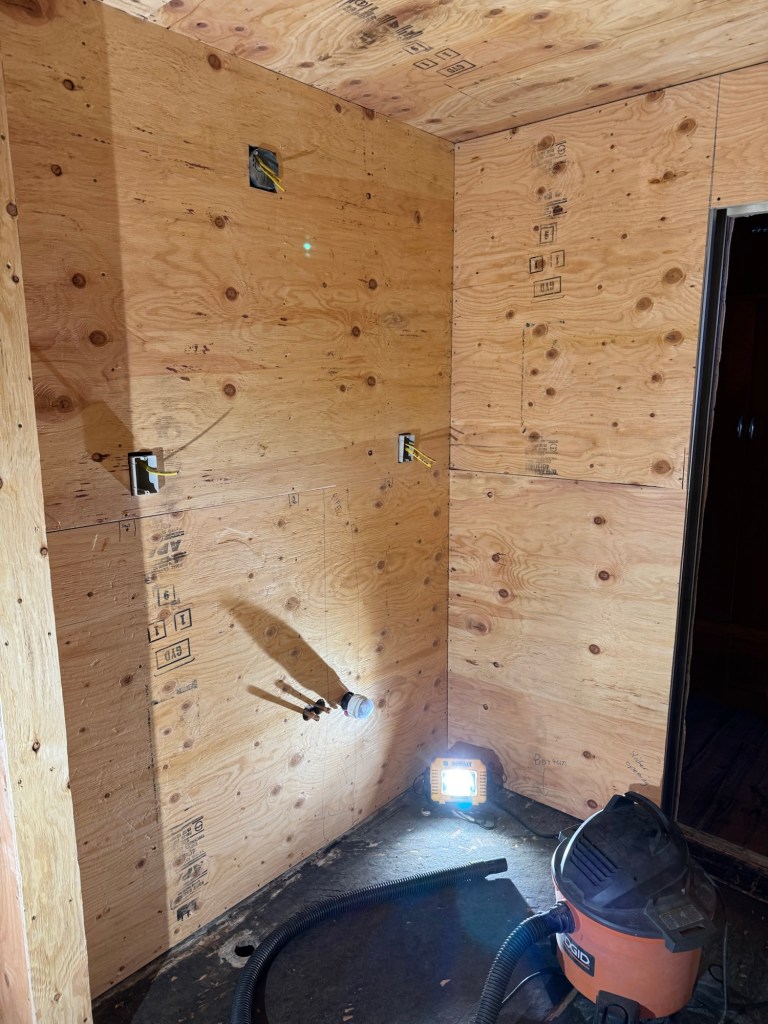
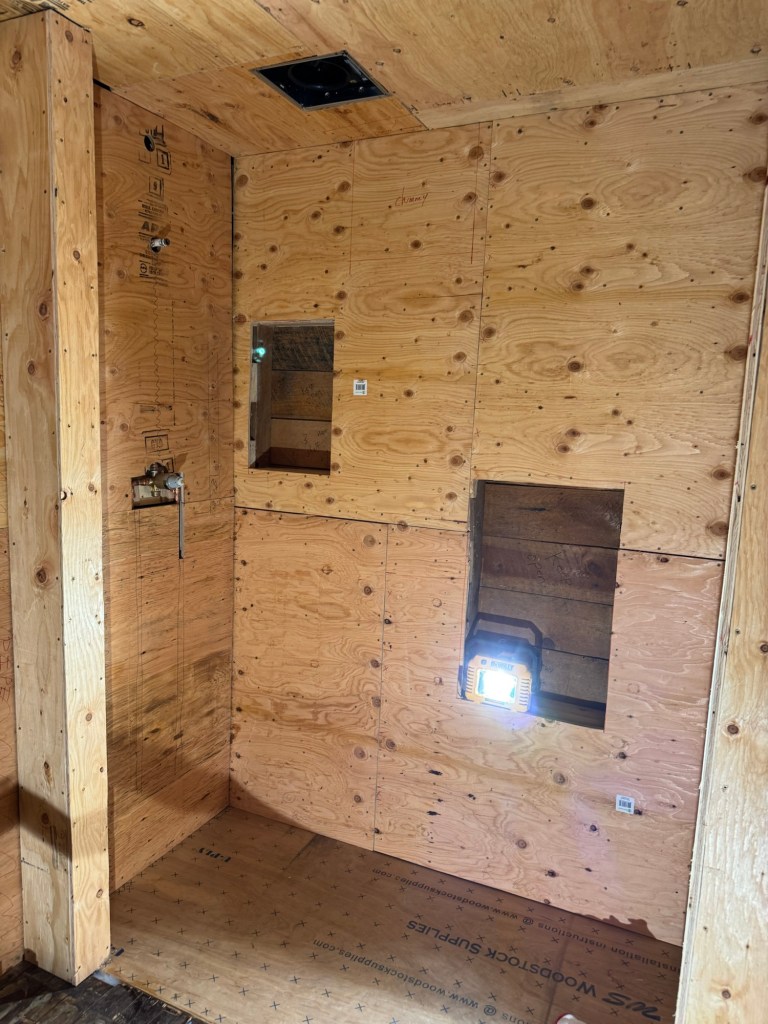
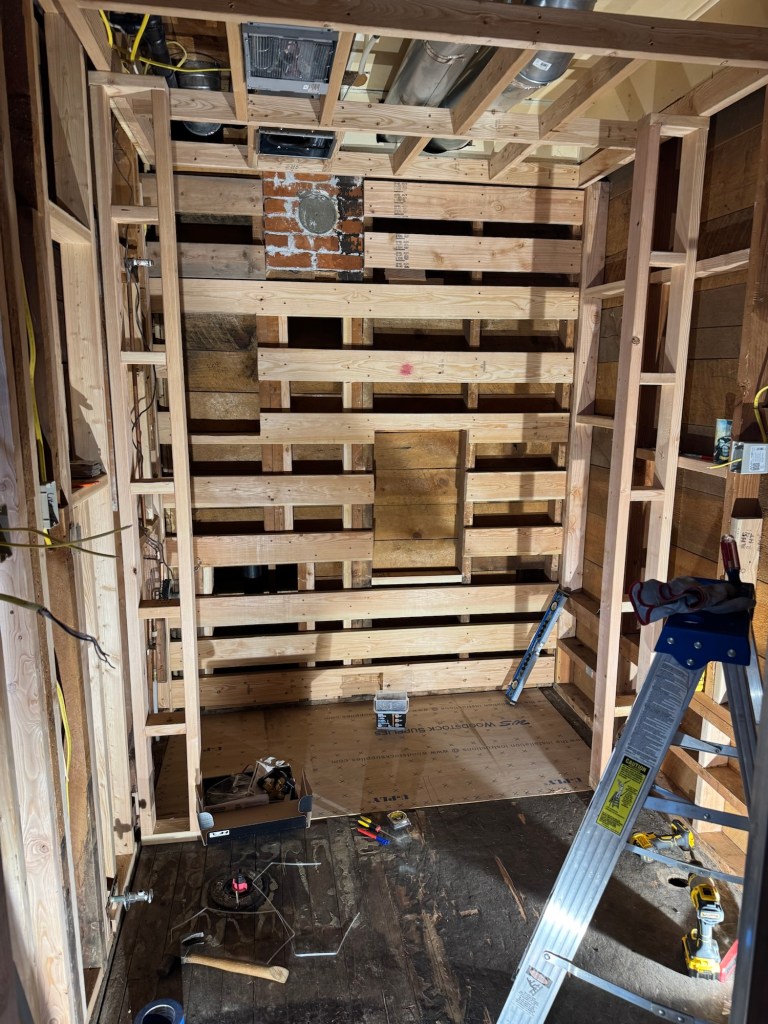
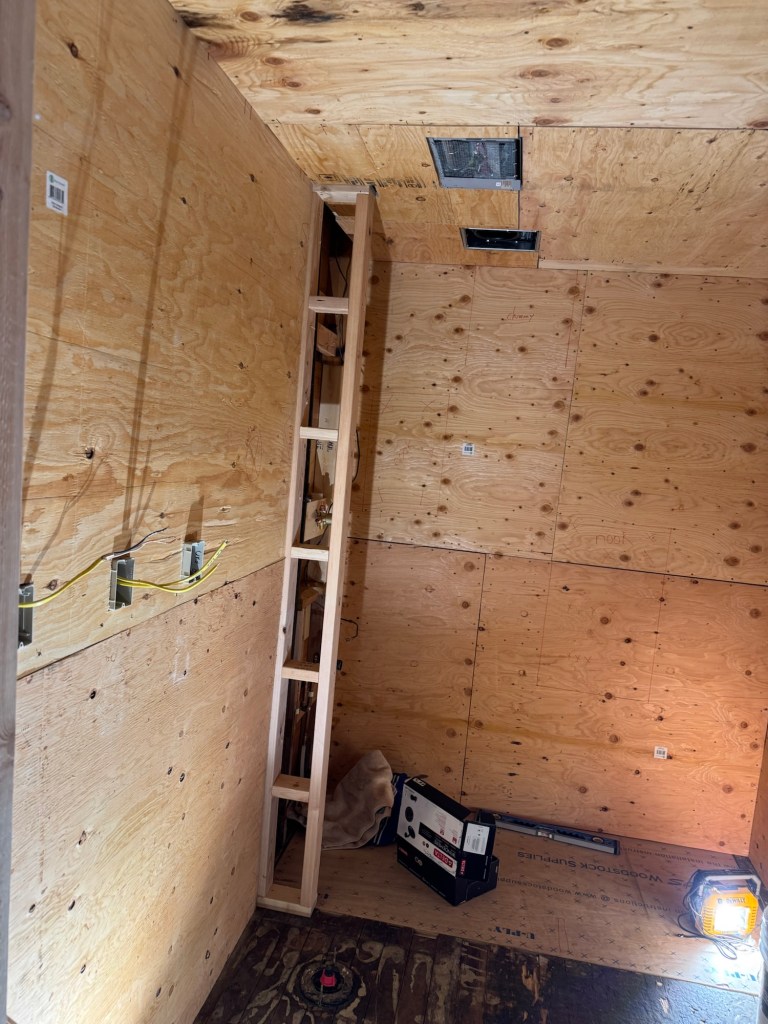
Mr Rainman and I got the rest of the plywood up on the walls. Surprisingly, the room is fairly square except for a corner of the shower by the shower head. I had to watch another video yesterday about the Schluter Kerdi-board. I can use mastic to butter out the corner and get that portion of the shower all level. The way we installed the plumbing we had to cut out some of the plywood to get it to fit correctly. Kerdi-board is getting installed over the plywood then tile so it will be fine. The plywood was an extra step and one that cost about 3-4 days of labor. It is so we can install grab rails anywhere we want and it will make putting up the tongue and groove and the tin ceiling much easier.
Mr Rainman and I had a discussion about the tongue and groove yesterday. Now when you look at the pocket door you can really see the 1/2” slant. I truly believe this is because nothing is breaking up your eye. You can only see it when you are standing in the shower looking outwards. I need to consult with the project supervisor to determine what direction she wants the tongue and groove but I think a 45 degree angle will totally throw off your eye and make it disappear.
That being said as she was inspecting the progress yesterday she spotted a mistake! I had cut one of the niche openings too wide. This happened because we did not install vertical 2×4 bumpers in the opening like we did the other three niches. I don’t know why we did not do the vertical ones. The horizontal ones are in place. Luckily, she spotted it so today it will be corrected with a couple of 2×6 boards installed vertically, problem solved while still little!
Mr Rainman put stripper on the door yesterday so we can get the paint off of it and start getting it rehabbed. We are going to have to plug one end of the latch and then drill new holes for the new handle and lock. It is doable but not super easy. Pretty much the story of the entire job to date.
The granite place called for the third time yesterday so I am going to have to make a trip over there today. The rest of our Schluter order was supposed to be in the store today also, so I am hoping to get both of them in one trip.
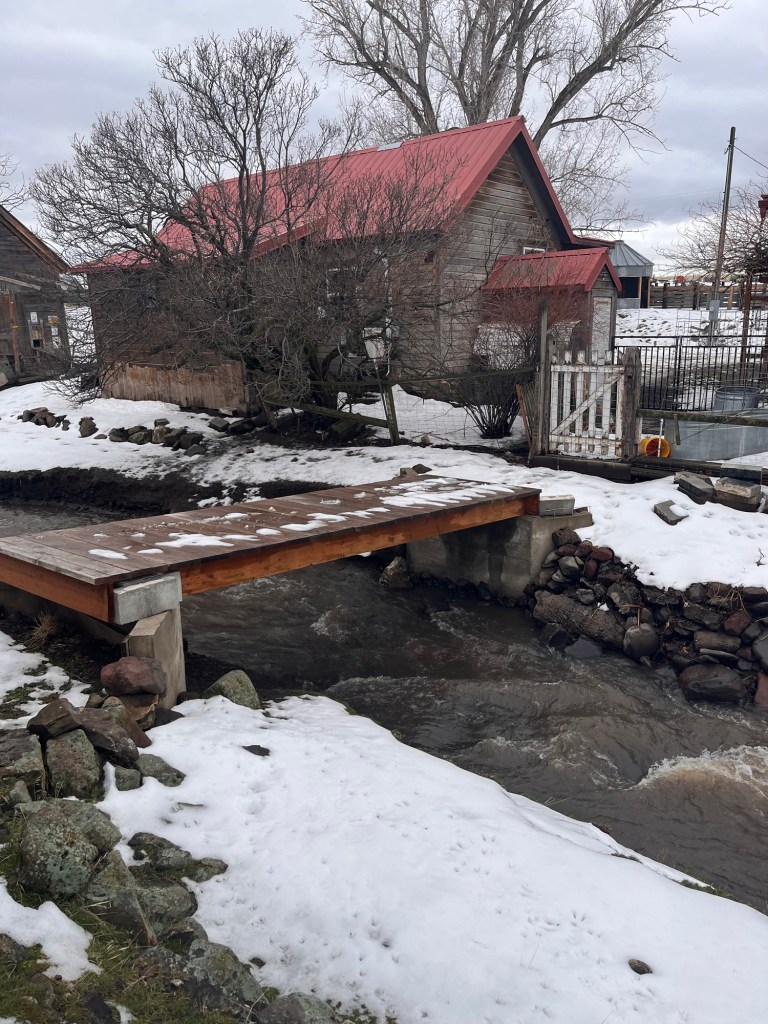
The outside temperature is warmer and now it is starting to rain on us. The problem with this is the wood wants to get wet and the back runoff creek bed is now really starting to fill up. It is roaring at night but only about 18” deep at this point. It is moving incredibly fast as the rain and melting snow start coming off the lower mountain foothills. I still have about fifty feet of diversion dike to complete up by the old chicken coop. That is going to have to get on the list this spring. It is too muddy at this point to do anything useful. It would just wash away.
Here’s hoping that the rest of the week goes smoother and I can get the Kerdi-board installed and tile up on the wall this weekend. If I can have tile going up by Friday I will be happy.
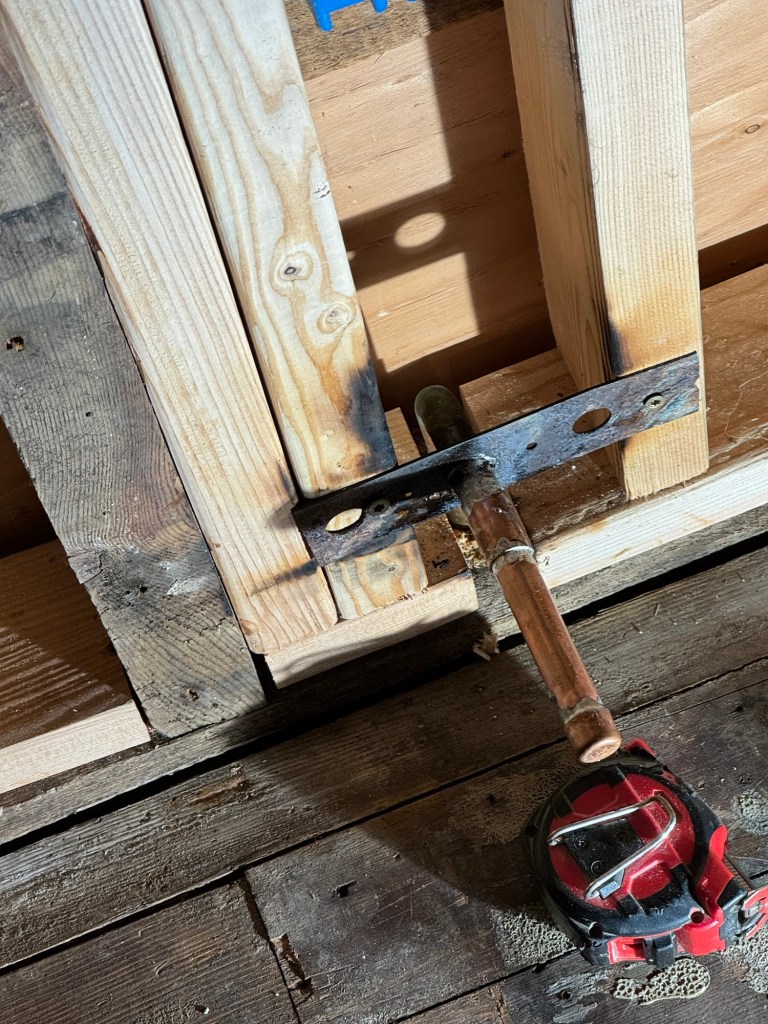
Well it’s been a long three days. Mr Rainman and I have kept after it diligently every day. There have been some setbacks, namely the plumbing. I am not a plumber, I have never been a plumber and I won’t even play a plumber on TV as I am just not a plumber! I managed to burn up the toilet stub and had to cut it short and after a couple of hours and two trips to the store I was able to solder on one end cap. The Gingerman had offered his soldering services but he was going to be gone until Sunday evening.
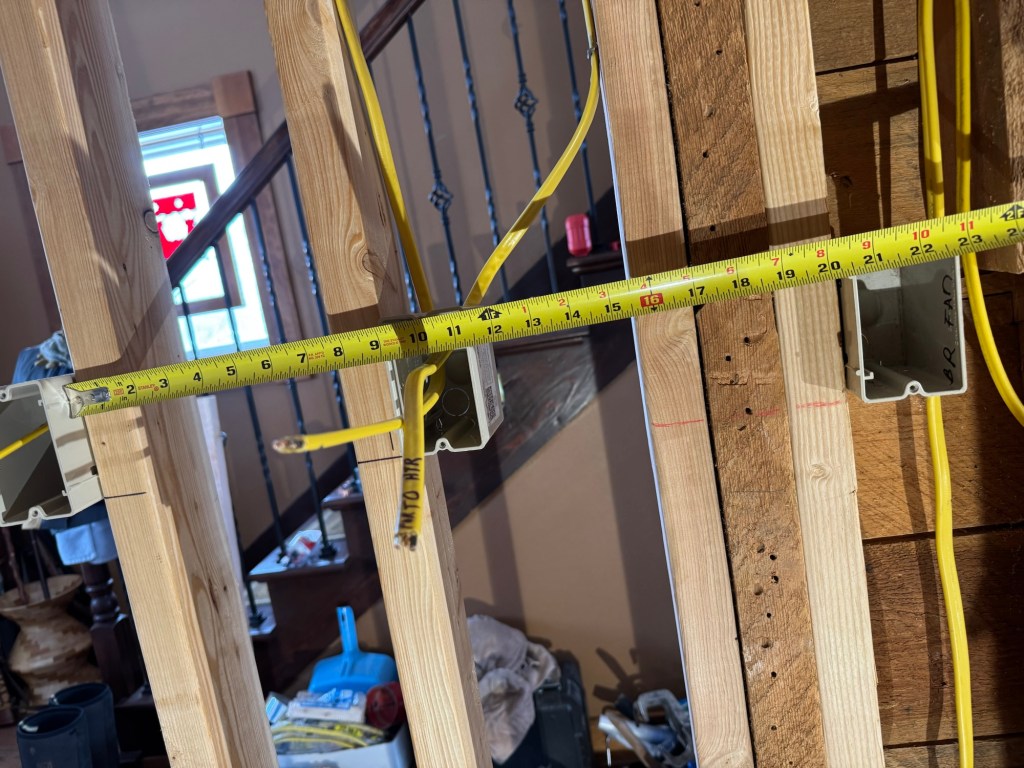
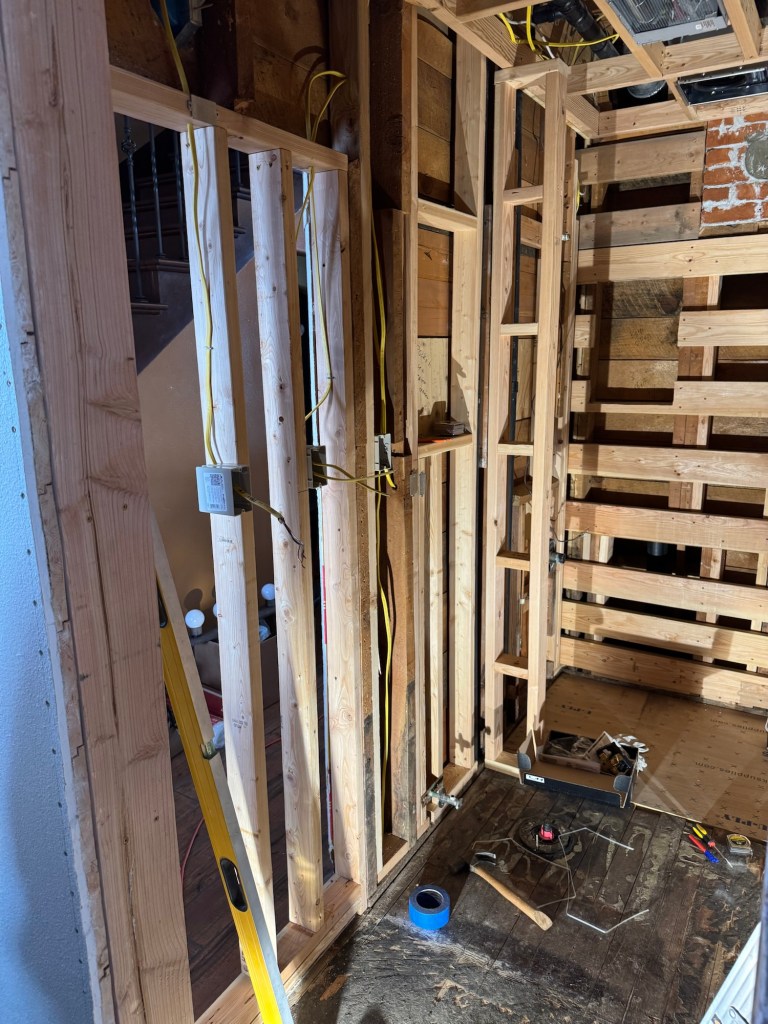
So I finished installing the new supports to block off the old door. I messed with that for 30 minutes trying to get the three outlet boxes equidistant from each other in a straight line. They are 9.25” apart and will look great when we are done!
The pocket door has been painful. I have never installed one before and the kit does not exactly have the greatest instructions. We installed the door and played with it to see how it works. It took us 30 minutes to figure out how to lock it into place onto the rollers. The door slants to the closed side. The floor slants also so I kept the slant so that the default position on the door will always be closed! This makes perfect sense to me and once we have the handle with indicator you will be able to tell if the bathroom is occupied, besides the fact that the door will not open. I ended up looking at how the contractor installed one in my mother’s house to figure out what would be the next steps for us. We know have a groove in the bottom of the door. This was painful as I always forget how to use a router, go shallow then a little deeper and make multiple passes, do not try and just count one inch out of the wood. I used the circular saw to make rough cuts and cleaned it up with the router making multiple descending swipes to get to the one inch deep goal. We also shimmed the opening bump board so that it now hits the entire door end at the same time. There is only about 1/32” opening in spots along the doorway. We will need to install trim to block the view of peepers.
Finishing the sliding door early is going to have to take precedence. We need to get the door stripped and sealed so it can be reinstalled before we close up the pocket. We are going to reuse the old door and will need to put a plug into the handle end where the old box knob was located. Then I will have to drill a new hole for the new flush locking mechanism. The door will take a few hours to strip and sand then re-stain and seal it.
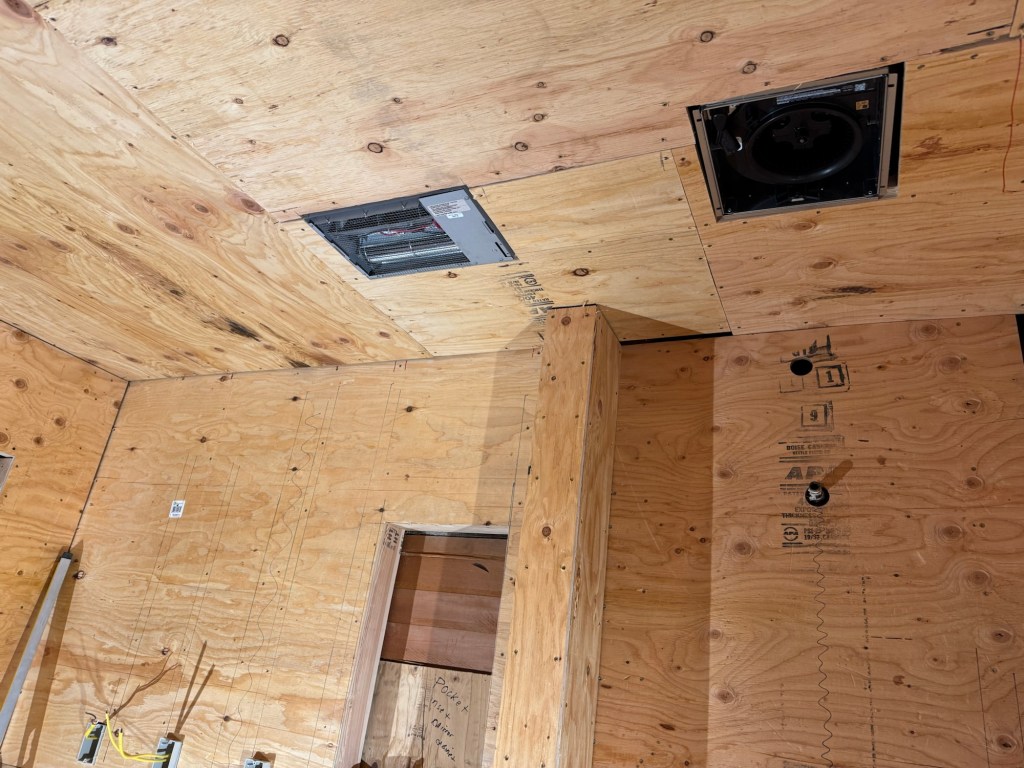
We started to put up the plywood but realized quickly that without the plumbing being installed or the sink and toilet stubs blocked off we were limited in what we could cover up. The ceiling had some complicated cuts to get it all on a single piece of material. I ended up marking and cutting one sheet wrong. So far we have not been able to utilize my mistake yet. We are using scraps when possible so that we don’t have to go buy more lumber.
The weather has not really been cooperating. First there was a lot of snow. Then there was a lot of ice over the snow. Today it was rain and freezing rain. We had to move the sawhorses out onto the front lawn as Annmarie ended up doing church remotely from her office due to ice on the roads. This meant we had a no noise rule for a couple of hours today. We just moved the makings to over by the front door and carried plywood over to the front door to mark and cut it to fit.
There will be no progress made tomorrow as I have to go in and do the paying job for a day. Mr Rainman is coming out on Tuesday so we can dig back into the project. Annmarie wants to know when we are going to start tiling! I tell her when all of the prep work is completed.
The quail have finally found their block I placed outside the kitchen window. They come every day now to eat seeds from their block. Sometimes it is very hard to see them. They are easy to spot when you are outside as they make a lot of noise! Like a whole lot of noise!
It has been a long two days. I just keep finding more issues. We ordered a special shower nozzle. I thought it was the valve and nozzle, it turns out it was not. I was able to get a Delta valve in Pendleton that will work just fine. We worked on getting the pocket door opened up but we did not have a long enough self tapping screw so that involved another trip to town. Regular screws were not going to go into the metal support studs for the pocket door.
We did manage to get the pocket door opening cut out. Mr Rainman suggested we go to Hermiston to buy all of the Schluter supplies so we have them on hand and can potentially avoid the upcoming snowstorm. We did not manage to avoid the snowstorm but the road did not get closed on us. I did however get pulled over by the police and issued a warning for driving too fast in bad weather conditions. This was fair but I am unsure why we got picked out of moving traffic. The officer was right, we went a lot slower the rest of the day.
The remodel store was amazing and they had 90% of what we needed. There is a lot of stuff to putting the room together according to how Schluter wants it so that the waterproof guarantee is met. You have to take pictures and document the process and follow their installation instructions. So their website and YouTube videos will be a necessary component of getting this all put together correctly. I have to say that we are only going to do this once and we do not want it to ever damage our house. Water is incredibly insidious and can damage a lot of your house before you catch it. We had to tear out an entire master bath and subfloor in our second home due to a crack in our tile wall in the shower. We don’t want to do this job again in our lifetimes.
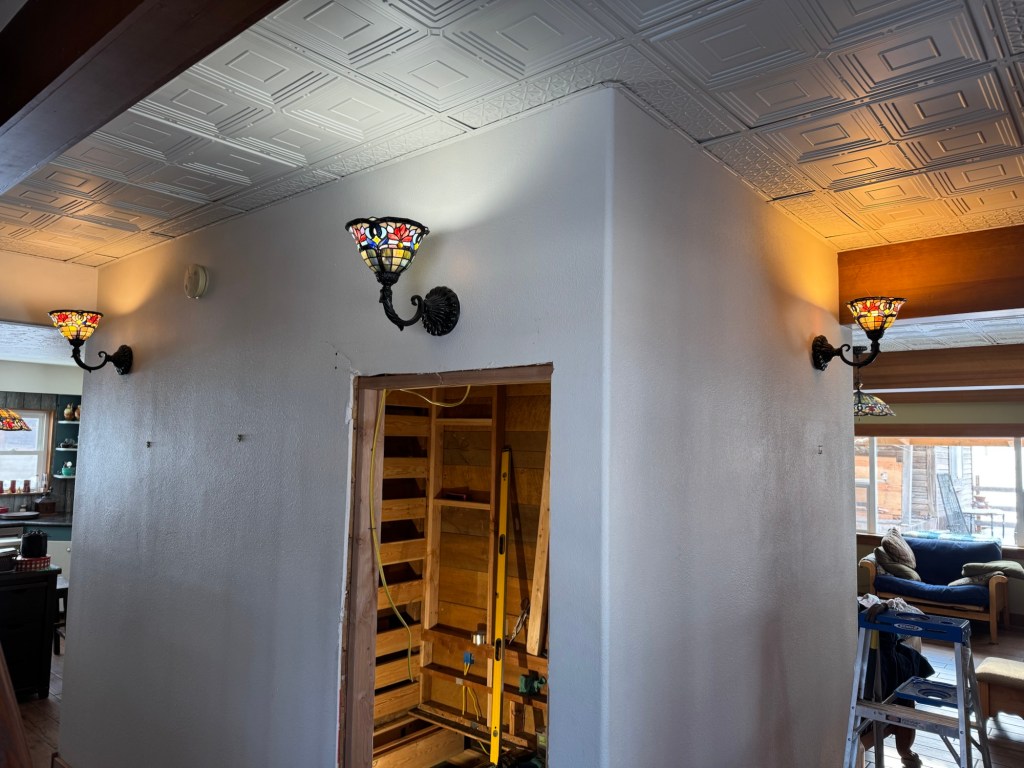
The entire Schluter waterproofing material to do the entire bathroom was around $3500. The grout alone was $800, it is 100% epoxy based and nasty stuff to work with but it is the same stuff you would use in a pool so water is really not an issue. Now if you have been to the hardware store you know that a 5# box of screws is now $40. We have already used about $150 in screws alone in a 6’x8’x8’ room. We have over $1500 in lumber for that little room. It is not cheap to remodel currently, and honestly, I do not see the prices dropping. By the time we are done we will have spent $15k in materials. This will have gotten us exactly what we wanted a waterproof room that has an entire tiled floor, tiled shower floor to ceiling, a pocket door, custom vanity (I altered) with granite top, custom oak linen cabinet made to fit the space (I build), smooth profile toilet, in wall cubbies in shower and medicine cabinet, in ceiling heater, Bluetooth speaker vent fan, tile 4’ up all other interior walls, tongue and groove wood above the tiles and a tin tile stamped patterned metal ceiling with tin crown molding. Doing the work yourself is the key to keeping the cost down. It will take at least four weeks to get it done, maybe a little longer for the finishing touches. I am told that this is a 100% completion project and there will be no stopping until it is done. I may have to order some new wood trim for the hallway walls but that will wait until we are at that step so we can order the necessary material only. But yes this is the last BIG ticket item for our house to be completely remodeled. It will have only taken us 20 years to rehab and repair our lovely home.
We have enough material to start getting stuff done. We will install the plywood over entire room then start installing the Kerdi-Board on the walls, then put the membrane on the floor. We are going to tile the main part of the bath first both the floor and walls while we wait for the shower pan insert. There is plenty of work for us to do while we are waiting for the material!
I was unable to pick the grout color so I brought home paper samples and set them on the tiles. We looked at them for a while then made a choice. We are going to go with the “Smoke Grey”, the top one on the picture for all of the grout in the entire room. Now I just have to call in my choice so the coloring can be ordered. We have to mix it into the epoxy when we combine the A & B bottles.
We spotted this weird slide track on our back hillside near the chicken coop. We think it is a raccoon sliding down the hill in the snow. We have seen raccoon tracks in the snow so I know there is at least one living in the barn still. So far I have not lost any chickens to it this year.
I had big plans for today, I was going to get things done and move on to the next step. My day went so well that I kept a little timeline:
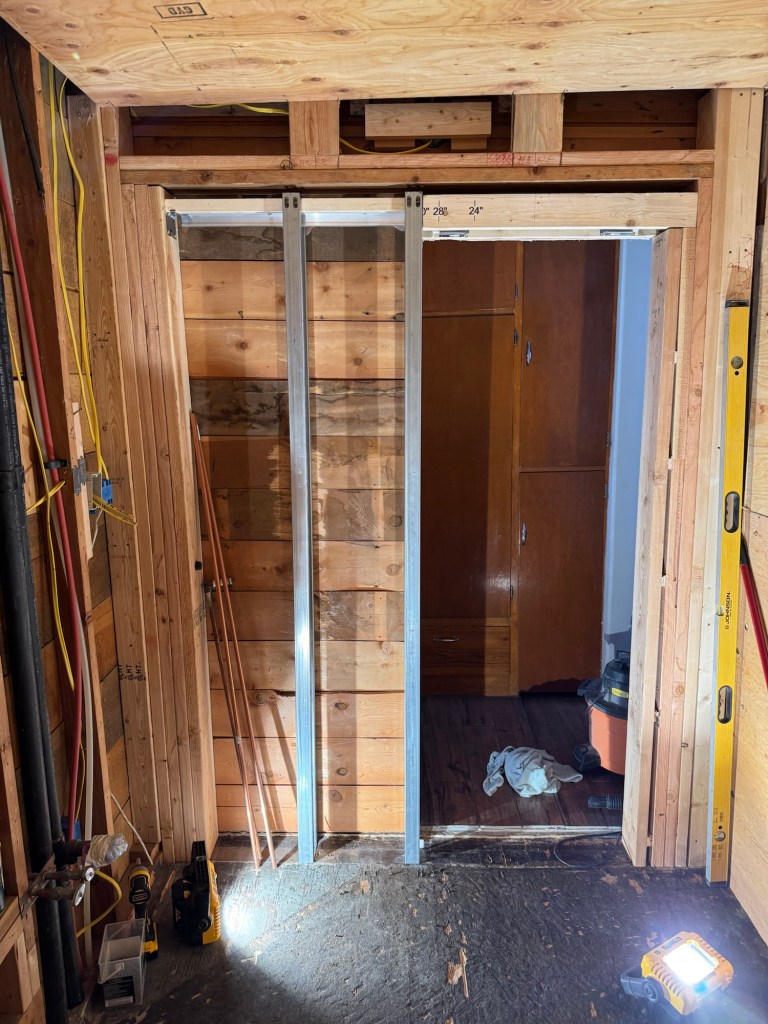
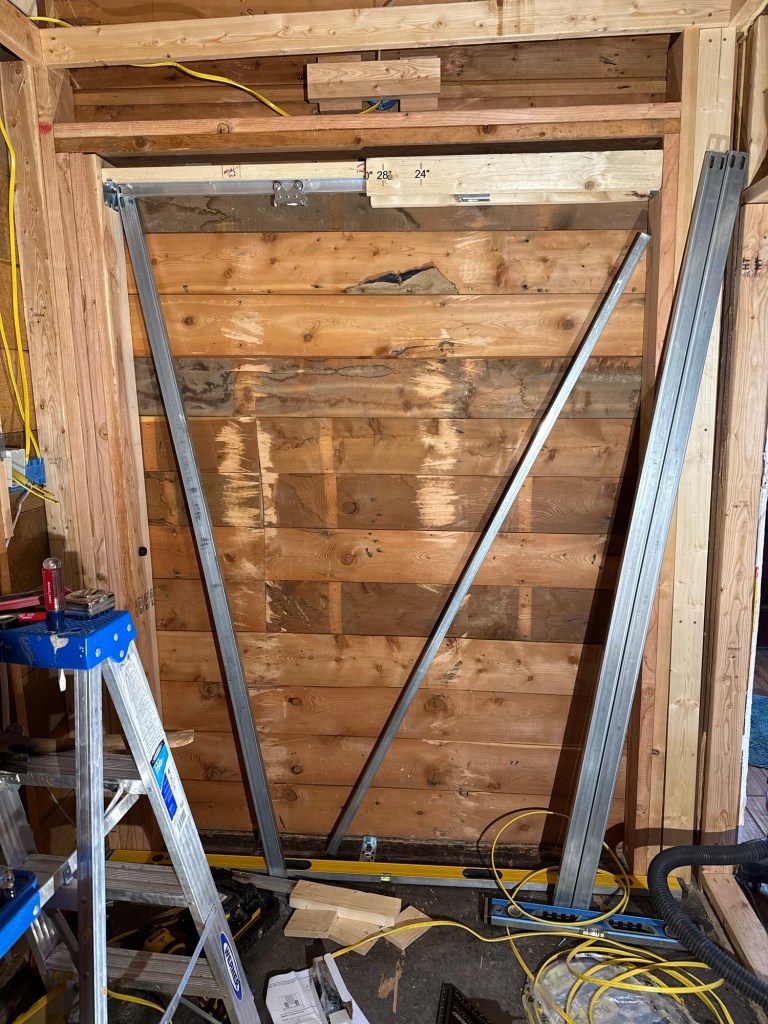
0800 Mr Rainman arrives and starts the Kubota tractor sitting in the yard, it was 4 F, and the tractor did start! The plan was to actually just let it idle and warm up for an hour. He then unpacked the rest of the box that was the pocket door frame. Big surprise, one side of the frame had a three foot piece of board that was warped and sticking out almost an inch from the main runner board. This was not good and needed to be corrected. He suggested (foolishly) that we send it back. I am on a timeline, I have a solid deadline and I will not be deterred.
0830 I realize after reading the instructions for said pocket door frame that we had sized the rough opening incorrectly. We were going to have to raise the top piece almost another eight inches.
0835 This was not going to happen as the hallway light was in the way.
0845 I had to have a phone consult with the wife to discuss moving the light. The problem is that if I raise it up then the light will be too close to the ceiling. It was decided that I would raise it and then flip the light upside down.
0900 While we are discussing this it was decided that I would run a new power outlet into the closet so we could have a closet light. Also, I cannot just run power from the hall light so that if you turned on the hall light it would automatically turn on the closet light. Instead I needed to figure out how to get power into the closet.
0950 It was finally decided that we would run power up the shoe side of the closet. The tile was far enough from the wall to drill a 1/2” hole down under the house. We had already discarded four different plans before this. Mr Rainman drilled the hole but now that we are going to have to run more wire and I still need to run new heater wire to the main service box we needed more electrical wire.
0955 Mr Rainman went to town to buy more 12/2 wire while I continued to work on moving the light. I had a really nice four inch hole bit and we made the hole lickity split!
1015 I went to install the outlet box and it was only a 3.5 inch box. I ended up having to go out and cut three more pieces of wood to make a support to screw the light box onto.
1200 Mr Rainman arrives with the new 250’ of electrical wire. He proceeds to tear apart our rough opening and cut longer legs.
1215 Light wired and turned on to see if it works. It works, and not only does it work but we positioned it directly across from the coat closet. Now the closet and overhead storage space are very bright and there is no need for a closet light. We decide to leave hole we drilled earlier open, until the straw boss verifies that the new light position and lumens entering the closet are sufficient.
1220 We hold a brief discussion on moving all three hall lights higher up on the wall and turning them upside down. One of the two on the long wall would be easy but the other one is boxed in and almost impossible to reach. It would take some more disassembly and a few hours to make it happen. So we opt out of any more changes to the lighting.
1230 Back at the pocket door frame. Attempted to pull the bent board back into position with screws and it will not pull the wood together. We are going to need more force. I take more measurements and decide that the frame can be cut to accommodate a 29.75” door instead of a 30” door. So more math, the frame got all marked up and we cut the three sides to the “correct” length.
1245 Mr Rainman reassembles the rough opening again with the taller boards. It was decided I had better crawl under the house and run the new wire from the breaker box to the bathroom heater. It needs its own 20 amp breaker. Since it was still single digit temperature outside I did not want to leave the house without power for long. I removed the front of the box and jammed a fiberglass cable rod down below the box. I was pretty sure that there was an opening under the house on that side of the box.
1300 I had to crawl under the house. There are a lot of spiderwebs. the tough part is we have a two foot round return duct running under our house and you have to shimmy under it . There is a small crawl tunnel to scoot under the duct but it is fairly small. When I went in I laid on my back and just slid down and under the duct. It was tight but I did not get stuck at all. Holy Smokes! This side of the duct has seen no human traffic since I installed the wire for the new wall oven years ago. The cobwebs ran from the floor to the underside of the floor, it was straight out of a horror movie. I had a hand covered in so many cobwebs I was making a ball of cobwebs with my left hand before proceeding along the foundation.
I was able to spot the rod, attach the wire and Mr Rainman pulled it up. He had to leave early, so I proceeded to get the wire into the breaker box and then run the individual wires alongside the outer edge of the box and make a run at a breaker near the other breakers related to this section of the house. I did not stick all the breakers together, I grouped them by location and then left 1-2 open spots between them just in case I needed to come back and add more circuits.
1500 Power back on and everything works, I have not wired the heater yet but the wires are all pulled and I left the new breaker off. I reread the instructions for the installing the frame. My rough opening is till not the right size. I had to go cut another piece of lumber and tear out what Mr Rainman had done and install the new pieces. On the plus side, I was able to go get a wood clamp and crank down on the bent piece of wood and get it screwed in flat like it was supposed to be.
I was able to get the pocket door frame mounted up on the wall but again I made another adjustment to make the door sit lower. The instructions they were giving me said the door would be 3/4-1.5” on the bottom of the door. I don’t want that big of a gap so I lowered the frame by 13/16”. This has caused a gap at the top of the rough opening. I am merely going to cut a few spacers and screw them in tomorrow, I am not going to tear it out again!