Chicken financials first quarter of 2015.

 
For feed safety!

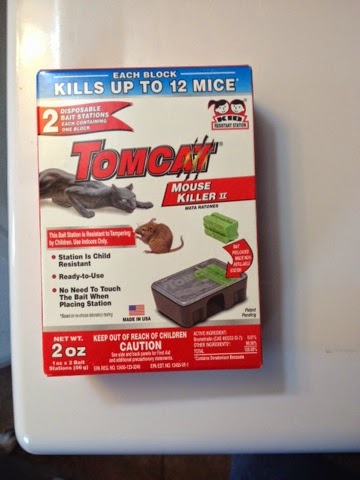
On average I had 22.3 laying hens giving me 8.3 eggs/day, for a productivity rate of 36% (this is great for Winter, and only 1% less than last year at the same time).  I am feeding on average 167# chicken feed/month for a grand total of 500# this year already (100# more than last year, with 6 more chickens than last year).  Bimart just put their chicken feed on sale for one week.  It is only $11.99/50# of layer pellets and $9.99/50# of scratch.  The only real problem is they put a limit of only six bags of each type!  So now I have to get Sarah to buy six of each type, Annmarie another 12 and me 12 more for a total of 1800#.  This won’t get me through the entire year but it saves me $3 on scratch and $5 on pellets for a savings of $144/feed.  That is a lot of savings.  The only problem with this is I have to store it all in the back of the coop.  So more cats is essential and I found these cute little poison pellet containers that dogs, kids and cats cannot get to the bait only mice.  I already put some out in the coop and will get more.  Plus, I will be cleaning the coop out very soon, probably while on vacation. 

  My monthly feed bill is $37.30/month (only a 1.50 increase over last year).  My feed costs are $1.93/doz with my total cost of production $1.93/doz (I have not purchased anything else at this point.  This will change as I clean out the coop and pay for new wood pellets and I will be getting babies at the end of the week).  I have collected 713 eggs to date (almost 150 more than last year).  Total feed costs are $112, supply expenses are none.  I am keeping with the new charge of $4/doz I started last year.  Eggs just keep getting more expensive in the grocery store.  I currently have a profit of $84 for the year.  My goal is to just make more than last year.  The eggs yolks are starting to turn a nice dark orange.  The chickens are spending more time outside free ranging in the pastures. 

I have one Turken chicken that is very broody.  She has claimed the old green cooler as her nest box and has been very diligent in staying in there.  Two days ago I gave her six eggs, five green ones and a white one.  I forgot to mark them with a pencil.  So there is no telling how many eggs she has in there now.  I will go out tomorrow and mark them and take away any extra eggs she may have.  The eggs should hatch in 21-24 days.  I can never remember the exact incubation period.  If so, then we will have lots of babies. 

Soon I will see the sun.

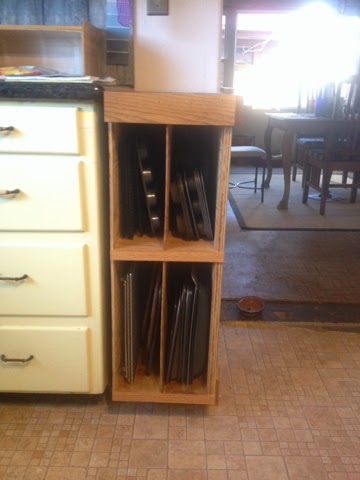
Old baking pan rack made several years ago.

I am trying to finish off the kitchen so I can get outside and dig into the myriad number of projects waiting for me.  Luckily, mother nature is cooperating with me this week, it is miserable cold and windy outside.  I had to use the saw multiple times yesterday and had a coat and long sleeve coat on during those excursions.  I started cutting the hole in the kitchen floor for the downdraft fan vent.  My fear was I would hit a floor support under the house.  I am pretty sure I did.  I just about have the square cut out and I think the back one inch is a support.  I will know after I dig the cut out of the hole.  If that is the case I may try and install the six inch pipe connection and use a pivoting joint to move around the support.  If I could avoid it altogether that would be the best!  I can cover the hole and shoot in some expanding foam so the cold doesn’t creep up into the kitchen.  I will dig into that after Easter.  The kitchen window trim is next. 

Annmarie has been bugging me to fix her cooking pan sorting rack.  The pans were just kind of haphazardly tossed in and hard to get out.  She wanted a second shelf and a new plywood side that was smooth.  That was the first project I tackled yesterday.  The nice part was I reused some of the plywood from the oven stand and two pieces of old oak trim I got last week from a contractor friend.  I love repurposing old things and giving them new life. 
 

New and improved baking pan rack.

Shelves installed and fan hidden.  We are still deciding on doors.

Once that was complete and all oiled up.  I only use olive oil as the finish.  Once a year I just reapply the oil to the entire piece.  I love the way it takes the stains and oil and pan burns, it adds character.  The wood doesn’t split or crack with the oil as a buffer.  Olive oil does not spoil.  It took almost 2/3 cup of oil to work in as a finish.  It is applied liberally. 

Next was the cooktop creation shelves.  I had started to store the pan lids on the top shelf but there was no way to keep them from falling off the back of the shelf.  So I had to cut a new piece and attach it to the back of the installed shelf.  One big hurdle was I wanted it tall enough to hid the cook top and downdraft fan bodies.  This meant that after cutting the back it was so tall that the shelf could not be removed as it hit the front side supports.  I made Sarah hold it out halfway so I could crawl under and predrill and install screws along the backside to hold the back wall in place. 
I did the bottom shelf next and had to cut the sides three times before I got them right.  The bottom shelf needs to slide out as one unit.  I don’t have the vent duct work installed so I could not permanently hide the plumbing.  I did want to hide the unsightly metal from the down draft fan.  So the back upright pieces go within 1/8 of an inch from the upper shelf.  It also slides right out as one unit, shelf and back wall are attached. 

Three days ago I sent Zeke out to get the sheep on the back hill side.  He was not cooperating and kept stopping and looking back for the next command.  I had to walk out into the orchard to keep hollering orders.  Sprout was tagging along behind me.  The alpaca started to wander over toward us.  I didn’t think any thing about it and continued hollering at Zeke.  I happened to look over my shoulder and the little brown alpaca was stomping poor sprout!  He was going to town on sprout, had him rolling around on the ground trying to get away.  I had to run over and shoo the alpaca back and pick sprout up off the ground to keep him away from the alpaca.  I knew llama were good guard animals for the sheep but had read that alpaca are not as aggressive and therefor not good guard animals.  That may be true of most alpacas but no one told that to the little brown one.  This may make the alpacas hard to work with Zeke. 

Sunset from helicopter.  It was pretty!

Tack room done

Tack room lazy susan.

Today was a recycle day.  A friend is doing some demolishing on his current contractor job.  I snagged a few intact formica countertops, a formica shelf with supports, some oak trim and some fluorescent lights.  The lights are for the old house and will be installed later.  The countertops are for the tack room cupboards.  We laid a couple of 2×4 across the three cabinets and attached them all together.  Two tops were custom cut for both cupboards and we installed a new shelf on the wall.  The tack room is officially complete.  I may put a few more small hooks on the wall but nothing fancy. 

Tack room long cupboards.

We spent a half an hour picking up all the wood on the hillside by the new lawn ornaments.  I wanted to get it all cleaned up before we install the new fence.  I will have to bring the tractor over to drag the large limbs that got cut off seven years ago.  I want to get it all on the new burn pile in the orchard and then torch it all. 

Lazy susan with formica top.

The oven works!  I wired it up and it works!  I love it when things work on the first try.  We let it run for about 1.5 hours to burn off the new smell.  Now it just needs to bake me some brownies!  Sarah tells me that my chicken food is going to go on sale very soon.  I am trying to decide whether to buy 1000# or 2000# of chicken food (20 or 40 bags).  Whatever I buy I will purchase more mouse traps and some poison bars to go in the coop food storage area.  We are also getting more cats, four more should do it.  We need better predator control.  I do not want any mice in the house. 
Three cabinets connected with formica top and new formica shelf.

Stove works!

Kitchen progress.

Cabinet in place and oven in its home!

It’s hard to believe we spent eight hours today working on getting the oven in place.  All we had to do was shove it in place and run a little wire.  Well, it was not quite that easy.  I made Phil crawl under the house and tried to drill a hole through the floor and almost caught the house on fire.  There was so much smoke I had to throw a cup of water into the wall just to appease my sense of safety.  Luckily, there was another hole already present so we used it.  Once the wire was all run I went to wire the panel and realized I forgot to go get a 220V 20A breaker.  I had to make trip to town for the breaker while Phil cleaned up the orchard and created another burn pile.  Fire is the greatest cleanup tool we have.  Once back we finished the wiring in short order and attempted to get the cabinet in place.  I did say that I measured everything three times before I cut it?  We had to push and push and wiggle and apply a few hundred pounds of effort to get the cabinet in an inch at a time.  Once in place we had to shim it level.  We only knocked off a little plaster off the wall on one side.  I was running out of time as I had an appointment this afternoon so we slid the stove in after removing the door and various pieces.  The oven fit perfectly, as if I had built the cabinet just for it!  It was perfect and I was grateful. 

Pump power is back!

Oven cabinet is ready to set up and then trim face.  Power needs to be ran first.

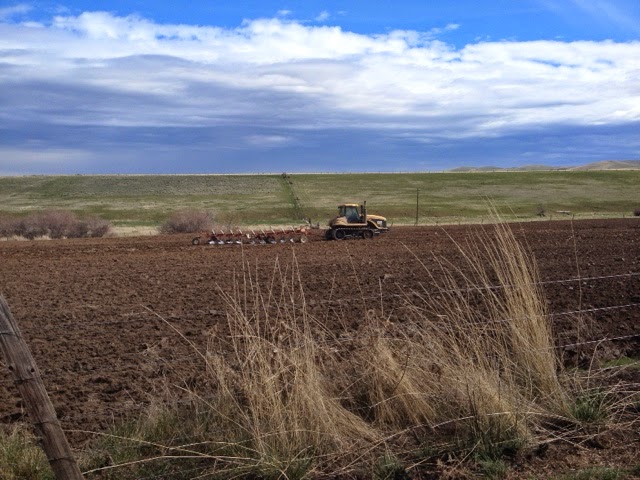
Bunch grass is spray resistant so plowing was implemented.

It was a day for the kitchen cabinet.  I had a paid helper come over so we could finish the cabinet.  I needed some last minute design input from Annmarie before she went to the Tricities.  We decided to slide the side shelving back 6 inches so it is only 18 inches deep, and even on both sides.  I was thinking about making all three shelves a different depth and all three with different size doors, that idea was vetoed, and both sides are identical.  This plan change meant we had to rip down a bunch of plywood to 18 inch widths.  The outside weather was miserable,
cold raining and windy.  The perfect day to be outside trying to cut finish wood!

 We started in first thing and I was already distracted from calling the power company, like I had promised to do.  Annmarie texted me around 0930 and I called immediately.  I gave them my address and told them the problem.  They were very polite and helpful on the phone.  A service rep came out to the house three hours later.  I went out and told him where the problem was and how to get in to the lower pasture.  He went down and fixed the wire!  One hour later there was power at the pump.  We had to run to the hardware store for screws so we stopped to check out the repair.  I fired up the irrigation pump and it the motor ran, the pump shaft turned but no water came out.  I didn’t bother to bring anything to prime the pump.  Now we just need to dig out the mud, change two valves on the line and lay out all the sprinkler pipe!  I am super stoked about irrigating this year.  I will call the power company and get the power bill changed over to our name next week.  Once the pump is up and going then we can get someone to come out and repair the retractable sprinkler. Its looking up! 

Future green house.

We spent ten hours today getting the cabinet all put together.  It was not easy.  It kept wanting to be off by 1/8 of an inch.  It had to be poked, prodded, clamped, pushed, pulled, shimmed and sworn at to get it all together.  I had to keep measuring diagonals to ensure we were not tweaking it.  I will be the first to admit that I am not a cabinet maker.  I much prefer building things for the shop and barn.  Way easier and way faster.  I only had one board in the wrong place by 3/4 inch and had to move it, not bad for ten hours of work.  We marked the spot for the power box to be installed.  Tomorrow we run power and then slide the cabinet between the walls to keep it stable.  Once there I will finish the face and then sand and stain it in place. After it is all dry we will slide it the six inches back against the wall. 

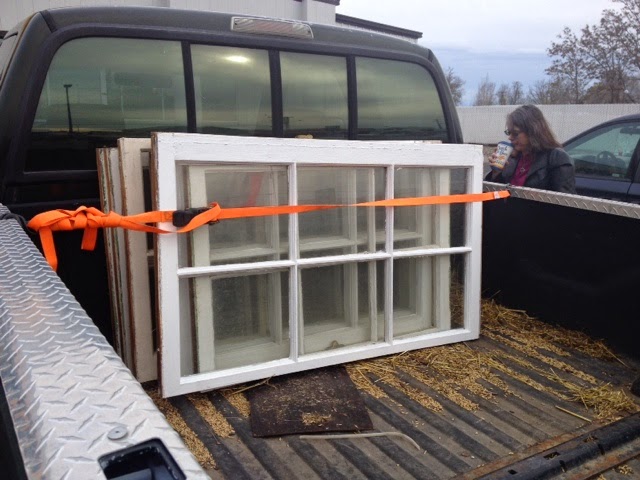
Yesterday, we drove to Hermiston and picked up eight more windows for the green house.  I am getting stoked about having one.  I have enough windows for all three sides.  I want to buy the greenhouse plastic sheets for the upper roof.  It will be on a slant and I am afraid the hail will break the old glass windows.  I remember as a kid we had a hothouse made of old windows and the hail broke every window.  I just need to work up a size and better plan.  I know I want a heat sink to run the whole back of the green house four feet deep and the entire height of the back wall.  I will fill it with old tires and rocks and paint the back wall black.  It can absorb heat/energy during the day and give it off all night. I also want to dig it down at least two feet maybe three feet into the ground for the same reason.  My heat sink will go all the way to the floor.  I want the wood to be all cedar so it can withstand the moisture.  I want spring operated vents but am considering running one power line to it from the chicken coop and installing a DC converter and running DC vent fans and vent louver motors.  I could run automatic watering valves also!  Still thinking about this version.