Cooktop planning.

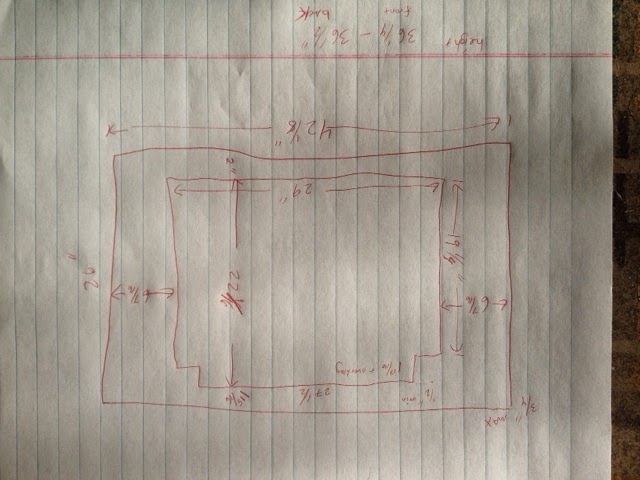
Cooktop plans for oak countertop.  upside down.

I went shopping today for all the things I thought I would need for the cooktop cupboard.  I went to the flooring place and found 15 square feet of oak flooring to use as the countertop.  I went and picked up the actual gas cook top.  I then went to the hardware store and picked up a pipe clamp and three 5 foot sections of iron pipe so I can glue the oak flooring together and then once dry use a router to cut the center hole for the cooktop and downdraft fan.  Next was a trip to the lumber store for a piece of 3/4 inch plywood for the top of the cupboard.  I will attach the oak to this.  It will make a nice stable top.  Especially, since I am going to cut out most of the both of these.  At home I had to unload everything.  The cook top was manageable for one person.  The appliance store owner warned me that I would need help with the oven.  She said it weighs almost 200 pounds.  No way I can move that into the house by myself.  I may very well make the shell of the oven cupboards out of 2×4 material.  I think I need to for the weight requirements.  I am just going to use 1×4 for the cooktop. 

I dug through and found the instructions for the cook top and the downdraft fan and sat down and started to draw up a set of plans!  I never do this but combining multiple pieces together and getting them to fit and look good means I actually need a plan with some accurate measurements.  I kept going back and measuring each appliance to make sure I was getting things right.  A few problems arose. The floor is not level where the stove is currently sitting.  We knew this but there is a 1/4 inch difference from the front to the back.  Eventually, we want to tile the kitchen which will change the height of the countertop.  I am accounting for this by cutting the counter 1/4 inch short and then installing and shimming it up and screwing in a 1×4 along the length of the floor, this allows me to correct the height difference and remove this and adjust it at a later date.  Both items are equally important when building this cupboard.  I did get a pleasant surprise the custom cupboard will be shallower than our current oven so I think our doors on the left side will be more easily accessed.  I cannot really figure out where the drawers storage will go until the stove top and fan are installed.  It looks like I am going to have to cut down through the floor to vent the down draft fan.  There is no other good way to do it.  On the plus side I can cut a square hole which will make it easier.  I just need to find an outside vent.  I am going to look for a square one.  I have only found round ones in my internet searches to date.  Once I get this all installed we will not have an oven.  This will really put a squeeze on that project.  There will be some added pressure to get it done!  I will start taking measurements so I can purchase the wire, breaker and 220V outlet.  I have a line on the boards from a local custom cutter.  Using a 2×4 frame will make it easier.  I will just build a box out of them and then side it and line it.  I won’t worry about it collapsing if I do that.  The bonus will be I can have the oven in a frame and fully functional!  That will give me some time to sheath it and make it all pretty.  I will also make it freestanding so when we redo the floor it will be self adjusting with the other two cupboards. 
 

cooktop cupboard, upside down.

Fire, Fire and more Fire!

Right arm fire damage.

I just want it known that this farmer crap is not as easy as reading a book.  Nor after listening to many tall tales about how it used to be done.  I truly believe that the school of hard knocks is how most farmers learn.  What most farmers don’t do is keep a blog!  An honest account of the actual things that occur on a farm.  I want it known that I have been very truthful over the years and try not to spare the reader the pretense that all is golden when working on a farm.  I try and paint a picture of the reality so that future readers can truly understand what our life entailed.  We print each years blog out as a hard cover book for our living room coffee table.  There will be no questions about what was done to the place by future generations.  They will be able to read up on all the improvements and changes. 

Today started out like any other day.  A little frost on the ground with the sun shining and a nice blue sky softened by the occasional white fluffy cloud.

Huge dent in tractor hood.

I went down to my mother-in-law’s house to trim her front yard trees.  A couple of hours later and there were three nicely shaped trees.  Sarah texted me and Zeke and I went to town in the pickup for lunch with the family and friends.  Zeke had stayed in the back of the pickup the entire time I trimmed on the trees.  He never once tried to jump out.  His reward was getting to ride to town with me.  He loves riding in the back of the pickup.  While I was trimming the trees the alpacas did some fighting and running and tried to call the sheep over to them.  They make all sorts of weird noises.  I had no idea they were that vocal.  After lunch, Annmarie and I ran some errands and then Zeke and I came home.  I had told Annmarie I would clean up the horse feeder area, as the manure was getting deep.  So my trusty tractor and I cleaned out the square pen, I dumped it over the fence then got into the barn lot and cleaned out the feed stalls.  I ended up piling everything in one corner of the little horse lot.  The lot slants severely and I would like to level it.  So I am going to start stacking the manure and dirt to make a level area.  There was still daylight to burn so I decided to start burning weeds in the fence line.  I had been wanting to do it for the last month but I had been working on the kitchen.  I had a new plan of attack.  Instead of wrestling the 30 gallon tank into the back of the pickup I would use the tractor, it seemed reasonable.  I put the tank into the bucket upright and used a long chain to go around it three time and once through the top so it couldn’t fall forward.  I turned the tank on and light the weed burner on the first try.  I was in business.  I burned the fence line out behind the grain bins.  It gets hot but as long as I wear a long sleeve shirt its not too bad.  The weeds are burning hot and fast and as soon as the fire hits the stubble it stops and self extinguishes.  It was perfect and there was a slight breeze away from me so I didn’t even have to breathe any smoke.  I did that whole fence line and started my way on the next section of fencing.

 About half way down the fence was some old spiked wheel thing that you drag behind the large tractor to break up dirt clods.  Donna and I had just talked about selling the old tractor and big equipment today so I decided that the weeds needed to be burned so I could take a picture.  I waded into the piece of equipment and started a couple of small fires to my left then one to my right and then turned back to my left to start a couple of more.  Did I say the wind was coming from my right side?  It started to get hot with all that fire around me so I stepped away from the flames but my right arm kept getting hotter and hotter.  It took me about ten seconds to realize I was on fire!  I could not see any flames as it was just above my elbow on the back of my arm.  I tried to get my outer shirt off but my cuffs were too tight and my leather gloves would not come off.  I jumped around and
managed to get my glove and outer shirt off.  Phew, saved or so I thought, my arm was still on fire!  The inside shirt was on fire.  I had to just reach over and smash the flames out.  Once I was sure no other part of my body was on fire I went back to burning. It hurt, but I could tell it was only a second degree burn and the skin had just been burnt off.  There was some burnt hair but no blisters as the skin was all burnt off.  There was work to be done!  Annmarie came out about five minutes later asking me to be done with the burning.  I really wanted to get down the driveway and had just gotten to the next corner of the fence.  After a short discussion  we went over and fed the alpacas and got to touch two different ones.  I went back to complete some more burning.  I was going to have to go over a large hill so I lifted the bucket with my propane tank high into the air.  The damn thing leaped out of the bucket backwards and smashed down onto the hood of my tractor!  It was awful.  I instantly killed the tractor engine assuming the radiator had just gotten smashed in.  I lifted the tractor hood and there was no engine contact just a huge dent.  I chained that bad boy back to the bucket with an extra loop under the bucket securing the tank from the bottom so it could not fall off in any direction.  I sure wish I had thought of that sooner. I fired that tractor back up and proceeded to continue burning!  Later, a hammer will fix that dent.  I made it all the way to the end of the driveway before it started to get dark.  I have the last ten feet of fence and the cattle guard to burn and I will be done.  I then went and fed all the rest of the animals and gave the horses some fresh straw in their stalls.  The chickens are really starting to lay eggs so spring time must be near. 
The worse part of this day was I considered downplaying the dent in the tractor hood but Annmarie witnessed it! 

I do have a few takeaways from this day.  Natural fibers are my friend!  NO more synthetic crap, I will only be wearing cotton and wool to work around the farm.  Wool would not have burned like that.  Always attach everything inside the tractor bucket from all directions.  The alpaca are tamer than we expected them to be.  On a plus side, I destroyed no fence today and my arm will be healed by the end of the week.  I will say that Annmarie did have to run into the bathroom and ask if there was anything wrong while I was showering.  I debrided the burn with a washcloth and some soap until I had all the burned hair and skin removed.  It did not feel good, after a few minutes it just got numb from too much stimulation, or else I just got numb to the pain.  I let a few good choice words cleaning up.  All is well and hopefully I can finish the burning this week and be done till early winter. 

Alpaca are here!

Alpaca in trailer.

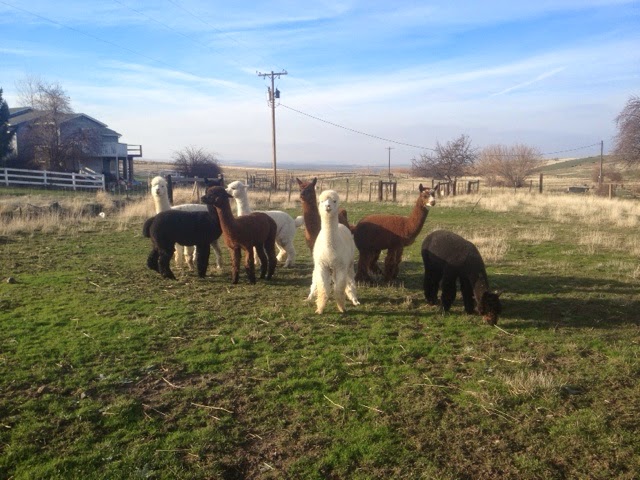
Well we made the plunge and purchased some alpaca.  I found a great deal on Craigslist.  I borrowed an animal trailer from a coworker and drove up to John Day this morning.  I took Zeke with me and he thought he had died and gone to heaven getting to spend three hours each way riding in the back with the wind in his face.  We even stopped a couple of times each direction so he could run around by the river.  The first time we stopped he took off and I waited 30 seconds before I started calling him.  It took him over a minute to come back at a dead run.   He must have gotten pretty far away.  I kept him in sight after that.  The drive was curvy and hilly but very nice.  I got lost in Canyon City and had to call for directions.  It was up some curvy road and off the beaten path.  I never could have gotten there with the first set of instructions.  We loaded the first six animals by just pushing them into the trailer.  We got them piled up by the opening and no one would go inside.  The owner put a bridle on one and we drug it up into the trailer and tied it to the far end.  After that we managed to push the other five inside.  I then swung the trailer divider over and just kept pushing to try and get it shut.  They did not want to go.  Plus, they started spitting at each other!  It is not really spit, it is regurgitated feed hucked directly up from the stomach.  It smells nasty.  We had to halter one of the other two and then physically lift the last one into the trailer.  I had to reach through and remove the halter on the first one and it was covered in nasty spit.  We drove 100 yards down the road and I stopped to take a picture of the alpaca.  I got a face full of nastiness!  I continued to stink the entire drive home.  The alpaca are easy to transport, as soon as the trailer starts moving they just sit down.  We got home and I drove into the orchard.  The cows were there so Zeke got to work and chased them out.  I opened the trailer and let the alpaca out.  They are fairly tame.  I touched everyone and they just ran out and formed a group.  Two hours later and they are still in the same place!  Just standing around trying to figure out this land of green.  We fed some hay but they did not come up to the feeder.  The plan now is just to let them get acclimated.  Their wool is only about 4 inches long now.  We plan on shearing them sometime in late May.  I have that much time to do some more research.  We also have to cut their hooves and grind their front teeth and fighting teeth down.  This will all be done on the day we shear.  It is going to be a long day!  The price was amazing as the owner was looking to downsize.  8 males only cost us $200. 

In our pasture and not really sure.

Fresh off the boat.

Kitchen new direction

New stove in dining room

Yesterday, was the day of completions. The heating guys came out and finished installing our new freestanding stove in the dining room.  It is amazing!  It actually gives off heat and heats up the whole room in minutes.  We are hoping this means our propane bill will decrease.  The wind needs to howl so we can see if this one blows out and we need some bitter below zero F temps to see if that keeps the stove from lighting. 

New in house filter.

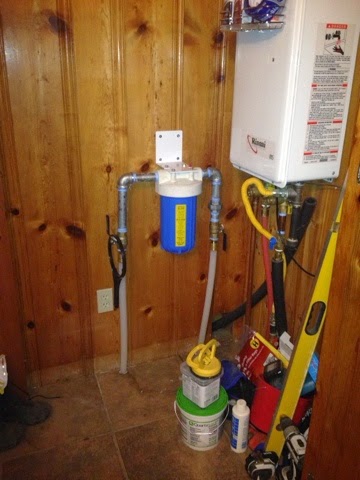
The plumber came that afternoon.  He installed a inline filter for all the water that comes into our house.  He ran the mainline up into our laundry room and then back down to the distribution manifold.  No more rocks and glue ribbons gumming up all our valves inside.  Now I can replace both outside water hydrants and not worry about ruining anything inside the house.  I am not sure that is such a good thing.  My last excuse to delay digging gone. 
We have solved our kitchen appliance problem.  So instead of only being the proud owners of a new downdraft fan, we are the proud owners of a downdraft fan, propane cook top and freestanding oven! LOL.  I will now be constructing four custom cupboards, a hardwood counter and wiring the back kitchen wall with 220V for the new electric oven.  This will be a great finish to the kitchen project.  Looking forward to the finished look. 

It’s all fun and games till you have to work on the exhaust fan.


Lead ewe with her twins.  Best color of the year.

I ran out of excuses to not work on the kitchen down draft fan.  Annmarie had suspected I was putting it off but I kept coming up with something else that needed to be done.  I ran out of “other things” to do, so today was day one of the vent fan fiasco.  Now, one might think I was sarcastic by this comment but you need to read more of the blog to understand what my true normal is usually like.  I unpacked the fan and found the fan body bent and the decorative top strip bent.  The fan body was not a big deal, I bent it back into place.  The chrome strip that goes on top of the raised fan had a peg bent and it needed to be replaced or it would not stay in place.  I called the Whirlpool help line.  I was told that the fan I had purchased was made in 2012 and was outside the manufacturer warranty.  I then led with the information that I had just purchased the fan from Fred’s appliance last month.  They then countered with wanting to know if I had contacted Fred’s to get the part.  I said no, I called them. We then found the part I needed and the helpful person, on the phone, said he would list the part in my file but they needed proof of purchase with a recent date before the part could be sent out.  I of course had thrown that away.  I had to call Fred’s and get someone to email me the receipt so I could in turn email it to Whirlpool who may have it on file in two days.  I just need to check back then and if everything is in order they will send me the part.  This only took 1.5 hours. 

fan insert raised, backwards!

After swapping blower motor, lift assembly does not move. 

I then put the fan together and turned the blower motor so it vented to the rear.  I was ready to rock as soon as I had some power.  I dug around in the old house and found a metal conduit ring, now if I only had some wire and a plug.  I wanted a flush plug so I went to the local hardware store and found a 90 degree extension cord and cut off the female end.  I wired the fan and figured out how to mount the legs and what was needed to mount it to the wall.  I scooted it in place and it fit!  A whole 1/4 inch to spare.  I plugged it in and it worked!  The fan extended (see picture to the right) and I was able to adjust the speed of the blower.  All was good with the world, or so I thought.

 I looked at both sides of the fan when extended and noticed that the side closest to the stove was just a piece of smooth stainless steel, but the other side was a couple of metal screens and the place where the air was actually getting sucked down.  This is not good, it is wrong.  Having done a very unguylike thing, I had read the instruction manual several times. I didn’t want to screw it up.  There was a way to swap the blower motor to the other side!  I was saved.  I had to remove the blower motor and swap the wiring internally and take off the covers.  But, alas it was not that simple.  There is a lifting mechanism and it cannot be moved.  I continued to swap over all the pieces so I can get the fan opening on the right side near the stove.  Well this makes my fan 4 inches too wide for my opening.  This means I will have to cut into the cabinet to get it to fit and cut out through cabinet wall to vent it outside.  This is still doable, but now I have to build a wooden top with the fan in the center.  Again, this is possible but it is starting to get more complicated.  This puts the raise and lower button next to the window.  You need to reach over 30 inches to raise and lower the fan.  The fan speed switch is a diagonal switch that you physically move up and down.  It would be at the far end of the fan near the window.  You would have to feel it while stretching out to adjust the fan speed. 

So I did some brainstorming, We could go buy a stovetop only and I could build a custom cabinet next to the sink that would hold the fan and stovetop.  This is what this fan is really designed to accommodate.  I had to do some more research.  We would then not have an oven.  So the heating guys are coming tomorrow to install our new downstairs propane freestanding heater in the dining room/living room.  I could ask for a quote to install propane in the kitchen where the sideboard is now.  We could move the stove/oven there and just not fry anything and just use the oven.  Eventually, I could build a custom cabinet and put in a single or double oven in that wall.  I realize that this is not spending less money to solve the problem but it is a solution and one which I came up all on my own.  I will have to consult the boss tonight when she gets home, but truly I am not sure how we are going to tackle this problem.