More brain power needed

Metal scrapyard haul!

I went to the scrapyard yesterday.  I needed to pick up my dad’s wheelchair before it got altered.  While there I picked up a trailer I can use with the tractor.  They pointed out all the T-posts that had been saved over the winter.  I had to have those!  I dug through and collected 135 T posts about half need to be straightened.  The rest can just be pounded into the ground.  They only had a couple of small woven wire rolls for me.  As an added bonus they had just got in four slightly used cow panels.  I snagged those for use as round protectors for our new baby trees.  Grandma Lane gave us six new one year old black walnut trees.  They need to be protected from all livestock and deer.  The trailer will need a front tongue support.  I will take if off of an old camp trailer we have at the house.  I will then be able to load it with the tractor and then hook up and pull it with the same tractor.  I will now be able to move compost from the barn lot to my back rock wall, allowing me to build the wall higher.  The T-posts are not necessary but I buy them every time I find them because they will be needed eventually. 
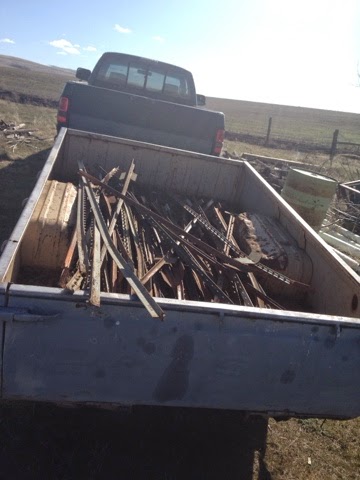
T-posts that need straightened.

New wall oven.

I picked up our new wall stove and Gannon helped me get it into the house.  We tried to get it into the library while packaged.  Not going to happen, we got stuck in the door way and had to cut it out of the packaging to get it in the rest of the way.  I needed it out of the packaging so I could take some real time measurements.  I think better with a tape measure. 

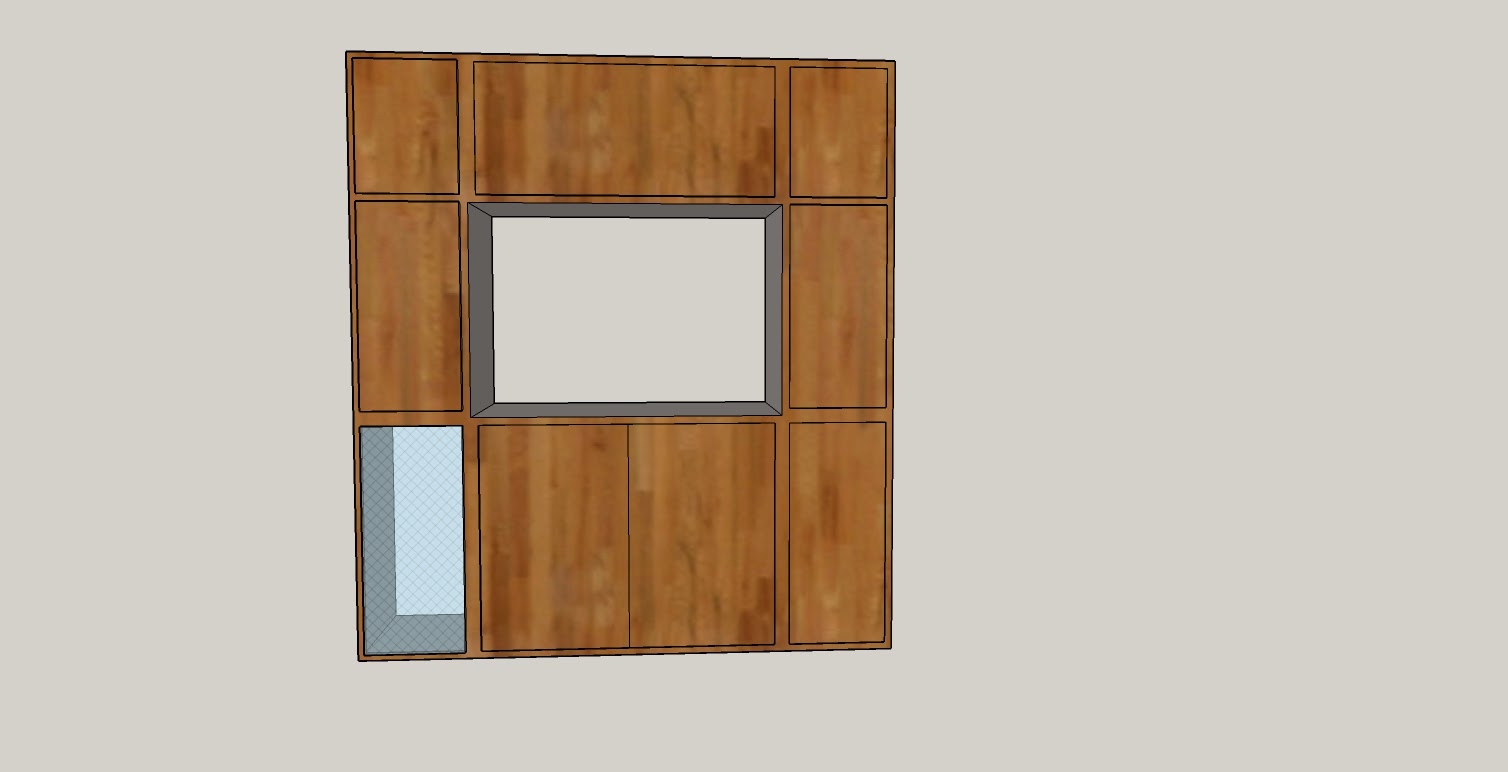
I had big plans for buying some lumber today and making a cabinet.  I spent almost three hours redrawing my plans.  I was off by 1/2 inch which would not have been big enough for the oven.  I changed my mind and decided to go with 3/4 inch oak plywood for the sides.  This means my inside supports have to be raised to allow the width for the oven to be uniform.  I caught this in my old sketch, causing more changes.  I have not ever purchased oak 3/4 inch double sided plywood before, oh wow, $80/board.  The center cabinet is going to cost $225 without doors and hardware.  I am going to get all three cabinets installed then we can decide how to finish off the doors and front.  I don’t want to cut a hole in the wall for power until the cabinet is made.  It has to be directly below the shelf. It only called for 12 g wire but I was unwilling to use it.  I will be installing 10 g wire and a 240 V 20 Amp breaker. The oven gets wired directly into the electrical box, no plug necessary.  I had to order more wood and a finish blade for my skilsaw.  I will clamp a 2×4 to the plywood and run my skilsaw along its edge to get a nice clean cut.  I need to split the sheets on their long side then on their short side for the shelves. 

I cooked a meal on the installed cooktop last night it was very nice, easy to use and had a nice even heat.  This morning I went to light the central burner and it would not light.  I kept trying then lit a side burner, WHOOSH!   I burned all the hair off the back of my left hand.  There was quite the collection of gas on top of the stove when it finally took off.  Definitely, need to get a handle on how to actually light the cooktop while I still have a little hair left on my head. 
Wall Oven Ponderings

Oven cabinet for back wall in kitchen.

Annmarie and I sat down the other day to decide how to go about installing the freestanding oven on the back wall in our kitchen.  First, we are going to move the sideboard into the dining room.  This is where it belongs as a working piece of furniture.  Next, we measured the space 71 inches wide and decided it should be as tall as the other shelves I made out of old doors so 79 inches tall.  Annmarie then printed out the installation instruction manual from the internet so I could get actual dimensions.  I sat in a chair and drew stick drawings while she got on the computer and mocked it all up.  We will have three separate cabinets.  This allows for ease of mobility.  As a single unit it would weigh a ton with a 155# oven installed.  This also lets me install the center and get some exact measurements for each side.  All three pieces will stick out from the wall 24 inches.  I was going to go with 2×4 notched for 1×4 side supports with plywood across for shelving but that takes up a lot of width for six boards plus siding.  I would waste almost a foot of space.  This was the rough draft.  It will have two doors under the stove with pull out drawers for pans and heavy stuff.  This means getting really good heavy duty rollers.  We are going to make the bottom left corner a wine rack with a glass front.  The three doors on the upper shelves will all lift upwards.  When I order the heavy duty drawer sliders I will order good hinges.  We are going to use the same knobs and pulls we are going to install in the repainted kitchen cupboards.  I will need to get that order in soon also. 

I had a chicken die last week and Annmarie made me promise to call the state if another one died.  I had to call and talk to several people before they left a message for the state vet.  He called the other day and we discussed my dead chicken.  Our chickens have no direct contact with any waterfowl.  All confirmed cases of H1N1 in domestic birds have been from direct contact with waterfowl feces.  So not the cause of my bird death most likely.  If I continue to have unaccountable deaths I need to freeze the chicken and contact them again.  He was very helpful and answered all my questions.  A most pleasant interaction. 

Cooktop works!

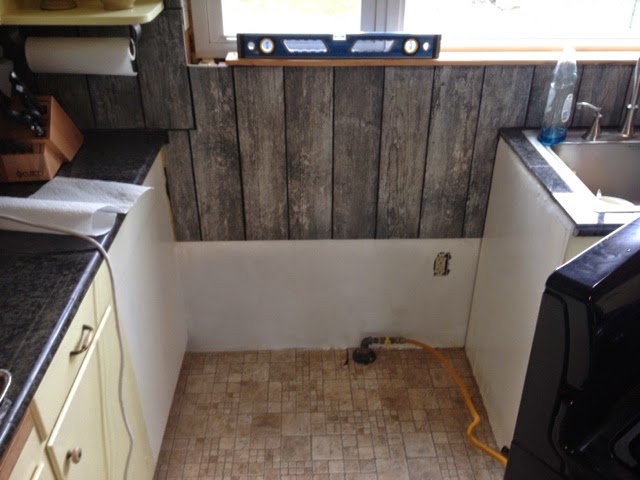
Ready for cooktop install.

The morning started out fairly calm.  Annmarie asked me why I did not lock the sheep up last night.  I said I did, she noted the many sheep on the back hillside.  She was putting on makeup in the mirror propped up in the window.  I deigned to get out of bed to verify for myself.  I believed her.  It dawned on me while I lay there in our cozy warm bed that I had forgotten to shut the barn door.  The reason is after I fed everyone Zeke and I were leaving the barn and a whole bunch of sheep had their heads in the nearest feeder.  Zeke darted past them on the way to the door, he made sure to swerve as close as possible to the sheep on his way out.  This spooked the sheep who still had their heads in the feeder.  Two of the feeders are chained together and the sheep were all on the far side causing the feeders to be pulled over.  One young boy, about three months old, got stuck underneath the feeders with his head still stuck through into the hay!  I had to go back into the barn and put the feeders up so he could pull his head out and run away.  I then spent a couple of minutes lecturing the sheep about their bad eating habits and flighty behavior.  I was still ranting as I left the barn.  I forgot to shut the door.  Annmarie wanted to know if I really ranted at the sheep.  Of course I did!  This becomes a bigger issue when the weather gets nicer.  The sheep will go out on the back hillside and decide to start roll call at 0300.  We sleep with our bedroom windows open year round.  It is very noisy. 

The hamster corpse was starting to get to me.  Not so bad that I was willing to cut out a one foot by twenty foot section out of the dining room wall, but it was starting to smell really bad.  This morning I needed a rag to finish cleaning up my grout on the backsplash so I opened up the door of the deep sink utility cabinet and the smell was awful and I saw gerbil poop on the floor.  I found the dead gerbil.  I made Sarah come down and clean up the entire mess, wash all the rags and bleach everything.  I think she may need to use vinegar on everything now.  It is much better than it was but it has not gone away yet.  Here’s to hoping the smell doesn’t last much longer. 

I grouted the backsplash tile I installed last night and then painted the walls where the cooktop was going to be installed.  Once that was done I had the child come down and help me install the cabinet. We got it in place and then leveled it front to back and side to side.  It is perfectly level so our gas heat should be even.   Once that was in place we installed the downdraft fan.  I got it all screwed into the top and plugged in and made sure it did not hit the window board.  The temporary board is the same depth I want the finished board located.  I need a new blade on my table saw before I cut the finish board.  It smoked and burned my oak top when I cut it.  The cooktop was next and dropped right in.  It has two anchors on the side and it overlaps the vent fan.  We are very happy with how it turned out.  I took a second picture once the sun went down so you could see it lit. 


Works!  Just needs downdraft fan exhaust cut in floor and then we need to decide on front facing or drawers.

Progress on stovetop

It fit finally!

I did it, I got it to fit.  It was not easy.  I tried the frame without any top and found out that my lower board for the exhaust fan was too high.  I could not lower the fan enough.  I had to cut a new board and lower it.  I tried to install the butcher block top and could not get it to fit. I had to take little cuts three separate times and finally just brought the jigsaw inside and cut it in place.  I even made sure I could shut off the gas!  The lowest point on the floor is the front right corner which would explain why that spot on our current stove is the hottest.  I adjusted the fan three times to get the height right. I even plugged it in and showed Annmarie how it went up and down.  I think this is going to look great!  My biggest issue was it was stuck in place.  Once Annmarie reminded me it needs to come out I encouraged it enough to get it out intact.  The backsplash needs to be finished and the back wall painted. 

Stove top and fan together.

Backsplash in place and drying.

I still need to finish the butcher block top.  I am just going to use an olive oil rub on the whole thing like I did with our last one.  When it looks a little dry I just break out some more olive oil.  It works great and looks good.  My only regret is I have to cut into the floor to install the exhaust vent.  I am not really looking forward to that portion of the job.  I got all the backsplash installed and a heater going on it so I can grout it in the morning.  I can get a coat of primer on and then some paint in the afternoon.  I don’t want to disconnect our stove until I have that special putty I need to put on the gas line connection to the cooktop.  Once the cooktop is in place I will cut a hole in the floor for the exhaust pipe.  I need to get the rest of the exhaust pipe so I can vent it outside the house.  I will order the exhaust vent tomorrow.  My goal is to get this up and running before Sunday and pickup the stove on Tuesday morning.  I will stop by the lumber yard at the same time and pickup some 2×4.  I think I have enough tongue and groove at the house to do both sides.  I have plywood for that project also.  I will keep the purchases down until I start to run out of supplies.  I don’t want to get too far ahead of the items being built. 

Tragedy has struck again, another chicken died.  Out of the blue and with no signs and symptoms of illness.  I will be calling the county extension agency tomorrow to see if they want to test the bird or if it just needs to be disposed.  Of course it had to be a hen and not one of the two roosters.  It was one of my buff orpington babies that just started laying. 

The gerbil is still making his presence known in the house even in death.  He fell down into one of the walls near the dining room and laundry room.  We are not sure which section of wall he is in nor how far down the wall his corpse is located.  He is stinking the place up.  We have a window open and the odor absorber open.  Luckily, I don’t think he can stink forever.  It is just not worth the effort to cut open every wall until I find it.   That sounds like a nightmare.  Eventually, he will become a mummy and the smell will go away. 

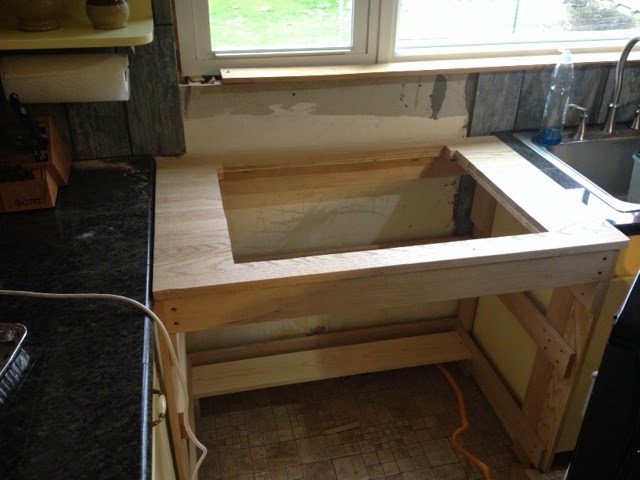
Stovetop custom cabinet.

Wrong, do over time.

It had to happen, I can only put off working on a project for so long before it gets noticed.  I was sure I had actually managed to buy all the needed supplies for the stovetop cabinet but was unsure where to start.  Plus, I did have to catch up on a bunch of little things around the house.  Yesterday, I started back in on the kitchen project.  I had purchased some six foot lengths of black iron pipe so I could move over my pipe clamps to longer lengths.  This worked out very well.  Each pipe clamp assembly goes for about $35 so just getting a new chunk of pipe saved a lot of money.  I found several clamps I had forgotten about.  I picked them up at a yard sale last year for $5/each, a great find!  I assembled the entire frame and was trying to install the long pieces but was having issues with the wood splitting.  I had split the top out of one leg in two different directions and was trying to figure out how to repair it when I noticed my mistake.  I had shortened the very front piece to make a toe cutout so when you stand next to the cupboard your foot slides under the countertop, thus allowing your body to be closer and you don’t have to lean.  I did not do a perfect mirror image and ended up with the cutout on opposite sides!  This worked out in the long run as I replaced the board that had been split twice.  Unfortunately, I had only purchased exactly as much lumber as I needed.  So the dogs and I had to go to town.  While at the lumber store I complained about the wood splitting and was sold a countersink to start the holes.  It was a life saver, and made all the difference. 

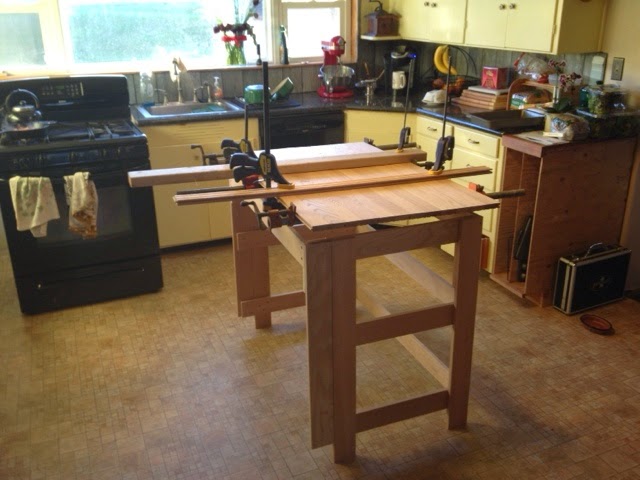
Corrected stand, butcher block top drying.

Once the stand was completed correctly I went out to assemble the butcher block top.  I am using oak flooring.  I just glued it at each joint and then clamped it all together.  Since I am cutting out the majority of the countertop, there is only 7 inches on each side and 2 inches front and back, I opted to glue the boards on their long sides.  I thought this would give me a wider look to the space.  I cut out the 3/4 inch plywood square that goes underneath it also.  Today, I will cut out the hole and drop the pieces into it as a test fit before I cut out the butcher block top.  I want it to work first. 

Workshop space!

I do all my woodwork on the old house porch.  If I would clean out the old house and wire in some electricity I might be able to use it!  Oh to have more time for the little projects.  Eventually, I will get this done.