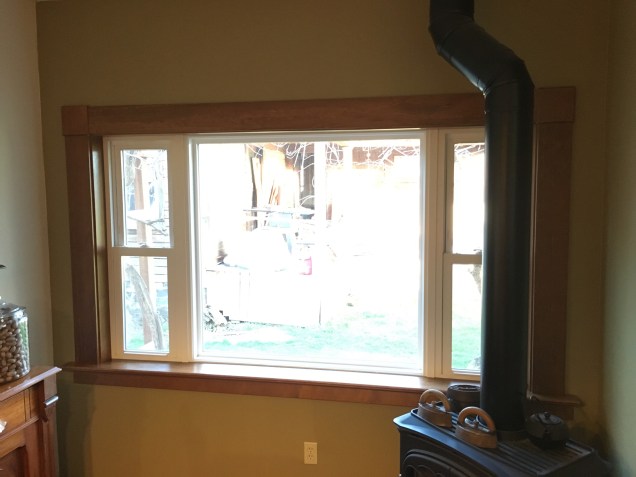
Window trim mania

One of the first things to do is get stuff ready. I spent part of Friday and Saturday getting all the tools ready for work. I added wings onto my radial arm saw so that I could cut the L shaped cutouts on the sill plates. Then I had to add a support arm past my table saw so as I ripped boards down they would be able to rest on something. I just clamped a piece of scrap from our furniture project across the end of the porch. I had to clamp my featherboard onto the table saw also. I wish I had some 2×8 board glued to the underside of my table to make clamping to the table easier. I may have to do something like that soon.

I managed to get one window done. I need to level the sill front to back a little better on the other windows. I am installing the sill, then but both inside upright pieces and the top inside piece. This lets me rest the top piece on the sides while I then set the reveal on both sides and staple them in. I use cedar shims always around doors and windows. I run a small bead of caulk on the end of each board so it sticks to the window. I know this makes window replacement very hard, but it really seals the building from stray breezes and bugs. The BUGS are the important reason to do it! I am then taking 100% silicone and sealing the backside of each board to the window frame. This is taking way more caulk than I anticipated. I am making sure to get a nice seal but in some places I am filling a 1″ gap. Yes I know I should have gotten some of that foam core rope to fill the area first but I didn’t do that. I also am hesitant to use that spray in foam insulation, even the low expanding stuff. It puts a lot of pressure on the window and I have screwed up door frames with the stuff and don’t want to mess up the window.

The pattern we used for the window frames is the original one from the house. It was still in place upstairs and we have duplicated it throughout the house. The only place we are deviating from it is the window at the bottom of the stairs and above it. I don’t want to fall down the stairs and hit my head on the corner of the window sill plate. So we are doing a flush mount with square pieces in all four corners. That way when I fall down the stairs it will be the landing that gets me not the fall. Annmarie was super happy that the trim is going in. I will be doing a bug audit to see if it helps cut down on the inside critters.

Desire

On Friday I had to go fix fence again. On Thursday the neighbor moved his cows into the pen directly across the road from our property. This means our bull can see a hundred plus cows across the road and starts to immediately think like a teenage boy. I noticed the cows on my way home and vowed to not work on our window trim but to instead fix the fence. Usually, the bull gets out every year at this time. We had noticed a weak spot in the fence a couple of months ago and I had vowed to Annmarie that I would fix it before the bull got out this year. Its in an awkward spot and there is a huge wild rose bush that has enveloped the fence in the way. The only real way to fix this section is to cut out the rosebush and rebuild this entire section. I don’t want to do that, so I plugged the hole with a 16 foot cow panel. I had brought a few more tools but no T post driver. I needed the driver. I ended up having to fix the entire fence all the way up to the gate on top. I put in new staples and Tpost clips where the bull had popped them loose. I added about 8 new wooden stays from scrap on the ground and my scrap pile. Eventually, there will be no more scrap piles laying around. I keep bringing the junk together and throwing it away, recycling it or burning it to clean up areas. This took me all morning long and put me way behind on the trim plan.

Before I could get started on the trim I had to install a couple of extenders onto my radial arm saw stand. When I went to cut the sill pieces I realized I only needed to cut a corner out of them and they would have to be way put away from the saw blade for that to happen. To make that possible I had to add extenders to each side. Its not permanent but I am going to leave it in place until all the trim is installed.

I managed to get all three large windows bottom sill plates installed on Friday. My goal is to use silicone to seal the boards against the window and then fill all the air gap behind the boards with more caulk to make them 100% sealed. This will stop the cold air but more importantly we are hoping it will stop the bugs! There are certain times in the year that they get out of control. This happens to be one of them. It is highly annoying to have bugs everywhere. Annmarie was very happy with the progress.

Bull fence

Today I finished painting the downstairs! I even considered starting in on the wood trim downstairs but I really want to do the windows first as the bugs have started coming around. I have the caulk to seal the wood trim to the window and the walls so no bug can sneak through. But the wooden shims have not arrived yet. I purchased a box of them and they will be here this week. I wanted cedar shims and I am going to leave the cedar closet lining boards I put up in the windows temporarily in place and just put the trim over them. They have helped keep the bugs out.

So instead I went out and started working on the Bull Enclosure. It will house the rams also when we are not using them. We have decided to pull the male species off of their respective herds at least a month prior to anyone having a baby. We don’t want the mothers to be stressed or harassed. I marked of a pen in the barn lot that will allow us to use the old lamb shed and lean to out back as shelter. The shed will be off limits unless we allow access. I have set it up so I have opposing gates that will allow us to block off the shed or allow them access to the shed and no where else. I broke out the hot pink paint marker and a tape measure and put a T sign every 8 feet. I will need to dig 57 holes! I think if I reuse what is present and use the old cedar posts I think I can come up with 40 posts maybe 45. I will buy the rest. I want to use railroad ties in the corners and two next to each gate side. I am going to install a 10 foot gate near the shed and another 8 foot gate on the back side of the fence past the lean to. I am contemplating one more near the culvert, but I don’t think so. Each gate is a weakness to be exploited by the bull. I managed to get 11 holes started tonight. I was unable to drill a single hole down to the depth needed even as wet as it has been.

The mistress was working hard and I had to replace one bolt on the auger and just as it was getting dark the shear bolt for the auger gave so tomorrow I will need to replace it before I can get started. My goal is to get all the holes started this week and then take a five gallon bucket of water and put it in each hole. I will do this every day and then drill it out the next day until all the holes are the right depth. I will start setting posts as soon as I can get a hole down to the right depth. I will set all the posts and put woven wire and smooth wire on the outside of the fence and I will line the inside of the fence with 2×6 boards. I will have to go 4 boards high to provide a sufficient barrier. So I will need to buy 2000 linear feet of 2×6 which also happens to be 2000 board feet. I want to buy 16 foot boards as I put the spacing at 8 feet apart, this means I need 125 boards. I will also need a saw and a whole bunch more wood anchors, another 500. This is the expensive part. That will cost me around $400 just for the metal screws.

I have the 10 foot gate, I will have to go scrounge around in my gate pile to see if I have another 8 foot gate. I may need to use a 6 foot gate.

The sheep have been hanging out on the back hillside. The gate nearest the creek is so badly damaged that it is not useful and needs to be replaced. I have simply not gotten to it and the sheep needed to go out on the back hillside anyways. We have had so much rain in the past few days that the back creek is up about 8 inches and running muddy.

Stock trailer

I finally managed to find a stock trailer! Last week I spotted one for $2500 which was my max upper end. I wanted to spend around $1500. We had been looking for over three months with no success. We had found a lot of horse trailers in that price range but no stock trailer. You ask, what is the difference? Well there is a difference, the first part is look at the back door. It will slide open halfway. This allows you to load animals directly from a chute. The second part is halfway down the trailer there is a divider that can be closed widthways. This allows you to push some animals into the trailer and shut internal gate. This then lets you load more animals!

This trailer is a 1979 model! It has a flat spare and another low tire. The lights only work on the right side and all the running lights are broken. On the plus side it has rubber mats the entire length of the floor. I will be getting it licensed after I fix the lights. The tires will be soon also. We are stoked!

Tax day 2017

Tax day at our house is always an exercise in frustration and irritation. One would think that every year it would get easier, it does not! I attempt to keep receipts every year and on the big ticket items I am very good, but the little things add up and I don’t always keep them. We keep trying but it seems like a certain percentage always get lost and per Annmarie’s mantra, “no receipt, no deduction”. She is not a creative accountant type, she believes in sticking to the rules when it comes to taxes. Over the years I have come to appreciate this approach as it saves us hassle in the long run.

Before taxes can be started I have to do my part. I collate and add up all the farm income and expenses and drop it into categories every year. I started doing this years ago for the blog to track various project costs. We have learned that my projects don’t always fit into the IRS definition of a category. This causes complications when trying to do the taxes which leads to hollering from the office to downstairs, which leads to tension. Ideally, the solution to this would be to find some chore outside the house to do while taxes are being prepared. Normally, this is a solid approach but on tax day this does not work. I know some things that are essential to filling out the tax form due to my unique category building system. This caused so much angst last year that I threw out my divided binder with the “Steve” categories and wrote on the outside of a folder the needed categories. This year I broke everything out by those categories. Those essential categories according to me were: Income- Sheep, Eggs, Cows, Alpaca and Hay. Expenses- Animals, Feed, General, Equipment, Vet, Tractor/sprayer, Business Expense, Fencing, Irrigation, Alpaca.

I am told that the IRS doesn’t officially recognize my need to create categories and has their own system. Income is pretty much the same and can be gleaned from my data set. Expenses however are a little different: Animals, Truck expenses, Chemicals, Conservation Expense, Custom Hire(machine work), Depreciation, Feed, Fertilizer, Freight & Trucking, Gasoline & Fuel & Oil, Insurance, Interest on equipment loan, Rent or lease on vehicles/machinery/equipment, Repairs & Maintenance, Seeds & Plants, Supplies, Taxes, Utilities, Vet/breeding/medicine, Purchased Animals.

I have the new categories written down for next year so hopefully my summary will be more in line with what the IRS and Annmarie want. The only real problem with this is the tax laws have changed and no one is exactly sure how they are going to be reflected next year. So I am going to just keep on plowing forward and hope for the best.

So here is 2017 according to Steve for the farm. Again, we lost money, but we are starting to turn the corner. It has taken us many years to get things up to speed and develop a plan while we were doing the catch up. This fall we will plant the upper bottoms with Roundup ready Alfalfa. We will then buy our own haying equipment in the early spring. We will be putting up our own hay. We are only going to hay approximately 20 acres. We have no intention of doing any more than that. This choice to stay small has allowed us to buy equipment designed for micro farms. We are getting a hay mower, rake and a round bailer that will all work on our 25 HP tractor for around $25K brand new. One of my jobs this year will be to clean out a spot in the machine shed for them to be stored out of the weather to increase their longevity. This change should save us $5-6K in feed expenses and will allow us to sell around $3-6K in hay annually and the sell of hay could very well purchase the equipment allowing us to get “free” hay. In reality, labor is not free just because we do our own. We are confident this plan is sound and I have two of the fields ready to go and the third one is still in the works. It has some water issues that I will be working on in this summer. I am going to round up to whole numbers on the finances for ease of data manipulation so my numbers may be off by a few bucks. I did it to the penny for Annmarie.

Income: $5992

Sheep (76 animals) $5200

Eggs (2912 collected) $792

Cows $0

Alpaca $0

Hay $0

Expenses: $16, 731

Equipment $3933 (old tractor to get running after the shop $327, flatbed trailer to get welded supports and repairs $1172, Pickup repair, new tires, new brakes and new muffler all were broken $2295, fuel for tractor 47 gallons $139)

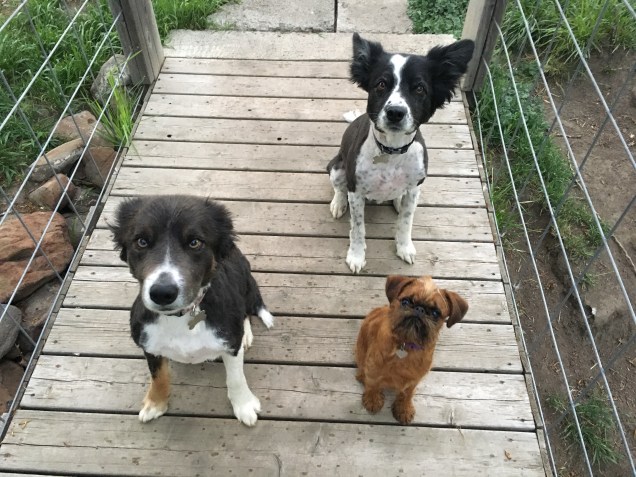
Vet $568 (Mouse $197, Zeke $371 he had a fox tail in his ear this summer)

Tractor/Sprayer $526. (Mower repair $180, herbicide $275, insecticide $71)

Business Expense $40

Fencing $1926 (30 yards of Gravel $635, 500 wooden stays and 122 used T posts and several rolls of smooth wire and clips)

Alpaca $706 (Shearing table was all of it, I was able to shear all the animals in one day with the table. We looked at buying one but it was around $2k. It is the only way to shear more than 1 or 2 animals. This is now all stored in our barn. We are working on making connections with people to work on sorting and roving it. Annmarie will do that this summer).

Irrigation $93 (power for the pump, we didn’t use the pump much this year)

General $268

Animals $2609 ($2500 for 21 adult breeder sheep)

Barn Improvements $238 (this year I need to finish the siding and raise the walls in the momma area again, we had sheep jumping out over the walls I did not raise. I would also like to build two more wall feeders.)

Feed $5825 (Dogs $285, chickens $60 we had a bunch of food left over from last year this caused us problems due to the mice problem so we have worked on upping our cat population for rodent control instead of buying poisons, Cows $3500, Sheep $1758, Alpaca $200, Cats $22)

Total loss for 2017 $10, 739

So if we didn’t pay out $5k for feed and sold $5k worth of hay we would break even and our cows are now where they need to be as we have 10 cows and by next year they will all be bred. So that will be around $5-6k in sales. Our hope is to be profitable in 2 years. It has taken us quite a while to get here and there is definitely a learning curve to doing it. Also, it takes time to build herds and fence. If you don’t use time then you have to have a lot more cash up front.